How to Choose a Bow: Beginner’s Guide
Choosing the right bow is the foundation of a successful archery journey. Whether you’re drawn to the sport for hunting, competition, or personal fulfillment, your bow must match your body, goals, and experience level. The wrong choice can lead to frustration, injury, or wasted money, while the right one makes every shot feel natural and rewarding.
You don’t need the most expensive gear to start. What matters is making informed decisions early so you can grow with your equipment. This guide covers everything you need to know about how to choose a bow that fits your body, supports your progress, and keeps you excited to shoot again and again.
Match Your Bow to Your Purpose
Before looking at models or prices, define why you’re shooting. Your purpose shapes every other decision from bow type to accessories.
Pick the Right Discipline First
Archery is not one-size-fits-all. Each style demands different equipment:
• Backyard Practice: Go simple. A youth fiberglass bow works for kids trying archery short-term, but it won’t teach proper form. For adults, even casual shooting deserves better.
• Olympic Target Archery: Accuracy is king. You will need an ILF (International Limb Fit) recurve with attachments for sights, stabilizers, and clickers. Precision tuning matters here.
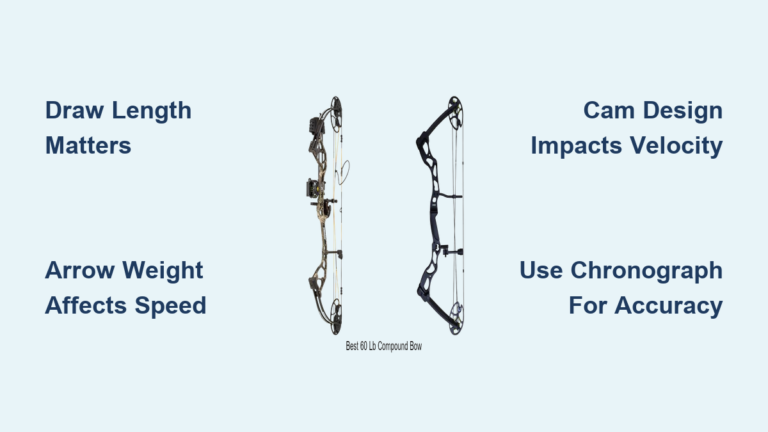
• Hunting: Speed, silence, and maneuverability win. Shorter recurves or compound bows with let-off let you hold steady on game. Many states require 40 to 50 lbs draw weight for big game.
• Traditional Shooting: Focus on instinct and feel. Think English longbows, Japanese yumi, or thumb-draw horsebows. These prioritize heritage over mechanical aids.
• Barebow: A middle ground. Modern ILF recurves shot without sights or stabilizers. Great for tuning form and transitioning between styles.
• 3D Archery: Shoot at life-sized animal targets at unknown distances. Often uses barebow or compound setups built for adaptability in real-world terrain.
Pro Tip: Goals change. Start with a bow that lets you evolve, like a takedown recurve, so you are not stuck buying new gear in six months.
Avoid the Buy Cheap, Learn Later Trap
Many assume starting with a $30 fiberglass bow saves money. It does not. These bows are inaccurate, hard to tune, and can cause bad habits. Worse, they break or get outgrown fast, forcing a second purchase. Invest wisely from the start.
Set a Realistic Budget
Your bow is just one part of the setup. Plan for total cost, not just the sticker price.
Know the Price Ranges
| Bow Type | Starting Cost | Notes |
|---|---|---|
| Youth Fiberglass | $25–$50 | Only for kids or trial use |
| Entry-Level Recurve | $200+ | Best beginner starting point |
| Mid-Range ILF Recurve | $300–$500 | Allows upgrades; long-term use |
| Entry-Level Compound | $400+ | Needs professional setup |
| High-End Bows | $800–$1,500+ | Diminishing returns for most |
Factor in Hidden Costs
Accessories add $100 to $200 quickly:
• Arrows: $50 for 6 (get 12 total)
• Finger tab: $15–$30
• Arm guard: $10–$20
• Quiver: $20–$60
• Bow case: $30–$100
• Target: $30–$100+
• Arrow rest (if not included): $15–$40
Rule of Thumb: A full beginner setup costs $300–$600. Do not spend it all on the bow. Balance matters.
Value Over Price
A $400 mid-range bow often outperforms a $1,200 pro model for beginners. Modern manufacturing spreads elite tech to affordable lines. Meanwhile, ultra-cheap bows use poor materials that hinder learning.
Expert Insight: “All bows are not created equal.” Build quality, warranty, and brand reputation matter more than price alone.
Choose the Right Bow Type

Not all bows serve the same purpose. Pick based on performance, adjustability, and long-term fit.
Compare Bow Types
| Type | Best For | Adjustability | Recommendation |
|---|---|---|---|
| Takedown Recurve (ILF) | Beginners, Olympic, barebow | High (limb swaps) | Top pick for most |
| Compound | Hunting, precision | Moderate (draw/let-off) | Needs pro setup |
| Traditional/Longbow | Historical interest | Low | For experienced or committed |
| Youth Fiberglass | Kids only | None | Not for learning |
| Crossbow | Disabled shooters, hunters | Low | Different rules and restrictions |
Key Advice: A takedown recurve with ILF limbs is the smartest starter choice. It works for Olympic, barebow, and traditional styles, growing with you.
Get the Draw Weight Right
Draw weight affects safety, form, and progress. Start too heavy, and you will hurt yourself or develop bad habits.
Start Light: 20–25 lbs for Adults
Forget ego. Even strong beginners should begin at 20–25 lbs. Archery uses underdeveloped back and shoulder muscles. Starting light builds strength safely.
Warning: Bows over 30 lbs risk rotator cuff strain and poor form.
Goal: You should draw smoothly, hold steady for 10+ seconds, and shoot consistently.
Expert Quote: “Go light and comfortable. You will harvest more game.”
Increase Gradually
As technique improves, bump weight in 5 to 10 lb steps. ILF limbs make this easy. Just swap them.
Hunting Tip: A well-placed 45 to 55 lb traditional bow can take elk. Precision beats raw power.
Switching from Compound? Drop 15 lbs. If you shoot 65 lbs on compound, start with a 50 lb recurve.
Measure Your Draw Length Accurately
Wrong draw length ruins accuracy and form. Get it right before buying.
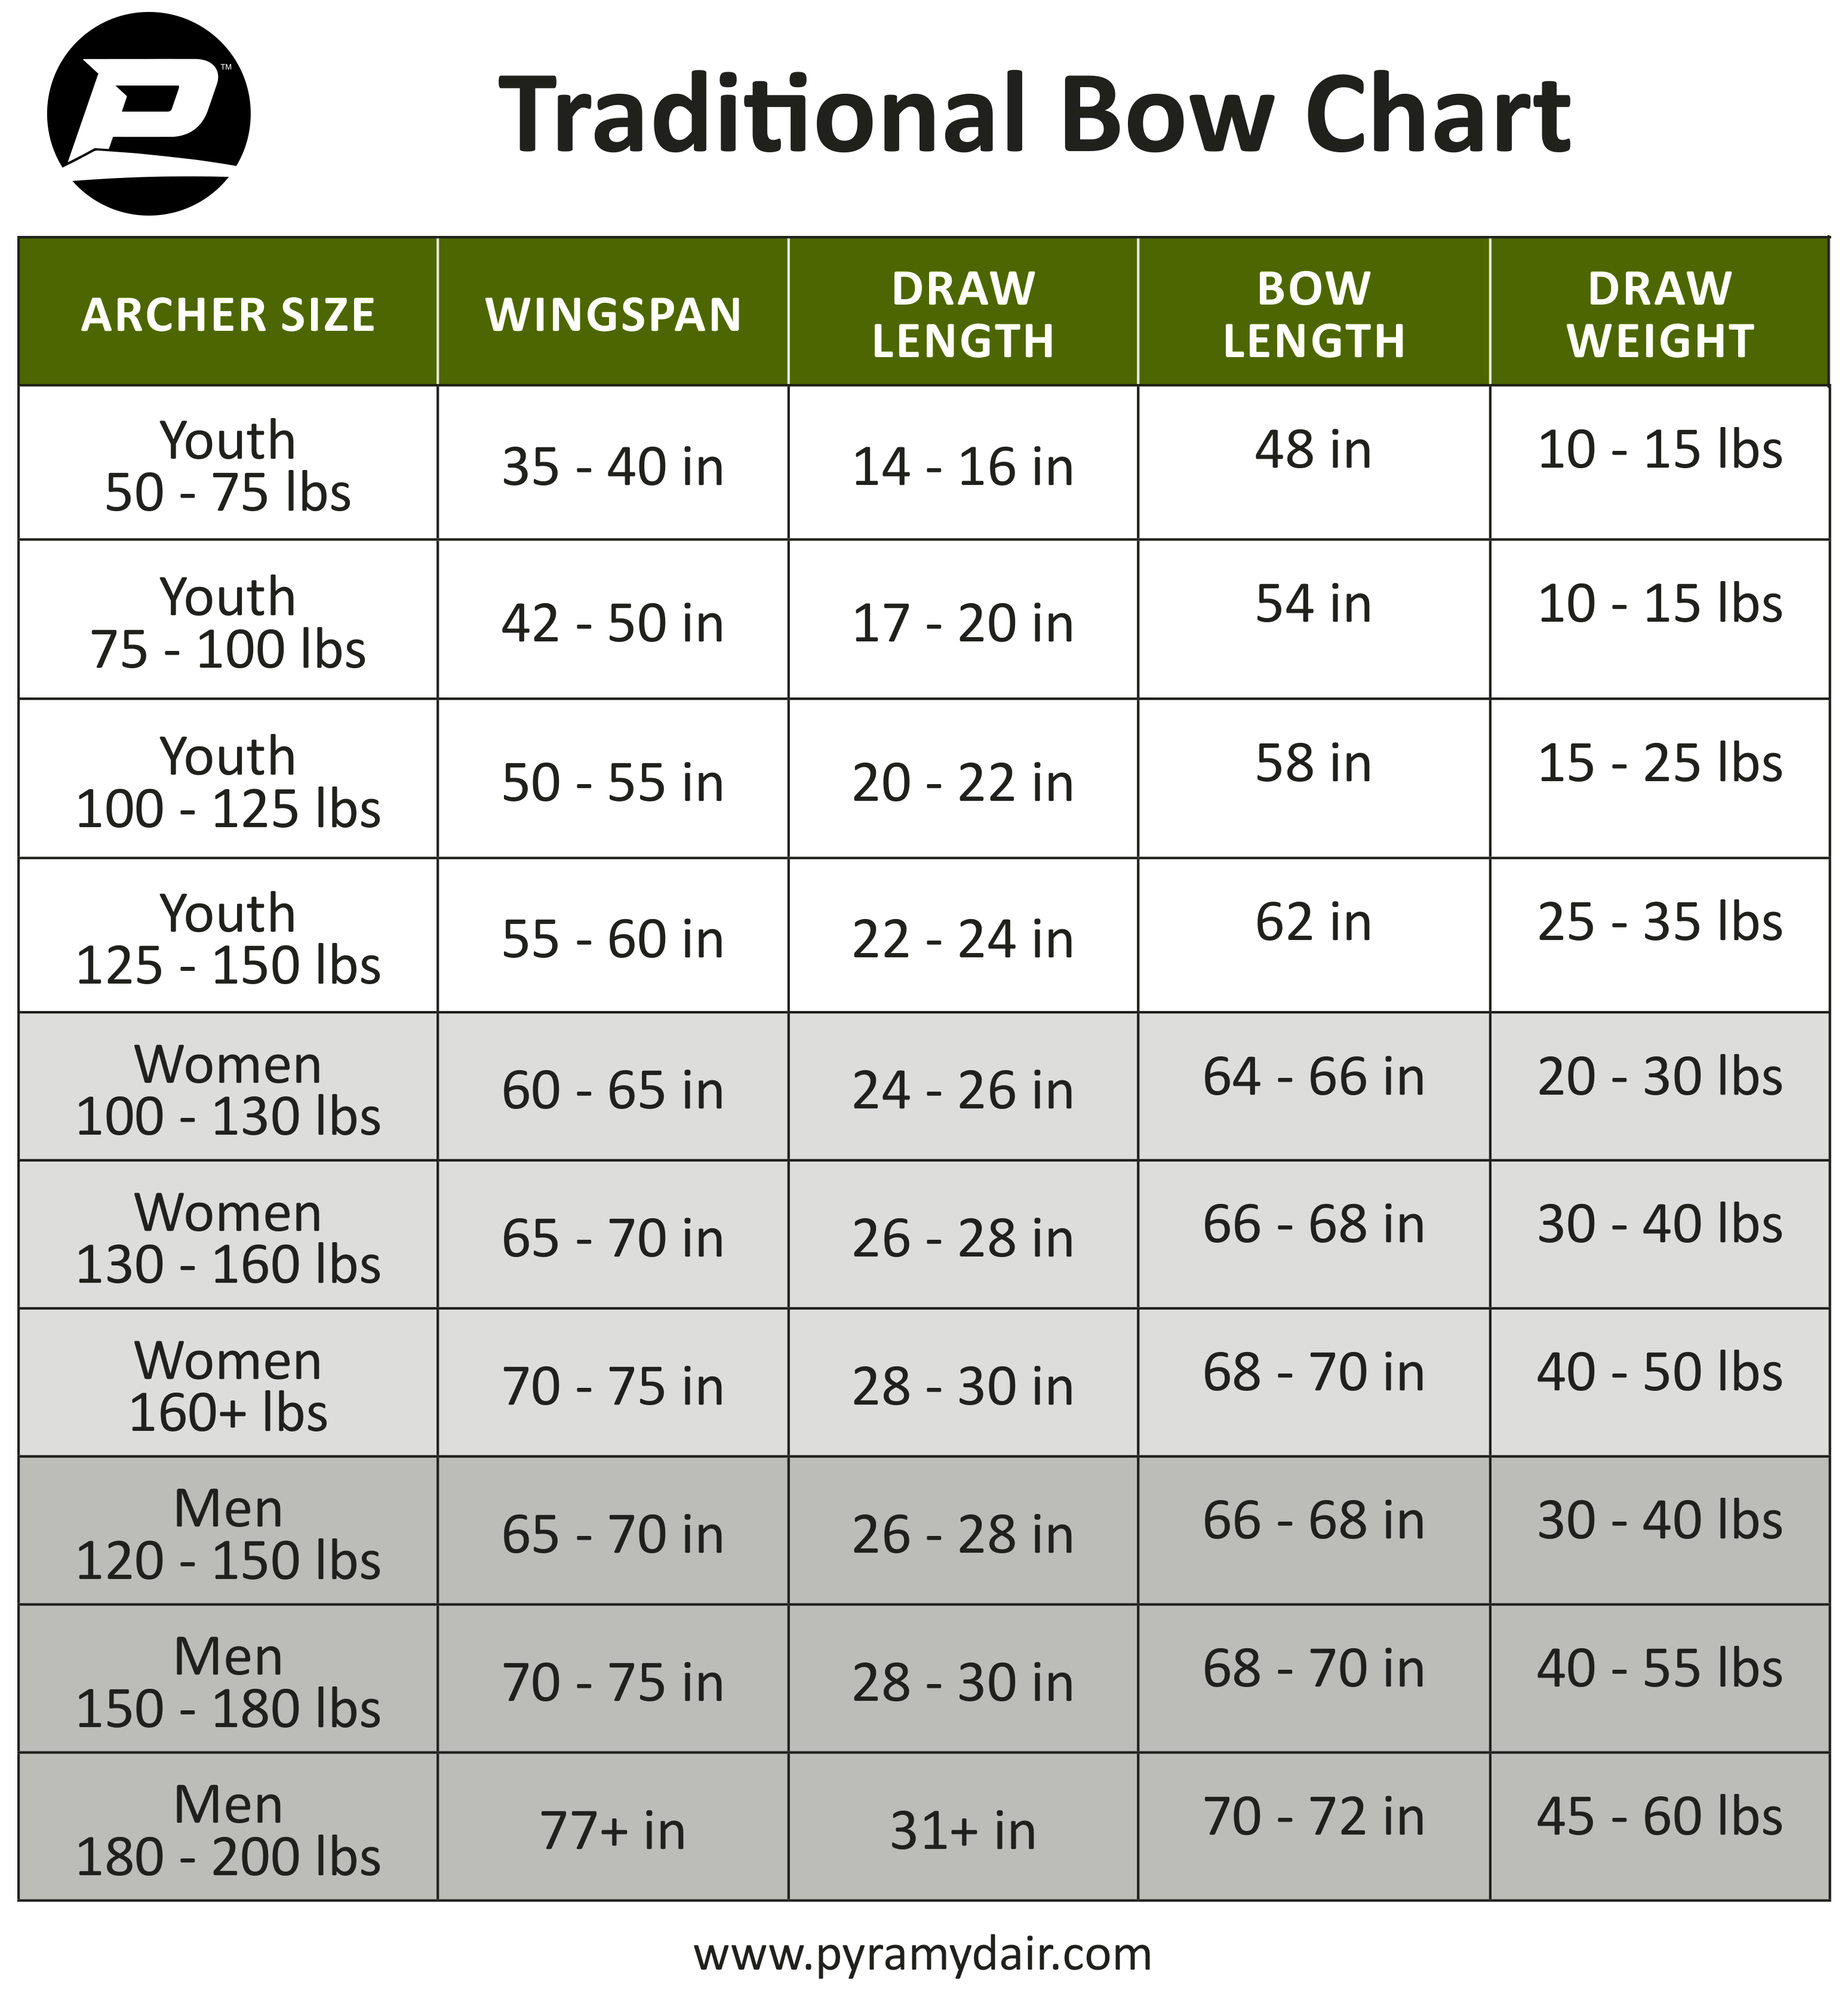
Calculate Using Wingspan
-
Stand arms out in a “T.”
-
Measure fingertip to fingertip in inches.
-
Divide by 2.5.
-
Round to nearest ½ inch.
Example: 68-inch wingspan divided by 2.5 equals 27.2, rounding to 27.5-inch draw length.
Alternative Definition: Distance from nocking point to grip pivot plus 1¾ inches at full draw.
Avoid Common Mistakes
Too Long: You will overdraw, pull past your jaw, and lose control.
Too Short: String stops in front of face, breaking anchor consistency.
Critical Step: Have a pro measure your draw length in person. Do not guess.
Select the Correct Bow Length
Bow length affects stability, forgiveness, and handling.
Recurve Length Guidelines
• Under 28-inch draw: 56–58 inch bow
• 28–29.5-inch draw: 60 inch bow
• Over 29.5-inch draw: 62 inch bow
• 66-inch models: More stable, ideal for target shooting or beginners
Sweet Spot: 60 inches is a versatile middle ground.
Hunting vs. Target Trade-Offs
Shorter (56–60″): Maneuverable in brush, great for hunting.
Longer (62–66″): Smoother shot, less vibration, better for target.
Expert Note: “Bow length boils down to what feels best in your hands.”
Understand Brace Height
Brace height changes how the bow shoots and how forgiving it is.
Short vs. Long Brace Height
Short (6 inches or less):
• Faster arrows
• Less forgiving
• Higher chance of string slap
Long (7–8 inches):
• Smoother draw
• More forgiving
• Less vibration
• Slightly slower
Recommended Settings
• Recurves: 6–7 inches
• Longbows: 7–8 inches
• Compounds: Factory-set, adjustable via cam
Why It Matters: Longer brace height means less string travel, making it easier to shoot cleanly.
Prioritize Adjustability and Upgrades
Your body and goals will change. Choose a bow that grows with you.
ILF: The Gold Standard
ILF (International Limb Fit) lets you:
• Swap limbs across brands
• Upgrade draw weight in 5 to 10 lb steps
• Tune tiller and brace height
Avoid Fixed Bows unless you are experienced and sure of your specs.
Compounds: Modular but Complex
You can adjust draw length and let-off, but tuning requires expertise. Misaligned cams can cause limb failure. Bows can explode.
Safety Tip: Buy compound bows through a shop that offers setup and tuning.
Test the Bow in Person
Specs do not tell the whole story. Feel is everything.
Try Before You Buy
• Visit a pro shop or archery club.
• Shoot multiple models set to your draw weight and length.
• Draw each 10+ times to assess comfort and consistency.
Real-World Example: One archer tested 30+ bows before choosing. He rented, borrowed, and resold until he found the right one.
If No Shop Is Nearby
• Rent gear from a club
• Borrow from experienced friends
• Buy used and resell with care
Focus on Physical Feel
A bow should feel like an extension of your body, not a tool fighting you.
Check the Grip
• Should sit between thumb pad and palm
• No death grip needed
• Minimal torque or hand strain
Warning: If a grip feels off, it probably is. Do not buy hoping to fix it later.
Evaluate the Draw Cycle
• Start: Smooth pull, no jerking
• Mid-Draw: Consistent resistance
• Full Draw: Solid back wall, no jarring
Think: Could you hold on a real animal at 10 yards?
Learn the Valley and Back Wall
These matter most for compound bow shooters, but recurve shooters benefit too.
What Is the Valley?
The point where let-off kicks in and holding weight drops.
• Shallow Valley: Less play, keeps you engaged. Favored by target shooters.
• Deep Valley: More play, lets muscles relax. Preferred for hunting.
Back Wall: The Full-Draw Stop
• Should feel solid but not harsh
• A sudden jolt means poor cam design or misalignment
Personal Preference: Some like staying tense. Others want to relax. Test both.
Minimize Hand Shock
Vibration ruins follow-through and causes anticipation.
Ideal Release Feel
• Dead or dampened hand
• No jarring shock
• Smooth energy transfer
Compounds: Less shock due to cam systems.
Recurves: Look for limb dampeners and quality riser materials.
Red Flag: Strong hand shock often means bad form or a low-quality bow.
Get Coaching Early
One lesson saves months of frustration.
Why Coaching Pays Off
• Prevents bad habits like plucking or dropping elbow
• Teaches proper form from day one
• Helps choose the right gear
User Quote: “I wish I started with a coach. It saved time, money, and frustration.”
Find Help
• Use USA Archery Coach Locator
• Join a local club
• Attend beginner clinics
Equip Yourself Fully
A bow is useless without the right accessories.
Essential Gear List
• Arrows: 6–12 total, match spine to draw weight
• Finger Tab: Protects fingers, improves release
• Arm Guard: Prevents string slap, non-negotiable
• Quiver: Holds arrows safely
• Target: Bag or 3D, rated for your bow’s power
• Bow Case: Protects during transport
Pro Tip: Buy arrows from a supplier who helps match spine to your setup.
Pick the Right Accessories
They are not extras. They are performance tools.
Mechanical Releases
• Wrist Strap: Secure, easy for beginners and hunters
• Handheld: More control, preferred by target shooters
• Trigger Types: Index or thumb, personal preference
Best For: Hunting and high-let-off compounds.
Sights and Peep Sights
• Multi-Pin: Set for fixed distances like 20, 30, 40 yards
• Single-Pin: Dial for range, better for unknown distances
• Peep Sight: Ensures consistent anchor and alignment
Critical: Keep your sight level. An unlevel sight ruins accuracy.
Arrow Rests
• Whisker Biscuit: Forgiving, great for beginners
• Drop-Away: Clean arrow flight, best for hunting
• Blade Rest: Precise tuning, ideal for target
Avoid Common Myths
Do not fall for outdated advice.
Myth vs. Reality
| Myth | Truth |
|---|---|
| “Start with a cheap bow” | Cheap bows limit growth and often cost more long-term |
| “You need a compound to hunt” | Many kill game with 50 lb recurves |
| “Adjustable draw weight is key” | Most adjustable recurves only vary 4–5 lbs. ILF is better |
| “Higher price equals better bow” | Mid-range bows now match pro performance |
Make Your Final Decision
Use this checklist to lock in your choice.
7-Step Decision Framework
-
Define Purpose: Target, hunting, traditional?
-
Set Budget: Include arrows, tab, arm guard, case
-
Choose Type: Takedown recurve (ILF) for most. Compound only with pro help
-
Match Specs: Draw weight (20–25 lbs), draw length (measured), brace height (7″+)
-
Test Extensively: Shoot multiple bows at correct settings
-
Prioritize Comfort: Grip, draw cycle, and hand shock matter most
-
Plan for Growth: Pick a bow that upgrades with you
Final Advice: The right bow makes you eager to shoot. Choose the one that fits your goals, body, and budget, and get out there.
Professional Insight: Beginning archers should look for a bow with a significant range of adjustability in draw weight and length.
Frequently Asked Questions About Choosing a Bow
What is the best bow for a beginner?
A takedown recurve with ILF limbs is the best bow for most beginners. It offers high adjustability, works across multiple disciplines, and grows with you as your skills improve.
How much should I spend on my first bow?
Plan to spend $300–$600 for a complete beginner setup. This includes the bow, arrows, finger tab, arm guard, quiver, and target. Do not spend the entire budget on the bow alone.
What draw weight should I start with?
Start with 20–25 lbs regardless of your strength. Archery uses specific back and shoulder muscles that need time to develop. You can increase weight in 5 to 10 lb increments as technique improves.
How do I know my correct draw length?
Stand with arms outstretched in a T position. Measure your wingspan from fingertip to fingertip in inches. Divide by 2.5 and round to the nearest half-inch. Have a professional verify this measurement before buying.
Can I use a compound bow for target archery?
Yes, compound bows can be used for target archery, but they require professional setup and tuning. Misaligned cams can cause equipment failure. Many target archers prefer recurves for the mechanical consistency.
Should I buy from a shop or online?
Buy in person whenever possible. Testing the bow in person is critical because feel is subjective and cannot be captured in specs. If no shop is nearby, buy online but have a professional tune and fit the bow.
Key Takeaways for Choosing Your Perfect Bow
Choosing the right bow comes down to matching equipment to your purpose, body, and goals. Start with a takedown recurve with ILF limbs for maximum versatility and upgrade potential. Set a realistic budget that includes accessories, not just the bow itself. Measure your draw length accurately and start with a light draw weight around 20 to 25 lbs to build proper form safely.
Test multiple bows in person before buying. The feel matters more than specs on paper. Prioritize comfort in the grip and draw cycle, and seek coaching early to prevent bad habits from forming. Remember that goals evolve, so choose a bow that can grow with you through ILF limb upgrades rather than requiring a completely new purchase later.
With the right bow in hand and a clear path forward, you are ready to build skill, confidence, and a lifelong passion for archery.