
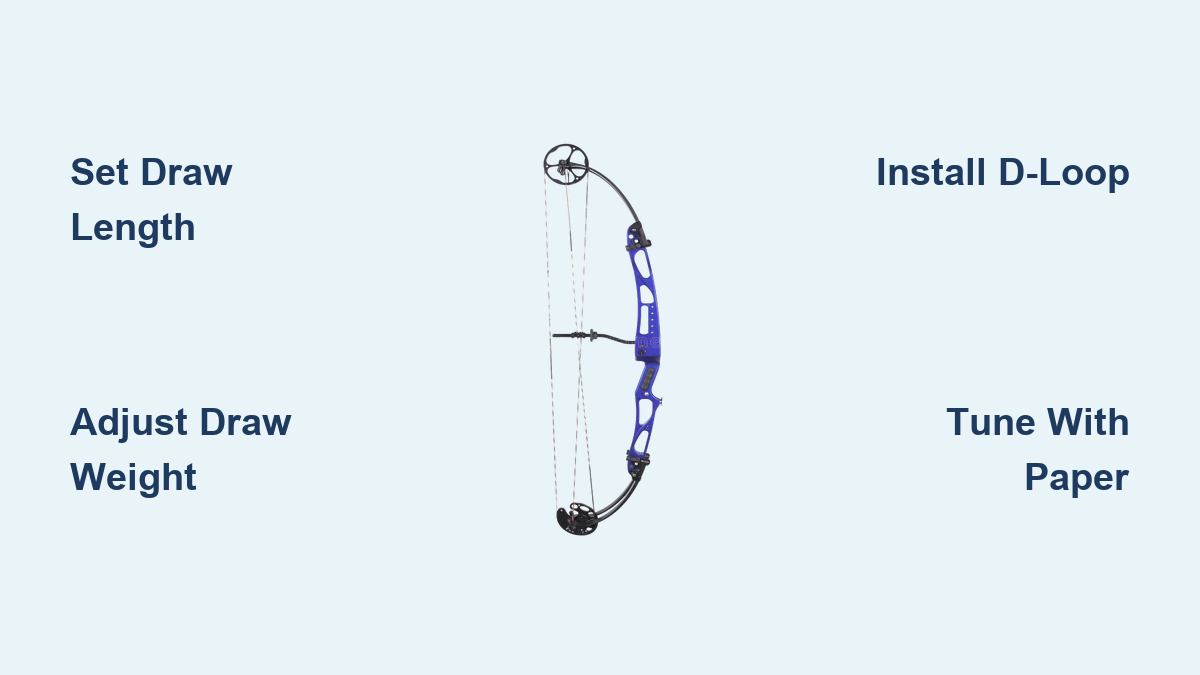
How to Set Up a Compound Bow: Step-by-Step Guide
Setting up a compound bow properly is essential for accuracy, consistency, and safety. Whether you own a budget-friendly SAS Siege or a premium Mathews V3X, skipping setup steps leads to poor arrow flight, equipment damage, or injury. A well-tuned bow starts with correct draw length and weight, precise accessory alignment, and thorough testing. This guide walks you through every stage from installing the D-loop to broadhead tuning using proven methods from professional archery technicians.
Adjust Draw Weight and Draw Length

Set Limb Bolt Tension
Use a torque wrench to adjust draw weight via the limb bolts. Turn clockwise to increase weight and counterclockwise to decrease. Most modern bows allow ±10 lbs adjustment from peak weight. Always torque to manufacturer specifications, typically 55–65 in-lbs, to avoid thread damage. Uneven tension causes cam lean and poor performance.
Align Draw Length Modules
Adjust or replace cam modules to match your measured draw length. For dual-cam systems, ensure both cams are set identically. Misaligned modules cause timing issues and erratic arrow flight. On tri-track systems, synchronize cams before setting draw length.
Pro Tip: Measure from pivot point of grip to arrow nock at full draw, plus 1.75 inches. That is your true draw length.
Replace Strings and Cables
Remove Old Setup Safely
Secure the bow in a bow press. Take photos of string and cable routing before removal to prevent reassembly errors. De-tension the bow fully if required, such as on Mathews V3 models. Remove cam axles one at a time to avoid limb shift.
Install New Strings Correctly
Follow your photo reference for routing. Use high-quality strings like BCY 1400X or ABB Platinum Series for durability. Reinstall yoke cables if needed. After installation, check for fraying or pinching at roller guards and cable slide.
Expert Note: Keep stock strings as backups. Field repairs often rely on them during hunting season.
Verify Brace Height and Axle-to-Axle
Measure ATA First
Axle-to-axle distance must match factory specifications. Use a tape measure between cam centers. If off, adjust by adding or removing twists from both cables evenly.
Set Brace Height
Brace height is the distance from grip throat to string at rest. It affects speed and forgiveness. Adjust by twisting cables.
Visual Cue: Use a ruler with a square base for accurate readings.
Add twists shortens cables, increases draw weight slightly, and decreases ATA. Remove twists lengthens cables, lowers draw weight, and increases ATA.
Mount the Arrow Rest

Choose the Right Rest Type
Select a rest based on your shooting style.
• Drop-away rests work best for release shooters with zero contact at release
• Whisker Biscuit rests are forgiving but create drag
• Flipper or spring rests are ideal for finger shooters
Attach the mounting bracket to the Berger hole just above the grip. Tighten securely with an Allen key and torque wrench.
Set Center Shot Accurately
Center shot is lateral alignment of arrow to string path. Use one of these methods.
T-Square Method: Align ruler edge with string. Adjust rest until arrow shaft lines up.
Stabilizer Reference: View from above. Arrow should be parallel to stabilizer bar.
String Alignment: Look down the string. Arrow must be centered.
Default center shot is 13/16 inch from riser centerline, with a range of 5/8 inch to 7/8 inch.
Fine-Tune with Micro-Adjustments
Loosen the mounting bolt and use micro-adjust screws for precise left/right or up/down changes. Ensure the launcher arm supports the arrow fully at rest and drops completely at full draw.
Install the D-Loop
Prepare the Cord
Cut 5 inches of D-loop material such as 40–50 strand BCY. Melt each end into a small mushroom knot. Seal without burning fibers.
Tie the Half-Hitch Knot
Position on string 1/8 inch above plunger hole center for release shooters. Pass one end through from shelf side, wrap around string, and pull through to form a half-hitch. Pull tight to lock.
Form and Secure the Loop
Create a loop large enough for your release aid. Use D-loop pliers to stretch and seat it tightly. Add a second half-hitch below for security. Melt and trim ends.
Critical Warning: Do not tie D-loop before peep sight. String twisting may require rework.
Warning: Over-melting weakens fibers. Under-melting causes fraying.
Set the Nock Point
Use a Bow Square
Place a 90-degree bow square on the riser shelf. Align arrow so it passes through the Berger hole. The string intersection point is your nocking location.
Position for Your Shooting Style
• Release shooters should set 1/8 inch above plunger hole center
• Finger shooters should set 3/8 inch above to compensate for arrow flex
Add Soft Nocking Knots
Tie three serving knots above and below the D-loop using BCY 1400X or Power Grip. Leave slight wiggle room. Too tight pinches the nock.
Pro Tip: Always use your actual hunting nock, especially lighted ones, when setting height.
Install the Peep Sight
Weave with Strong Serving
Use two 2-foot lengths of BCY 1400 Power Grip. Thread through peep hole, tie overhand knots on each side, then cross strands and repeat. Apply 10–14 half-hitches per side. Trim to 1/4 inch and melt upward.
Position at Anchor Height
Install with bow in press and slight tension. Place peep 6–8 inches behind nocking point. Draw to full anchor. Peep should align with sight housing and be upright when head tilts naturally.
Prevent Rotation
Mark both sides of peep with a Sharpie to detect movement. Rotate during installation so hole is level at full draw. Never glue or permanently secure until confirmed over multiple draws.
Legal Note: Some states restrict peep size. Verify before hunting season.
Route Cable Guard and Activator Cord
Check Cable Guard Alignment
Ensure cables run cleanly through the slide without touching each other or the riser. Flip the slide if contact occurs. Tighten set screws securely. Flexing affects cam timing.
Connect Activator Cord
For drop-away rests, attach cord to rest activation lever. Route to bottom cam axle or tie-off point. Pull snug. Apply light preload. Tie off with overhand knot, clip, and melt.
Test by drawing slowly. Rest must drop fully at full draw and return at rest.
Advantage: Limb-driven rests eliminate manual tensioning. Adjust via press system.
Mount and Level the Sight
Attach at Standard Height
Mount sight on riser right side for right-handed bows, approximately 6 inches above grip. Use Allen keys to secure.
Three-Axis Leveling
First Axis (Vertical): Ensure housing is plumb when bow is level.
Second Axis (Windage Ring): Loosen side screws, rotate until bubble level centers.
Third Axis (Forward/Back Tilt): Place bow in vise at 45-degree angle. Level front housing. Adjust wing-truss screw until level reads true.
Check: Factory levels may be inaccurate. Verify with a second level on the riser.
Test Fletching Clearance
Perform an Ink Test
Coat fletchings with dry-erase marker. Shoot into a backstop. Wipe marks indicate contact points.
Analyze and Fix
• Contact with rest: Adjust rest height or lateral position
• Contact with cables: Rotate nocks so cock feather clears upward
• Persistent issues: Switch to shoot-through rest like Whisker Biscuit
Note: Finger shooters expect minor contact. Use flexible rests to minimize impact.
Synchronize Cams
Use a Draw Board
Secure bow on draw board with grip against peg. Attach S-hook to D-loop and safety rope to nock.
Observe Cam Stop Contact
Draw to just before let-off.
• Both cams hit stop simultaneously: in sync
• Top cam hits first: add twist to top cable
• Bottom cam hits first: add twist to bottom cable
Recheck after each twist. Each twist slightly increases draw weight. Monitor changes.
Caution: Binary cam systems require max poundage set before timing.
Perform Paper Tuning
Shoot Through Freezer Paper
Tape paper to frame. Stand 5–7 feet away. Shoot a field-point-tipped arrow.
Read the Tear Pattern
| Tear | Meaning | Fix |
|---|---|---|
| Round hole | Perfect | Done |
| Vertical, fletch high | Nock high | Lower rest |
| Vertical, fletch low | Nock low | Raise rest |
| Horizontal, left | Arrow too weak | Move rest right or stiffen arrow |
| Horizontal, right | Arrow too stiff | Move rest left or weaken arrow |
Key Insight: Tears show nock travel path, not arrow direction.
Repeat until you get a bullet hole.
Tune for Broadheads

Shoot Field Points First
Fire 3–5 arrows with field points at 20 yards. Mark group center.
Compare with Broadheads
Now shoot 1–2 broadheads. If they impact right of field points, move rest left. If left, move rest right. If low, raise rest. If high, lower rest.
Goal: Group within 2–3 inches at 30 yards.
Pro Tip: Mechanical broadheads fly like field points but may fail on hard impacts.
Sight In All Pins
Start at 10 Yards
Shoot 3–5 arrows. Adjust sight until group hits bullseye.
Set 20-Yard Pin
Move to 20 yards. Refine pin. Keep this pin fixed when adjusting longer distances.
Build Outward
Use chase the arrow rule. Arrows hit low-right? Move sight down and right. Hit high-left? Move up and left.
For single-pin sliders, calibrate using manufacturer tape. Start at 20 yards, walk back to 60 yards, adjust dial.
Balance the Bow
Identify Imbalance
A quiver pulling the bow down causes torque and inconsistent groups.
Counteract with Stabilizers
Use a Quivalizer, which combines stabilizer and quiver. Or add an offset rod or sidekick to opposite side.
User Feedback: A balanced bow reduces grip pressure and improves follow-through.
Select Arrows and Broadheads
Match Spine to Setup
Use manufacturer charts based on draw weight, length, arrow length, and point weight. Release shooters should choose slightly stiffer arrows. Finger shooters are more sensitive to spine changes.
Recommended Arrows
• Victory VAP SS (micro-diameter)
• Easton A/C, FMJ Injexion 4mm
Use Victory insert/outserts for micro-shafts.
Optimize Weight and FOC
• Ideal arrow weight: 275–285 fps
• Heavier arrows (504 grains): Quieter, better penetration
• Point weight: approximately 150 grains total (insert plus broadhead)
• Below 120 grains: poor grouping
• Above 150 grains: hard to tune
Final Checks and Maintenance
Pre-Shot Checklist
• All screws torqued to spec
• D-loop secure, no fraying
• Peep aligned and marked
• Rest drops fully
• String and cables clean and waxed
Ongoing Care
Wax every 5–10 hours. Inspect roller guards and cable slide. Recheck levels monthly. Store in case. Avoid heat and cold.
Pro Tip: Mark cam-to-limb alignment with silver Sharpie. Watch for movement indicating stretch.
Frequently Asked Questions About Setting Up a Compound Bow
What tools do I need to set up a compound bow?
You need a bow press, bow vise, Allen keys, torque wrench, D-loop material and pliers, bow square, measuring tape, draw board, and a lighter for melting cord ends. Having these tools ensures safe and accurate setup.
How do I determine the correct draw length for my compound bow?
Measure from the pivot point of the grip to the arrow nock at full draw, then add 1.75 inches. This gives your true draw length. The ideal draw allows full extension with slight elbow bend and consistent anchor point.
What is center shot on a compound bow?
Center shot is the lateral alignment of the arrow relative to the string path. The standard measurement is 13/16 inch from the riser centerline, with a usable range of 5/8 inch to 7/8 inch. Proper center shot ensures consistent arrow flight.
How often should I wax my bowstring?
Apply string wax every 5–10 hours of shooting. Regular waxing prevents fraying, extends string life, and maintains performance. Avoid over-waxing, which attracts dirt and debris.
Why does my arrow fishtail left with a right-handed bow?
Arrow fishtailing left typically indicates weak spine or the rest positioned too far left. Fix by moving the rest right or switching to a stiffer arrow spine. Check paper tuning results to confirm.
Can I set up a compound bow without a bow press?
You cannot safely replace strings or cables without a bow press. However, you can adjust draw weight, install rests, sights, and D-loops, and perform paper tuning without one. String and cable work requires professional shop assistance.
Key Takeaways for Setting Up Your Compound Bow
Proper compound bow setup follows a specific sequence. Start by setting draw length and weight to fit your body. Install and center the arrow rest. Add the D-loop and peep sight. Mount and level your sight. Check fletching clearance and synchronize cams. Paper tune until you achieve bullet holes. Broadhead tune to match field point impact.
The critical insight from professional technicians is that bow tuning is mandatory for reaching your potential as an archer. Skipping steps leads to poor accuracy and equipment damage. Take your time with each phase. Verify measurements twice before moving forward.
Your next step is to gather the required tools and begin with draw length and weight adjustment. Document all settings as you go. A properly set-up bow delivers tight groups, consistent hits, and reliable performance in the field.


