
How to Shorten a Bow String: Quick Steps
A bow string that’s too long causes frustrating problems like poor brace height, string slippage during draw, inconsistent arrow flight, or even equipment damage. Whether you own a compound bow or traditional recurve, knowing how to shorten a bow string is a valuable skill that can save you time and money. The good news: most string length issues can be corrected safely using methods like adding twists, re-serving loops, or retwisting Flemish ends. This guide walks you through every reliable technique, with step-by-step instructions, expert insights, and clear safety warnings so you can tune your bow with confidence.
You’ll learn how to diagnose string length problems, measure brace height accurately, choose the right shortening method for your string type, and avoid common mistakes that could lead to string failure. Most importantly, you’ll know when it’s smarter to simply replace the string instead of modifying it.
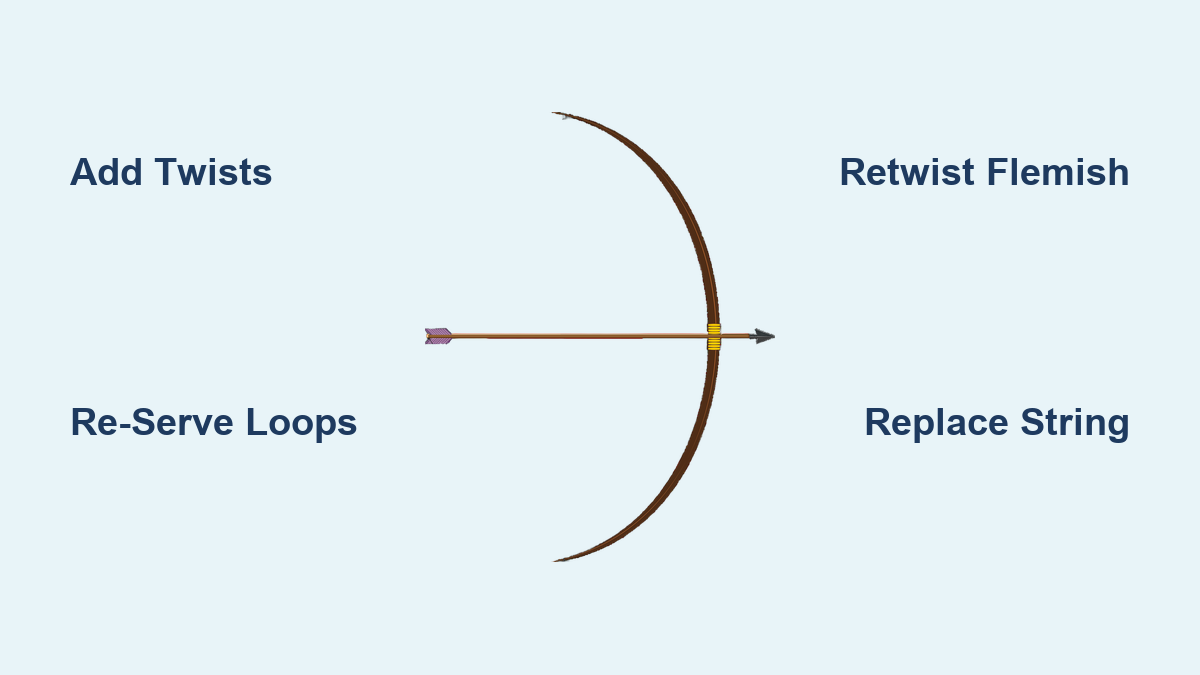
Add Twists to Shorten Your Bow String
Twisting the string is the safest, most reversible method for minor length adjustments. This technique works by compressing the strands, effectively reducing the distance between the end loops. Each full twist shortens the string by approximately 1/16″ to 1/8″, depending on the material and strand count. For most bows, adding 10 to 20 twists brings the brace height into the manufacturer’s specified range, typically within ±0.25″ of the target.
Step-by-Step Twisting Process
Keep the string mounted on the bow and grasp it near the top limb. Rotate the string in the direction of the original twist lay, which is usually clockwise. Add 10 twists initially, then test the draw and remeasure the brace height. Repeat this process in small increments until you achieve the desired measurement. Stop once you reach the manufacturer’s specification or notice the string feeling overly tight.
Use a string winder or low-speed drill for consistent twisting if available, but never overdo it. Limit total shortening to approximately 1 inch. Beyond this point, the string becomes stiff and harsh, vibration and noise increase, and the risk of serving unraveling or fiber stress rises significantly.
Why Twisting Works
Twisting compresses the strands together, which reduces the overall length between the loops. This method is ideal for compensating for initial stretch after installing a new string or addressing minor fit issues. Twisting slightly reduces draw weight rather than increasing it, which is an important consideration for fine-tuning your bow’s performance.
Fix Oversized Loops with Re-Serving
If your string slips off limb bolts or cams during draw, the loop may be too large even if the overall string length appears correct. Loops must fit snugly on limb tips, cam grooves, or quick-connect pins. A loose fit allows unwanted movement that can lead to string derailment during the draw cycle.
Tighten Loops Without Cutting
Use a serving tool and serving thread to add layers over the existing loop without cutting the string. Clean and wax the area first, then wind the serving thread tightly around the loop base. Apply 2 to 3 wraps to slightly reduce the diameter, and seal with adhesive if needed. This method preserves the original string while improving the fit.
When to Rebuild the Loop
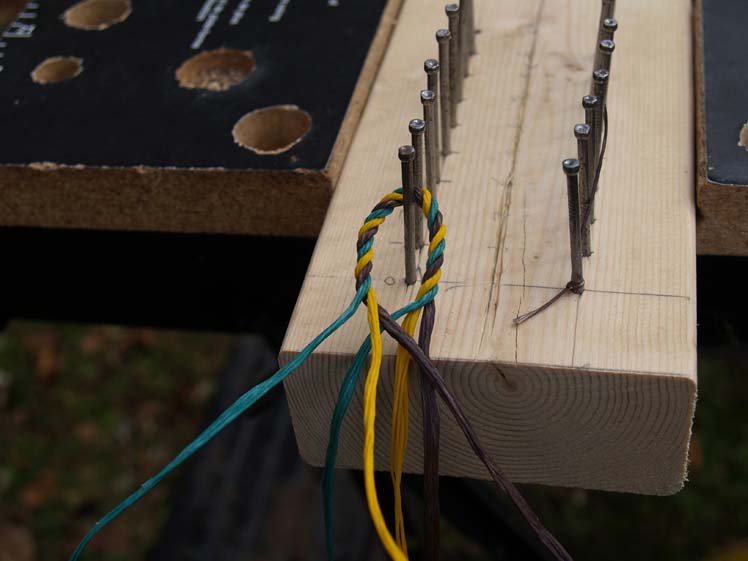
If the loop is severely stretched or damaged, you’ll need to rebuild it. Unravel one end of a Flemish string, then trim the core strands by 1 to 2 inches. Stagger your cuts across strands every half inch to prevent weak spots from forming. Retie and re-serve the loop, then wax thoroughly before use. Never cut all strands at the same point, as this creates a dangerous failure hazard under tension. This method requires intermediate skill and proper tools.
Retwist a Flemish String for Major Adjustments
For significant shortening, up to 3 inches, retwisting a Flemish string is possible but only recommended for experienced users. This permanent modification involves unraveling one loop, measuring the required shortening, and cutting the core strands shorter while staggering cuts across multiple points to distribute stress evenly.
Step-by-Step Retwist Process
Unravel one loop, typically the nock end. Measure how much you need to shorten the string, such as 2 inches. Cut core strands shorter, staggering cuts every half inch across the bundle. Rewax all strands thoroughly to restore proper lubrication. Re-form the loop using the traditional Flemish splice technique, then re-serve and inspect for symmetry and tightness.
This method carries substantial risks. The modification is permanent, uneven cuts create high stress points, and the string may unravel under load if not done correctly. Only attempt this if you have experience with string building. If you’re unsure, building a new string or purchasing a replacement is the safer choice.
Use a Tillering String for Testing
Before modifying your primary string, consider using a tillering string for testing different lengths. A tillering string is a temporary, adjustable string with one fixed loop and one sliding knot or adjustable end. It’s designed for setting ideal brace height, fitting multiple bows, and bow building or tuning work.
The major benefit is that it’s fully reusable and non-destructive, meaning no risk to your primary string. This provides flexibility, especially for traditional archers or anyone building their own bows. You can experiment with different lengths and configurations without committing to permanent changes.
Measure and Verify Brace Height
Shortening the string is pointless without accurate measurement. The brace height is the distance from the deepest point of the grip throat to the string when the bow is at rest. This measurement determines whether your string length is correct.
How to Measure Correctly
Stand the bow upright against a wall with the back flat against the surface. Find the deepest point of the grip throat. Measure straight to the string perpendicularly, not at an angle. Use a ruler, tape measure, or dedicated brace height gauge for accuracy. Most manufacturers specify a range, such as 7.5″ ±0.25″. Stay within this tolerance. If the bow shoots cleanly and quietly, minor deviations are acceptable.
If your measured brace height is slightly above spec but the bow performs well, expert advice suggests it should not matter. Prioritize consistent performance over exact numbers.
Check Cam Alignment and Limb Twist on Compound Bows

Misalignment can mimic or worsen string slippage problems. On compound bows, check if the top or bottom cam tilts sideways, which indicates uneven cable tension. This cam lean can cause the string to jump off the track even when the string length is correct.
Adjust Split Yokes if Applicable
Some compound bows, like the Mission Craze, use split yoke cables. You can add twists to one leg to tilt the cam back into alignment, or remove twists from the opposite leg to correct lean. Recheck string tracking after making any adjustment. Don’t ignore cam lean, as even a perfectly tensioned string can derail if the cam is misaligned.
Low draw weights combined with high let-off create strings that act like wet noodles, making it easy to torque them off the cams. This is a common cause of string derailment on compound bows.
Understand String Material Stretch and Creep

All strings stretch to some degree, and different materials behave differently. B55 string stretches approximately 1.5 inches during the first 50 to 100 shots. Fast Flight stretches about 1.25 inches, while BCY 452X stretches less than 1 inch due to its low creep characteristics.
Longer strings stretch more than shorter ones, similar to how rubber bands work. A 74-inch string elongates more than a 44-inch string. New strings that haven’t been pre-stretched by the manufacturer may experience rapid elongation after installation. Allow new strings to settle with 50 to 100 test draws, then recheck brace height.
Know When to Replace Instead of Repair
Sometimes shortening isn’t worth the risk. You should replace the string instead of modifying it if you lack experience with string building, the string is frayed or worn, the required shortening exceeds 1 inch and involves cutting, or replacement cost is low.
Replacement strings often cost only $7.50 to $15, making them far more affordable than risking damage to your bow or injury to yourself. Even if your current string is too long for your current bow, keep it as a backup. It might fit a future bow, making it a useful spare rather than waste.
Essential Tools for Bow String Adjustments
DIY adjustments require proper equipment to ensure safety and effectiveness. Essential tools include a serving tool for rebuilding or repairing loops and nock points, a string winder for safe removal and restringing, a brace height gauge for accurate measurement, digital calipers for measuring loop diameter precisely, wax and applicator for maintaining strand strength and flexibility, and a twist rod or low-speed drill for adding consistent twists quickly.
Without proper tools and technique, you risk damaging your bow or creating unsafe conditions. Don’t rely solely on YouTube tutorials without understanding the underlying principles.
Follow the 10-Step Adjustment Checklist
Use this systematic approach to diagnose and fix string length issues. First, diagnose the problem by asking whether the string slips during draw, brace height is too low, or peep rotation is excessive. Second, measure current brace height and compare to OEM specifications. Third, add 10 to 20 twists and test after each increment. Fourth, re-measure and verify the brace height while checking for improved string retention.
Fifth, inspect end loops to see if they’re too large for limb tips or cams. Sixth, check for cam lean or limb twist by looking down the bow’s belly. The string path should be straight. Seventh, adjust split yokes if needed to correct cam alignment on compound bows. Eighth, test shoot gradually starting with a target at close range. Watch for noise, vibration, or erratic arrow flight. Ninth, monitor for stretch and creep by rechecking brace height after 20 to 50 shots, especially with new strings. Tenth, replace if unsure. If performance is unstable or you doubt the string’s integrity, install a new one.
Frequently Asked Questions About Shortening a Bow String
Can I shorten a bow string without cutting it?
Yes, the safest method is adding twists. Each twist shortens the string by approximately 1/16″ to 1/8″. This method is reversible and works well for minor adjustments up to about 1 inch. Simply twist the string in the direction of the original lay while it’s mounted on the bow, then remeasure brace height.
How many twists does it take to shorten a bow string?
Ten to twenty twists typically provide enough shortening for most bows, bringing the brace height within the manufacturer’s specified range. Add twists incrementally, testing after each set, and stop once you reach the target measurement. Excessive twisting makes the string feel stiff and increases vibration.
What happens if I over-twist my bow string?
Over-twisting beyond 1 inch of effective shortening makes the string feel excessively stiff, like shooting a guitar string. It increases fiber stress, accelerates wear, and can cause serving to unravel. The increased tension also raises the risk of string failure or limb damage.
Should I replace my bow string instead of shortening it?
If you’re a beginner, the string needs significant shortening exceeding 1 inch, or you’re uncertain about your technique, replacement is often the smarter choice. New strings cost only $7.50 to $15, and the safety benefits far outweigh the minor cost savings of risky modifications.
How do I know if my bow string is too long?
Signs include string slipping off limb tips or cams during draw, brace height exceeding manufacturer specifications, excessive peep sight rotation, or inconsistent arrow flight. Measure your brace height and compare it to the OEM spec to confirm.
Can I shorten an endless loop bow string?
Endless loop strings can only be shortened by adding twists, similar to other string types. You cannot re-serve or retwist an endless loop without specialized equipment and experience. For significant length corrections on endless loop strings, replacement is typically the best option.
Key Takeaways for Shortening Your Bow String
For small adjustments under 1 inch, use the twisting method. It’s safe, easy, and fully reversible. For moderate shortening of 1 to 3 inches on a Flemish string, only attempt retwisting if you’re experienced in string making. Stagger all cuts, wax thoroughly, and inspect before use. For beginners or uncertain archers, buying a new string is the safest approach. Keep a tillering string on hand for flexible testing and tuning without risking your primary string.
When in doubt about a modified string’s integrity, don’t shoot it. A failed string can cause catastrophic damage to your bow or serious injury to you. Prioritize safety over convenience every time.


