How to Use a Crossbow: Quick Steps
You’ve just unboxed your new crossbow, maybe a Barnett C5 Wildcat or another entry-level model, and you’re ready to shoot. But before you pull the trigger, there’s a right way and a wrong way to use a crossbow. Done correctly, it’s a precise and powerful tool for hunting or target practice. Done wrong, it can be dangerous or damage your gear.
This guide covers everything from cocking and loading to aiming, firing, and safe unloading. Whether you’re 6’5″ and hunting from a tree stand or a rifle shooter switching to archery, you’ll learn how to use a crossbow safely and effectively.
Assemble Your Crossbow Properly

Before shooting, ensure your crossbow is correctly assembled. Even minor errors can affect accuracy or cause mechanical failure.
Install String and Slide Correctly
Route the bowstring into the limb slots, then place it over the flight rail. The string slide must be installed with its upper and lower slots aligned per your manual. If installed backward, the string may bind or wear prematurely.
Pro Tip: Wax the string before final assembly. Focus on unserved sections near the slide and trigger contact points to reduce friction.
Mount Scope with Precision
Attach the red-dot scope or multi-reticle system, ensuring the horizontal lines are level. Use a bubble level or laser tool to avoid canting. Misaligned scopes lead to inaccurate shots, especially past 30 yards.
Key mounting details to remember:
- Maintain a 1/32 inch gap between the uncocked string and the string stops
- Tighten screws to manufacturer torque specs, as over-tightening can crack the rail
Warning: Never use household lubricants like WD-40. They aren’t formulated for high-pressure, high-speed contact.
Lubricate Key Components
Apply lubricant to these areas before your first use:
- Flight rail: Apply manufacturer-approved rail lube to reduce heat and wear
- Moving parts: Lightly oil hinges, trigger housing, and cocking mechanisms
- Avoid excess: Too much oil attracts dirt and degrades performance
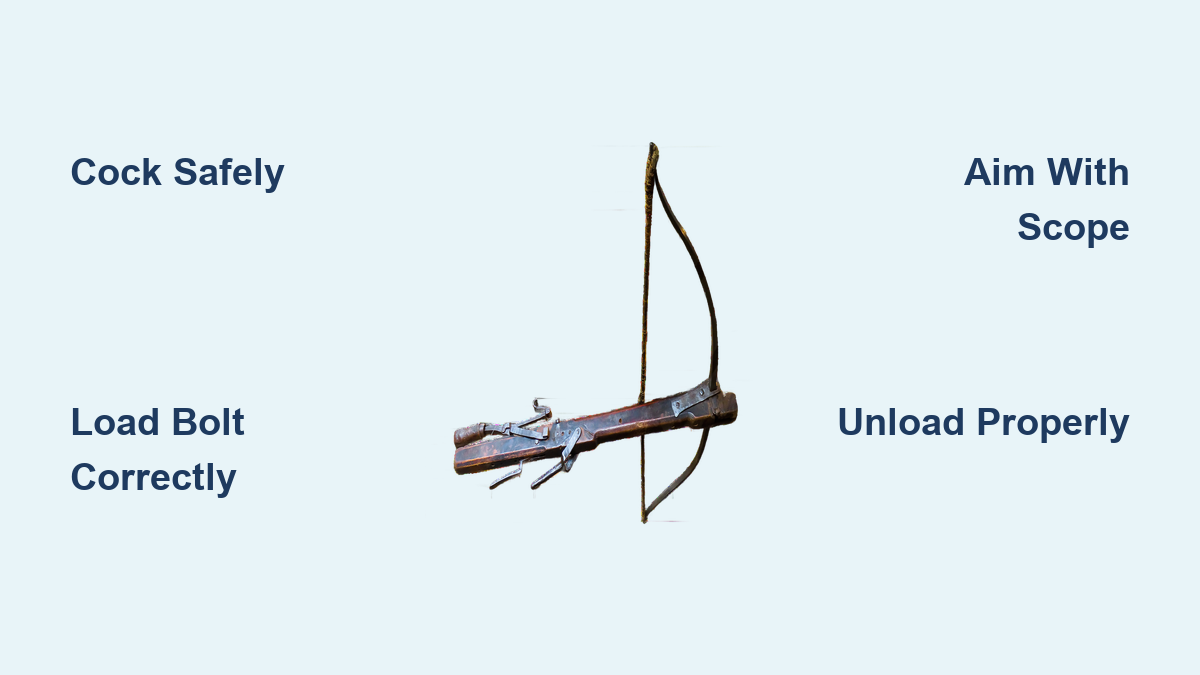
Cock the Crossbow Safely
Cocking draws the string back and locks it into the trigger mechanism. Use the correct method to avoid injury or limb damage.
Use a Rope Cocking Device
Most entry-level crossbows include a dual-hook rope with a foot stirrup.
Step-by-Step Rope Cocking:
- Place the stirrup on the ground and step firmly into it
- Hook each end of the rope onto the bowstring with hooks facing away from you
- Pull upward evenly using leg strength, not just arms
- Stop when you hear 2 to 3 sharp clicks, confirming full engagement
- Remove the rope and verify the string is seated in the trigger mechanism
Critical: Only use the manufacturer-supplied rope. Aftermarket versions may slip or damage the string.
User Insight: Mark the string where the hooks engage for consistent cocking every time.
Crank Cocking for Low Effort
For users with limited strength or mobility, a crank system reduces effort significantly.
Winch Cocking Steps:
- Attach the puller to the center of the string
- Insert the crank handle into the buttstock port
- Turn slowly until the string locks
- Remove the crank and confirm full engagement
Best Practice: Crank systems are slower and noisier but ideal for older shooters or extended hunting sessions.
Safety Note: Some models require the safety to be in fire mode before cocking. If already safe, the mechanism may lock and prevent cocking.
Load the Bolt with Correct Alignment

Loading a bolt improperly can damage your crossbow or cause a misfire.
Choose the Right Bolt
Select bolts with these specifications:
- Length: 20 inches (standard for most models)
- Shaft: Carbon fiber recommended for durability and speed
- Nock: Half-moon style designed for crossbows only
- Never use regular arrows: Their spine is too weak and may shatter on release
Align the Index Vane Downward
Bolts have three fletchings, two matching and one different (index vane). The odd-colored vane must face down, aligned with the rail groove.
Example: Two green vanes and one white vane means the white vane goes down. Misalignment causes rail contact, erratic flight, and potential dry-fire risk.
Loading Procedure
- Hold the bolt by the shaft or tip, never by the nock
- Slide it into the flight rail until it clicks into the trigger
- Visually confirm the nock is fully seated, the bolt is straight, and the index vane is down
- Ensure the anti-dry-fire mechanism is active
Safety Reminder: Keep fingers out of the danger triangle, the space between the string and limbs.
User Mistake: Beginners often overlook fletching alignment, leading to poor accuracy and rail wear.
Engage Safety and Check Trigger
Your crossbow is now cocked and loaded. The next step is safety management.
Activate the Safety Switch
The safety is located near the trigger housing. Flip to Safe immediately after loading. This prevents accidental discharge during transport or movement.
Rule: Keep safety on until your target is in sight and you’re ready to shoot.
Understand Trigger Pull Weight
| Type | Weight | Notes |
|---|---|---|
| Feather-light | 1.5 to 2 lbs | High precision, higher accident risk |
| Standard | 3 to 4 lbs | Balanced control (e.g., Barnett C5) |
| Heavy-duty | 5+ lbs | Safer, may reduce shot smoothness |
Ideal triggers break cleanly without creep or grit. Lower-end models often have inconsistent pulls, so test before relying in the field.
Expert Tip: Practice dry-fire trigger pulls (unloaded and uncocked) to refine smooth squeezing and reduce flinching.
Aim and Fire with Proper Form
Now you’re set to shoot. Accuracy depends on stance, alignment, and follow-through.
Mount the Crossbow Correctly
Proper mounting involves these elements:
- Shoulder: Seat the buttstock firmly into your shooting shoulder
- Trigger hand: On the grip, finger resting lightly on trigger
- Support hand: On the foregrip for stability
- Head: Rest your cheek on the stock comb (welding) for consistent eye alignment
- Eye dominance: Use your dominant eye, even if you’re right-handed but left-eye dominant
Safety Wing Tip: If your model has string safety wings, ensure hands are clear of the string’s path.
Use Scope Reticles for Distance
Most red-dot scopes have three dots. The top dot is for approximately 20 yards, the middle for approximately 35 yards, and the bottom for approximately 50 yards. For ethical hunting, aim within 20 to 35 yards. Beyond that, bolt drop increases significantly.
Calibration Tip: Zero your scope at 20, 30, and 40 yards using practice bolts.
Firing Sequence
- Acquire target through the scope
- Take 2 to 3 slow breaths to steady your heart rate
- Begin exhaling and pull the trigger around 50% exhalation
- Move safety to Fire
- Squeeze the trigger smoothly, do not jerk
- Follow through by keeping your head down and eyes on target for 1 to 2 seconds
- Track bolt impact or game movement
User Insight: Poor follow-through is a top cause of missed shots. Even slight flinching ruins accuracy at 50 yards.
Unload the Crossbow Safely
Never leave your crossbow cocked. Prolonged tension harms the string and limbs.
Discharge with a Blunt Bolt (Best Method)
- Load a blunt-tipped discharge bolt
- Aim at a soft backstop (foam block, dirt mound, or hay bale)
- Fire to release tension
- Retrieve bolt only if safe
Warning: Never shoot into hard surfaces or water. Ricochet risk is high.
Crank Release (Crank-Capable Models Only)
- Reattach the crank device
- Pull the string slightly to engage full tension
- With no bolt loaded, pull the trigger (mock fire)
- Slowly reverse the crank to release the string
Critical Rule: Only attempt this if your model allows anti-dry-fire override. Never dry-fire without confirming compatibility.
Maximum Time Cocked: 24 Hours
Leaving a crossbow cocked longer weakens the string and cams. Immediate unloading is best practice. If you must leave it cocked, do not exceed one day.
User Feedback: Many hunters keep a dedicated de-cocking bolt for field safety.
Maintain Your Crossbow Regularly
Long-term performance depends on consistent care.
Wax String Every Few Shots
Apply bowstring-specific wax to prevent drying and fraying. Focus on contact points near the slide and trigger. Never use substitutes.
Re-Lube the Rail After 50 Shots
Apply manufacturer-recommended rail lube. Wipe off excess to avoid attracting debris. Inspect for scratches or wear, as damaged rails affect bolt speed.
Inspect Bolts and Broadheads
- Practice bolts: Use blunt or field tips
- Hunting bolts: Switch to broadheads (e.g., Grim Reaper 125-grain, 2-inch cut)
- Never shoot broadheads into hard targets: Blades dull or break
Storage Tip: Store bolts upright to prevent fletching warping.
Follow Critical Safety Rules
Treat every crossbow as if it’s loaded and ready to fire.
Top 5 Safety Rules
- Always engage the safety after cocking
- Keep your finger off the trigger until aiming
- Never point at anything you don’t intend to shoot
- Verify your target and what lies beyond it
- Use a safe backstop with no roads, homes, or people nearby
Prevent Dry-Firing
Firing without a bolt can destroy the string and limbs, crack the flight rail, and send debris flying with risk of serious injury. Even with anti-dry-fire mechanisms, never rely on them 100%.
Final Warning: A loaded crossbow is as dangerous as a loaded firearm. Treat it with equal respect.
Ideal Use Cases and User Profiles
Who Benefits Most
- Tall hunters (e.g., 6’5″): Easier maneuvering in tree stands
- Beginners: Simpler learning curve than compound bows
- Rifle shooters: Familiar trigger and aiming mechanics
- Close-range hunters: Ethical kills within 20 to 35 yards
Target Practice Setup
- Target: 4x4x4 foot foam block (ideal), hay bale (acceptable)
- Bolts: 20-inch with blunt tips
- Distance: Start at 5 to 6 yards, progress to 50 yards
- Practice: Include uncocked trigger pulls to improve control
Pro Tip: Mimic hunting conditions by practicing seated, in a blind, or from a kneeling position.
Performance Specs at a Glance

| Feature | Specification |
|---|---|
| Bolt Speed | 300 to 470 fps |
| Draw Weight | 150 to 200 lbs (assisted) |
| Effective Range | 50 yards (scope), 20 to 35 yards (ethical hunting) |
| Accuracy | Sub-2-inch groups at 20 yards |
| Trigger Pull | 1.5 to 5+ lbs |
| Cocking Methods | Rope, crank, auto |
| Anti-Dry-Fire | Standard on modern models |
Gear Checklist
Must-Haves
- Crossbow (e.g., Barnett C5)
- 20-inch bolts (4 or more)
- Rope cocking device
- Red-dot scope
- Quiver
- Foot stirrup
- String wax and rail lube
- Soft backstop (foam or hay)
Recommended Add-Ons
- Crank cocking system
- Bipod or monopod
- Extra bolts (6 total minimum)
- Case for transport
- De-cocking bolt
Frequently Asked Questions About Using a Crossbow
What is the proper way to cock a crossbow?
Use the included rope cocking device by placing the foot stirrup on the ground, stepping into it firmly, hooking the rope onto the bowstring with hooks facing away from you, and pulling upward until you hear 2 to 3 sharp clicks confirming full engagement.
How do I load a bolt correctly into my crossbow?
Hold the bolt by the shaft or tip (never the nock), slide it into the flight rail until it clicks into the trigger, and ensure the odd-colored index vane faces downward aligned with the rail groove.
What distance should I aim at when hunting with a crossbow?
For ethical hunting, aim within 20 to 35 yards. Beyond this range, bolt drop increases significantly and clean kills become more difficult to achieve.
How long can I leave my crossbow cocked?
Never leave a crossbow cocked longer than 24 hours. Immediate unloading after use is best practice, as prolonged tension weakens the string and damages the limbs.
What safety features should I always use?
Always engage the safety immediately after cocking, keep your finger off the trigger until ready to shoot, never point the crossbow at anything you don’t intend to shoot, and verify your target and what lies beyond it.
How often should I maintain my crossbow?
Wax the string every few shots and re-lube the flight rail after every 50 shots. Inspect bolts and broadheads regularly and replace any damaged components immediately.
Key Takeaways for Using Your Crossbow Safely
Using a crossbow safely and effectively isn’t just about pulling a trigger. It’s about precision, preparation, and discipline. Follow these steps every time, prioritize maintenance, and never skip safety checks.
Assemble your crossbow correctly by paying attention to string slide orientation and proper lubrication. Cock it safely using the manufacturer-supplied rope or crank device. Load bolts with the index vane facing down and keep fingers clear of the danger triangle.
With practice, your crossbow becomes a reliable, accurate, and ethical tool for hunting or sport. Whether you’re using a $350 Barnett or a $1,000 premium model, doing it right makes all the difference.