
How to Broadhead Tune a Bow: Step-by-Step Guide
If your broadheads fly off target while field points hit true, you are not alone—and more importantly, you are not ready for the hunt. Broadhead tuning is the critical process that ensures your hunting arrows fly exactly where your practice arrows do. Without it, even a perfectly placed shot can glance off bone or fail to penetrate deeply enough for an ethical kill.
The goal is not just accuracy. It is identical point-of-impact between field points and broadheads at 20, 30, 40 yards and beyond. This is not about adjusting your sight to compensate. It is about fixing flight flaws so both arrow types behave the same. When done right, your fixed-blade broadhead will group tight with field points, giving you confidence in the stand.
Verify Mechanical Setup First
Before shooting a single arrow, confirm your bow is mechanically sound. Tuning on a flawed foundation wastes time and masks real problems.
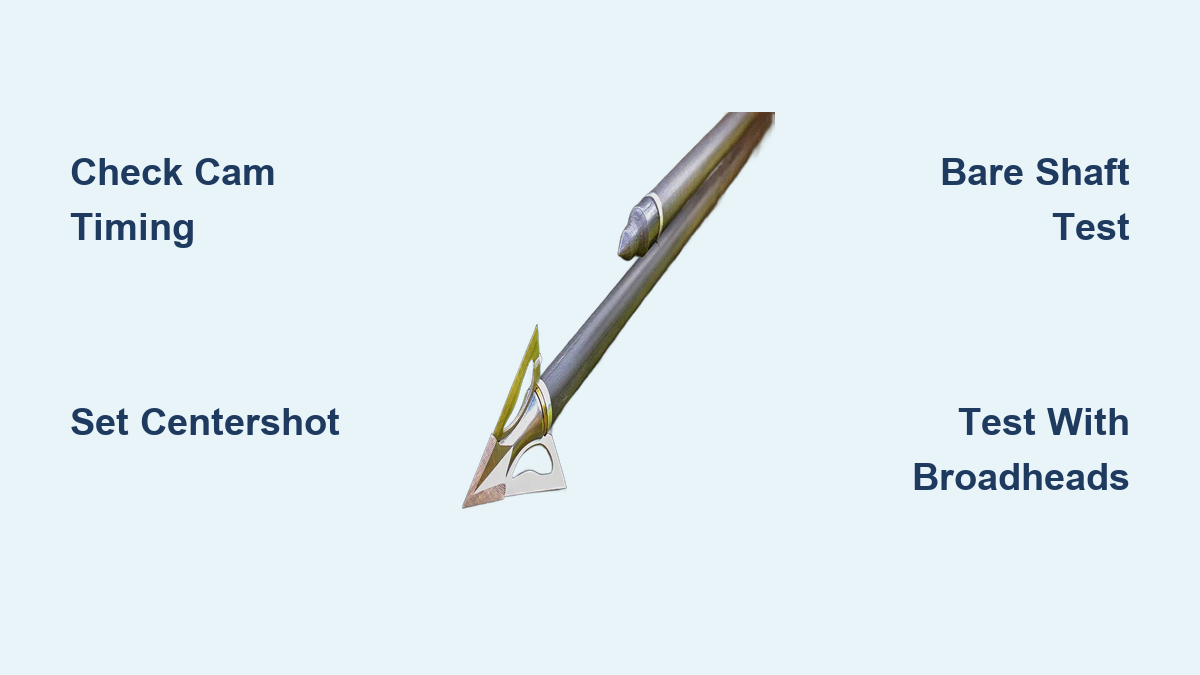
Check Cam Timing and Synchronization
Dual-cam and hybrid-cam bows demand precise cam sync. Even 1/8 inch of timing error causes uneven string travel, leading to fishtailing and inconsistent broadhead flight.
On Mathews bows, the control cable should pass through the center of the timing holes. Hoyt and Bowtech models use shims to align top and bottom cams properly. You will need a bow press to make corrections. No field adjustment replaces this step.
Misaligned cams cause vertical string movement, which destabilizes arrow launch especially under hunting conditions.
Set Centershot Correctly
Centershot is the lateral alignment of the arrow to the riser. Most modern bows require approximately 13/16 inch from riser edge to arrow center.
Use a bow square to measure this distance. Deviations beyond plus or minus 3/16 inch indicate rest mounting errors or riser defects. Keep centershot neutral before fine-tuning with micro-adjustments.
This baseline ensures rest adjustments stay within effective range.
Confirm Nocking Point and Eliminate Nock Pinch
Set nocking point with a bow square. Typically 1/8 inch to 3/16 inch above square works for most setups.
Then test for nock pinch by drawing the bow slowly. If the D-loop compresses the arrow nock, it is pinching. This causes erratic flight, fishtailing, or high and low misses.
Fix nock pinch by adding serving material above and below the nocking point to create clearance. Brass beads or extra string wraps work well.
Prepare Arrows for Consistency
Use identical arrows for testing. Same model, same length, same weight, same spine.
Cut arrows square so inserts seat flat. Spin test each shaft on an arrow spinner. Discard any with wobble. Ensure fletchings are straight and undamaged.
Even one warped arrow skews your results and leads you to make wrong adjustments.
Mount All Hunting Accessories
Install everything you will carry in the field before tuning. This includes quiver, stabilizers, sling, peep sight, and lighted nocks if used.
These affect balance, vibration, and arrow dynamics. Tuning without them gives false confidence. Your bow setup must match hunting conditions exactly.
Master Paper Tuning for Launch Diagnostics

Paper tuning reveals hidden launch flaws invisible to the eye. It is your first diagnostic step, like an X-ray for arrow flight.
Hang Paper and Shoot Clean Tears
Hang a large sheet of paper 3 to 8 feet in front of your shooting line. Butcher paper or poster board works well. Place a target behind to catch arrows.
Shoot a fletched arrow with a field point using solid form. Examine the tear pattern to diagnose launch issues.
Interpret Tear Patterns
A high vertical tear means the nock is too high or the tail is low. Lower the nocking point or raise the rest slightly.
A low vertical tear means the nock is too low or the tail is high. Raise the nocking point or lower the rest.
A right tear for a right-handed shooter means the rest is too far left. Move the rest right or shim the cam left.
A left tear means the rest is too far right. Move the rest left or shim the cam right.
Make micro-adjustments, one thirty-second of an inch at a time. Avoid moving the rest more than 3/16 inch total.
A slight high or left tear is acceptable if field groups are tight. Do not over-tune.
Use 3-Foot vs. 10-Foot Paper for Deeper Insight
Three-foot paper shows initial launch behavior. It is ideal for detecting tail kick or nock pinch.
Ten-foot paper reveals how fletchings correct flight. It helps spot steering issues.
If the tear changes dramatically between distances, your fletchings are fighting the arrow is natural flight path. That means rest position, spine, or helical angle needs adjustment.
Apply Bare Shaft Tuning for Precision
Bare shaft tuning is the gold standard. Unfletched arrows mimic broadhead flight because they lack stabilizing vanes. When bare shafts group with fletched arrows, your broadheads will too.
Prepare Taped Bare Shafts
Remove vanes from 3 to 4 arrows. Weigh the removed vanes, typically 10 to 15 grains. Wrap duct tape around the nock end to match that weight.
This preserves balance and simulates real-world mass distribution better than completely bare shafts.
Sight In Fletched Arrows at 20 Yards
Use fletched arrows with field points. Shoot at a small dot until you achieve a tight group, ideally under 1 inch.
Consistent form is mandatory. Any inconsistency mimics tuning problems.
Shoot Bare Shafts and Diagnose Impact
Now shoot bare shafts at the same target. Compare their group to the fletched arrows.
If bare shafts hit right of fletched arrows for a right-handed shooter, the arrow is under-spined or the rest is too far right. Move the rest left.
If bare shafts hit left, the arrow is over-spined or the rest is too far left. Move the rest right.
If bare shafts hit high, the nocking point is too low or the rest is too low. Raise the rest or nocking point.
If bare shafts hit low, the nocking point is too high or the rest is too high. Lower the rest or nocking point.
The golden rule is chase the bare shaft. Move the rest in the direction the bare shaft is hitting to bring it into the fletched group.
For cam shimming, move cams opposite the bare shaft is impact. Bare shaft hits right, shim cams left. Start with 1/16 inch shims and re-test after each change.
Extend Testing to 30 and 40 Yards
At 20 yards, small errors are hidden. At 30 to 40 yards, they magnify.
A 1/64 inch rest adjustment can correct an 8-inch group spread at 30 yards.
If bare shafts still group with fletched arrows at 40 yards, your setup is rock-solid.
Test Directly with Broadheads
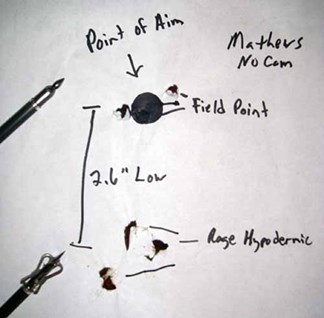
Now it is time for real-world validation using actual hunting broadheads.
Alternate Field Points and Broadheads
Shoot two arrows with field points at a 2-inch dot at 20 yards. Then shoot two with real broadheads. Use the same arrows and same weight.
Observe where the broadheads land compared to field points.
Broadheads hit right means the arrow exits left of center. Move the rest left.
Broadheads hit left means the arrow exits right of center. Move the rest right.
Broadheads hit low means check nocking point or rest height.
Make micro-adjustments, 1/64 inch or 2 clicks on a QAD rest. Re-test after each change.
Extend to 30, 40, and 60 Yards
If broadheads and field points stay together at 20 yards, test at longer ranges.
Fixed-blade broadheads often hit slightly lower at 50 plus yards due to drag. This is normal.
Mechanical broadheads usually fly flatter and group tighter across distances.
If POI diverges beyond 2 inches, revisit spine, fletching, or form.
Optimize Arrow Spine and Fletching
Even perfect rest tuning fails if your arrow is not matched to your bow.
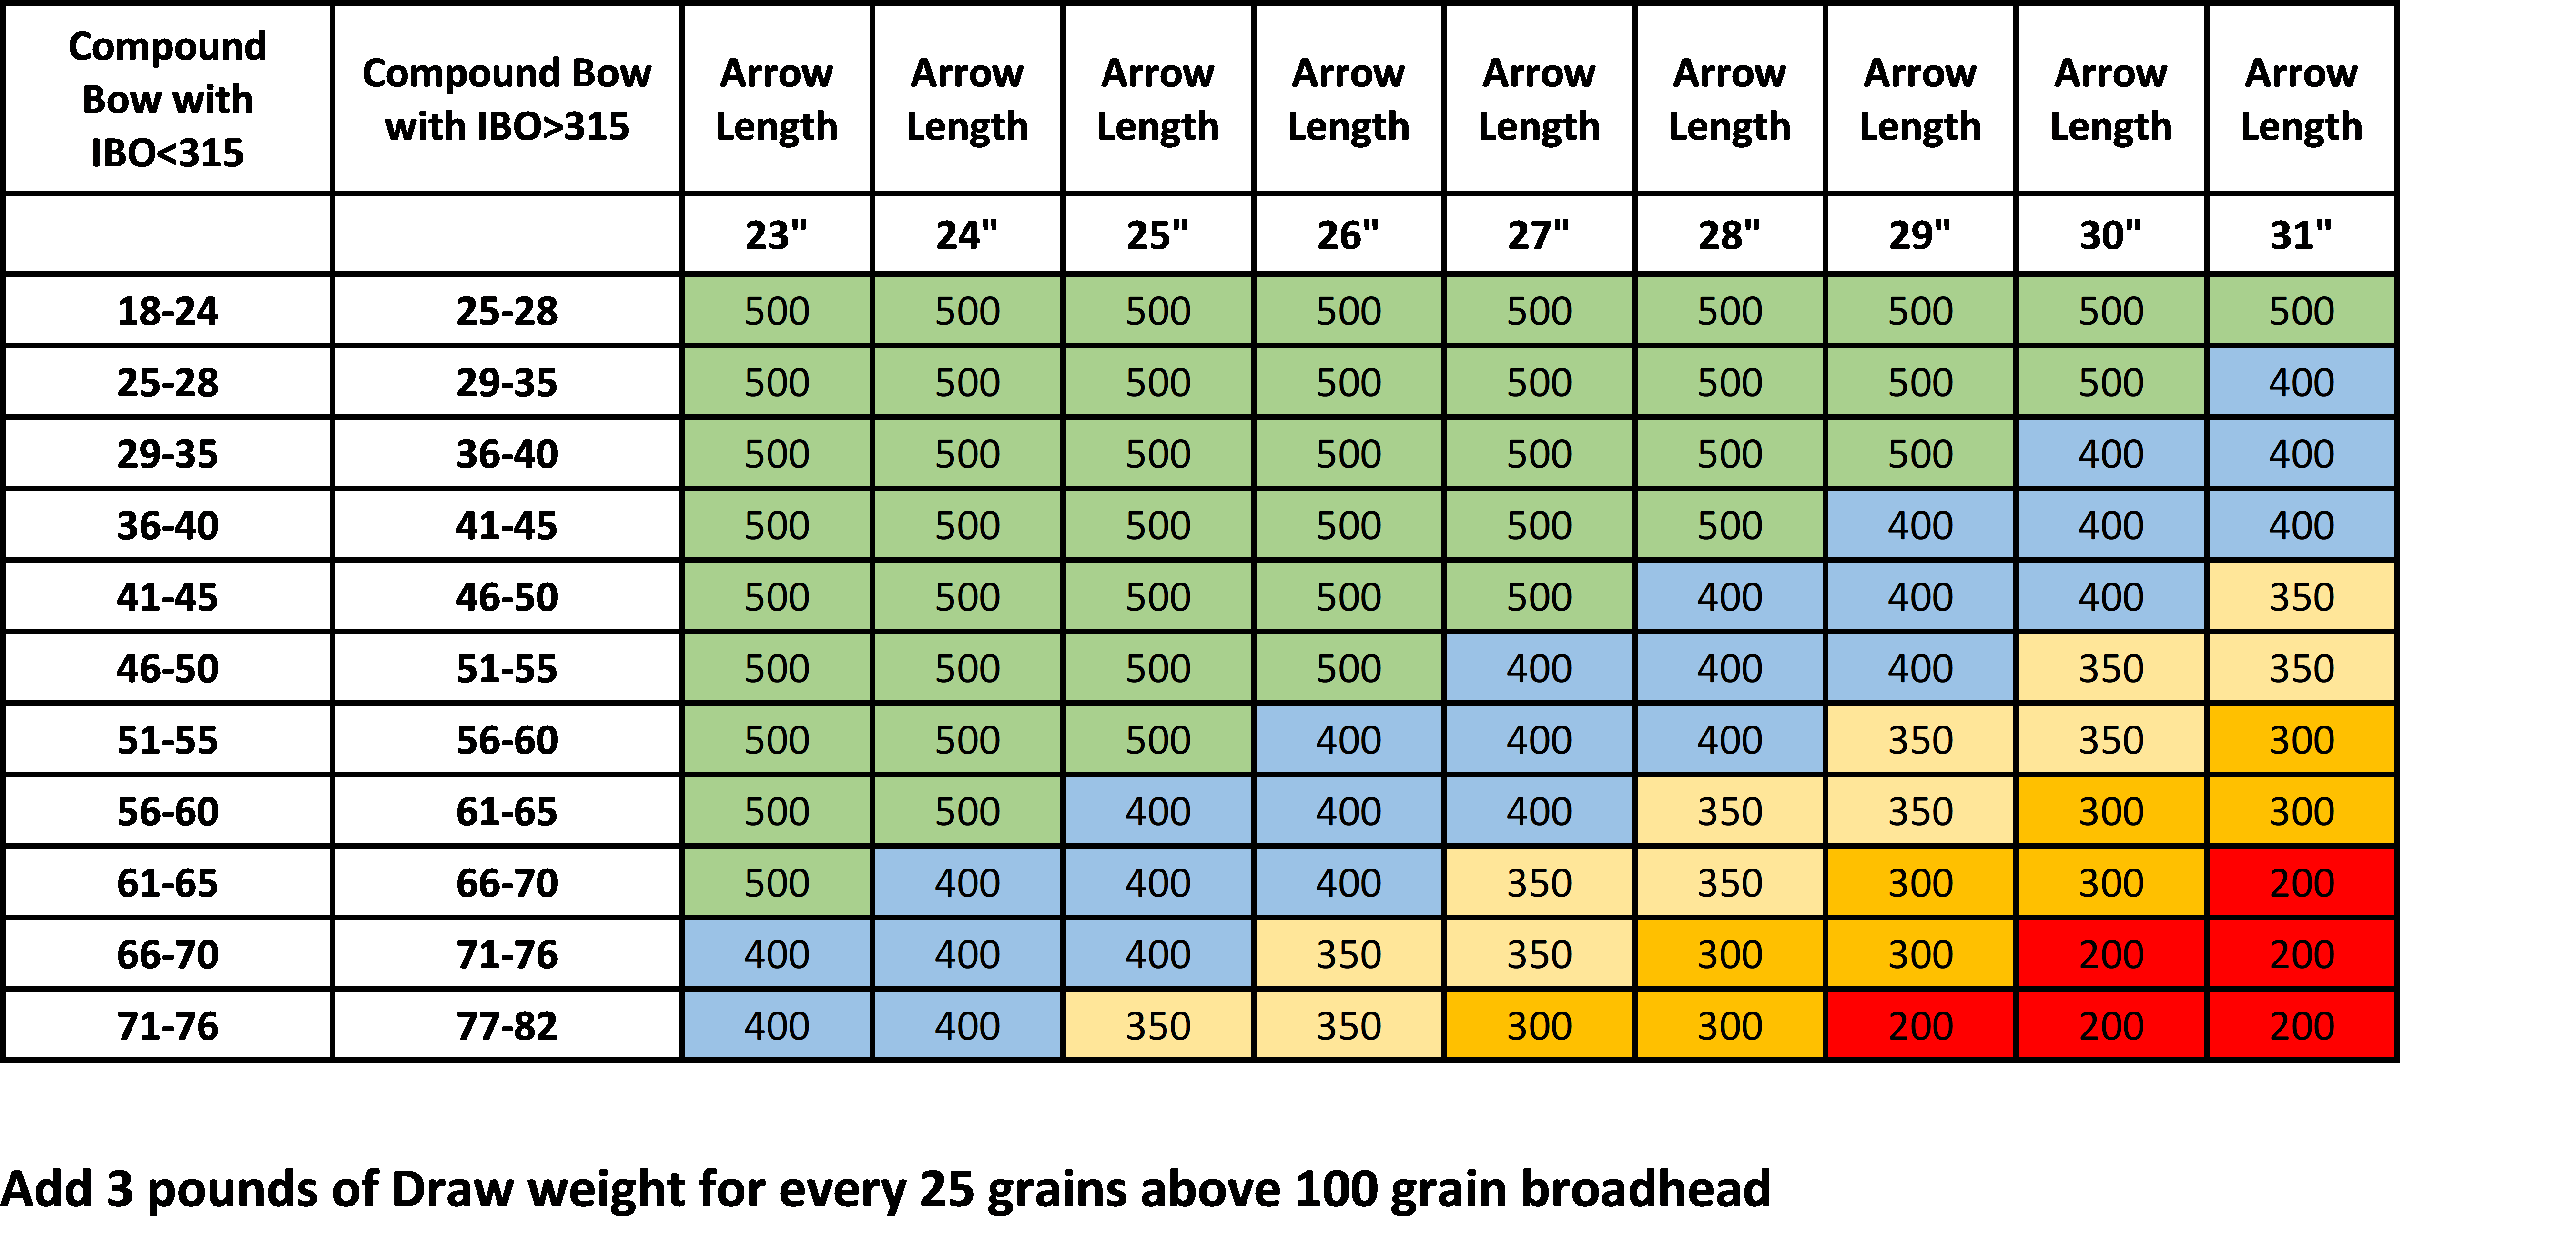
Match Dynamic Spine to Your Setup
Static spine, such as 350 or 400, is just a starting point. Dynamic spine, how the arrow flexes during launch, depends on draw weight, draw length, arrow length, front-of-center weight, and cam aggressiveness.
As a rule, add 25 grains of front weight equals add 3 pounds on the spine chart.
Too weak or flexible causes broadheads to fly right for right-handed shooters. Too stiff causes them to fly left.
If broadheads hit right, stiffen the spine, shorten the shaft, or reduce front weight.
If broadheads hit left, use a softer spine, lengthen the shaft, or add weight up front.
Maximize Fletching Steering Power
Fletchings correct broadhead-induced planing. More correction means tighter groups.
Taller vanes outperform longer ones. Half-inch or 7/16 inch vanes outperform low-profile 2-inch vanes.
Helical angle increases correction but risks rest or cable contact.
Four-fletch setups offer better correction than three-fletch for large fixed blades.
Your fletching should provide more steering power than the broadhead introduces.
Use four-fletch with half-inch or taller vanes and moderate helical for large fixed blades. Use three-fletch with low helical or straight for mechanical or low-profile heads.
Troubleshoot Common Flight Issues
Even with perfect setup, problems arise. Here is how to fix them fast.
Scattered Impacts
Likely cause is shooting form flaws. Death grip twists the riser. Inconsistent anchor shifts peep alignment. Facial string contact yanks the arrow off line.
Fix by relaxing your grip, aligning hand with riser, and accepting light cheek contact but not deep slapping.
Fletching Contact with Rest
Symptoms include hissing noise, erratic flight, or vanes nicked after shooting.
Causes are rest timing off, excessive helical, or rest too high or low.
Fix by adjusting rest launch timing, reducing helical, or repositioning rest vertically.
Nock Pinch or String Nock Resistance
If the arrow nock binds on the string at full draw, add brass beads or extra serving above and below nocking point. This ensures smooth release and consistent launch.
Choose the Right Broadhead Type
Your broadhead choice affects tuning difficulty.
Fixed-Blade Broadheads
Fixed blades offer deep penetration, proven lethality, and a large wound channel. The downside is high drag, finicky flight, and sensitivity to tune flaws.
They are best for experienced shooters with precise setups.
If fixed blades will not tune, try mechanicals. They are more forgiving.
Mechanical Broadheads
Mechanicals offer aerodynamic flight, consistent performance, and easier tuning.
They require at least 40 foot-pounds of kinetic energy for reliable deployment.
Many include practice tips that match hunting weight, ideal for tuning without damaging expensive blades.
Switching to mechanicals often solves tuning issues without changing arrows or spine.
Validate and Hunt with Confidence
Now that your bow is tuned, verify it under real conditions.
Carry Bare Shafts for Quick Checks
Keep 3 to 4 bare shafts in your quiver. Before hunting season or after transport, shoot them to confirm tune.
They mimic broadhead flight. Any shift means re-tuning is needed.
Identify Your Best Arrow-Broadhead Pair
Test multiple broadheads on different arrows. One combo will group best.
Mark it with a Sharpie and reserve it for hunting. This builds psychological confidence and ensures peak performance.
Sharpen Fixed Blades, Not Mechanicals
Sharpen fixed blades after practice using a ceramic stone or honing guide.
Do not sharpen mechanicals. Use practice mode instead to preserve blade integrity.
Avoid the Sight-Only Fix Trap
Never just adjust your sight to align broadheads with field points.
That does not fix flight problems. It masks them.
The result is reduced forgiveness under stress, poor penetration, and inconsistent performance in real hunts.
True tuning means both arrow types fly the same. Your sight stays put.
Frequently Asked Questions About Broadhead Tuning
What is the difference between field point and broadhead tuning?
Field point tuning ensures your practice arrows fly true. Broadhead tuning ensures your hunting arrows fly identically to field points. Broadheads create more drag and aerodynamic imbalance than field points, so they require specific adjustment to achieve the same point of impact.
How do I know if my bow needs broadhead tuning?
Shoot field points at a target, then shoot broadheads at the same target without adjusting your sight. If they land in different spots, your bow needs broadhead tuning. If they group together, your setup is already tuned.
Can I tune my bow without paper tuning?
Yes. Paper tuning is optional. You can achieve perfect broadhead tune using bare shaft testing and direct field-to-broadhead comparison. Many hunters skip paper tuning entirely and go straight to shooting broadheads at 20 yards.
Why do my broadheads hit lower than field points at long range?
Fixed-blade broadheads create more drag than field points. This causes them to drop slightly more at 40 yards and beyond. This is normal behavior. Mechanical broadheads typically fly flatter and maintain tighter groups at distance.
How long does broadhead tuning take?
With a micro-adjustable rest and disciplined process, you can achieve perfect broadhead tune in under 30 minutes. More complex setups or issues may require multiple sessions.
What if bare shafts will not group with fletched arrows?
Check for nock pinch first. Then verify cam timing and arrow spine. If problems persist, your arrow may be too weak or too stiff for your bow setup. Try a different spine rating or adjust draw weight.
Key Takeaways for Perfect Broadhead Tuning
Broadhead tuning is not optional for serious bowhunters. It is the difference between confidence and uncertainty, between clean kills and poor penetration.
Start by verifying mechanical integrity. Check cam timing, centershot, nocking point, and arrow consistency. Use bare shaft tuning as your gold standard. Chase the bare shaft by moving the rest in the direction of its impact.
Test directly with broadheads at 20, 30, and 40 yards. Make micro-adjustments only. The goal is identical point-of-impact between field points and broadheads without sight changes.
Choose the right broadhead type for your setup. Fixed blades require precise tuning. Mechanical broadheads are more forgiving. Match your fletching to your broadhead for maximum steering power.
Carry bare shafts for quick tune checks throughout the season. Identify your best arrow-broadhead combo and reserve it for hunting.
With proper broadhead tuning, you will step into the stand knowing your arrow will fly exactly where you aim. That is bowhunting confidence.


