
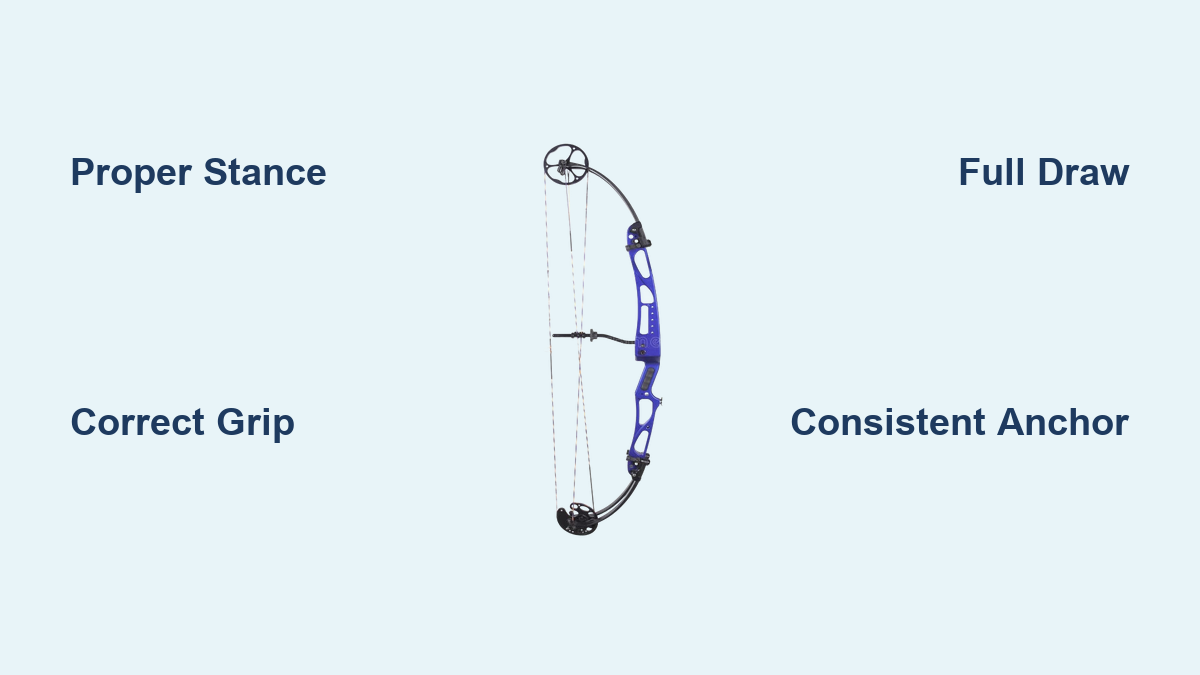
How to Shoot a Compound Bow: Step-by-Step Guide
Shooting a compound bow effectively combines precision, consistency, and muscle memory. Whether you are stepping onto the range for the first time or refining your form before hunting season, mastering the mechanics of the shot cycle is essential. The right technique improves accuracy, reduces fatigue, and builds confidence, especially when it matters most in the field or under competition pressure. This guide breaks down every phase of how to shoot a compound bow, from stance to follow-through, using proven methods from elite archers. You will learn not just what to do, but why each step matters and how to practice like a pro.
Set Up the Right Equipment for Success
Your equipment must match your physical size and strength. A bow that is too powerful or poorly fitted will undermine your technique before you even begin.
Choose a Bow That Fits You
A compound bow should be tailored to your body, not the other way around. High-end models like the Matthews Monster Chill offer impressive speed at 333 ft/s, but they only work if you can shoot them consistently. Beginners often benefit from a forgiving, adjustable model like the Bear Cruzer G2.
Key specs to customize include:
- Draw length must align with your arm span, typically 23 to 30 inches
- Draw weight should be adjustable, starting at 50 to 60 lb to build proper form before increasing
- Brace height around 7 inches provides stability and accuracy for most shooters
If you are fatiguing by the fifth shot, your draw weight is too high.
Install Critical Accessories
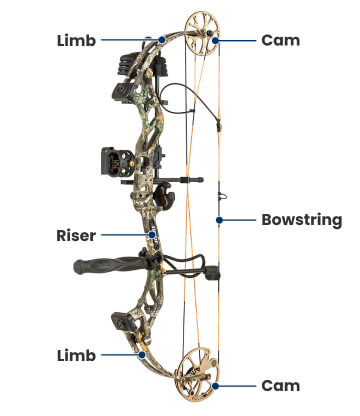
Your bow is only as good as its setup. Essential accessories ensure repeatable shots and long-term performance.
Essential accessories include:
- D-loop that connects the release aid to the string and reduces wear
- Peep sight for aiming alignment
- Arrow rest that supports the arrow during the shot
- Sight for distance targeting
- Bubble level to prevent bow canting
- Quiver to hold arrows during practice
A loose D-loop or misaligned peep sight can ruin accuracy even with perfect form.
Select the Correct Arrows
Arrows must match your bow is spine, length, and weight. Mismatched arrows fly unpredictably and create inconsistent groups.
Use field points for practice because they are safer and provide consistent flight. Practice with broadheads only if you hunt with them, and verify that flight characteristics match your field points. Never mix arrow brands or batches, as one inconsistent arrow skews your entire group.
Perform a Pre-Shot Safety Check
A few seconds of inspection prevent costly mistakes and ensure safe shooting sessions.
Inspect Your Gear Before Every Session
Run through this checklist before each shooting session:
- Check string and cables for fraying, dryness, or broken strands
- Verify D-loop is securely tied and not worn or twisted
- Confirm peep sight is properly rotated and aligned
- Inspect arrows for cracks, bends, or damaged fletching
- Verify brace height is within manufacturer specs
- Confirm draw weight and length are set correctly for your body
Wax your string every three to five shooting sessions to prevent premature failure. A well-maintained bow performs predictably, and neglecting maintenance leads to erratic arrow flight.
Adopt a Stable Shooting Stance
Your stance is the foundation of every shot. Think of it as the base of a camera tripod: steady, balanced, and repeatable.
Align Your Feet for Balance
Proper foot positioning controls balance, stability, and alignment. Poor foot positioning compromises every other element of your form.
Stand with feet hip-width apart. Align the ball of your back foot with the big toe of your front foot, pointing both toward the target. Keep knees slightly bent in an athletic posture, and turn toes outward slightly for added stability.
Trace your foot positions on a cardboard mat and use it as a reference until muscle memory develops.
Maintain Full-Body Alignment
Your body should feel like a single, solid unit from the ground up.
Keep hips directly under shoulders. Shoulders should be relaxed and level, not hunched. Keep your head upright and proud, imagining a string lifting the crown of your head to maintain spinal alignment. Do not tilt forward, backward, or sideways.
Nock the Arrow Properly
Proper nocking ensures the arrow seats securely and fires predictably.
Step-by-Step Nocking Process
Follow this sequence every time you nock an arrow:
- Step to the shooting line with one foot on each side
- Pull an arrow from the quiver
- Place the shaft on the arrow rest
- Clip the nock onto the string between the D-loop, pushing until you hear a distinct click
A poorly seated nock causes dry-fires or dangerous arrow deflection. Always double-check that the nock is fully seated before shooting.
Use a Relaxed Bow Hand Grip
Gripping too tightly twists the bow, leading to left and right misses. The goal is zero hand pressure.
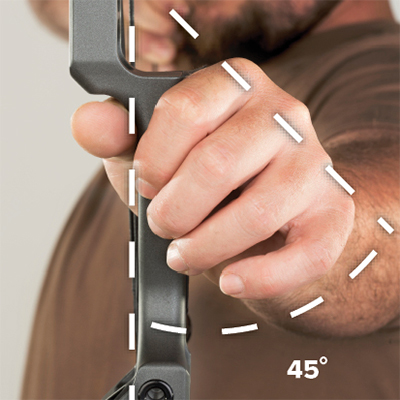
Avoid Torque with Proper Hand Placement
Rest the bow in the heel of your hand between the thumb and wrist. Let the bow sit naturally without squeezing. Your thumb should point at a 45-degree upward angle, and you should allow the bow to fall forward after release.
If the bow stays upright after shooting, you are gripping too hard. White knuckles are a red flag. Relax your grip immediately.
Mirror Your Release Hand
When drawing, your release hand should mirror your bow hand with the thumb down. This symmetry improves alignment and anchor consistency.
Draw the Bow Smoothly
The draw should feel like a controlled pull from your back muscles, not a tug from your arms.
Use Back Muscles, Not Arms
Raise both arms together toward the target. Keep your bow arm straight but not locked. Pull straight back with no up or down motion, engaging shoulder blades early while keeping the front shoulder low.
Think of closing a barn door behind you, not starting a lawnmower.
Stop at Full Draw
Draw until the cams hit the back wall, which is the mechanical stop. Do not force past it. The let-off system, typically 65 to 80 percent, reduces holding weight at full draw, so use it to your advantage.
If you are straining at full draw, your draw weight is too high.
Anchor Consistently Every Time
An anchor point ensures your head, hand, and eye align the same way on every shot. Without consistency here, your accuracy will suffer.
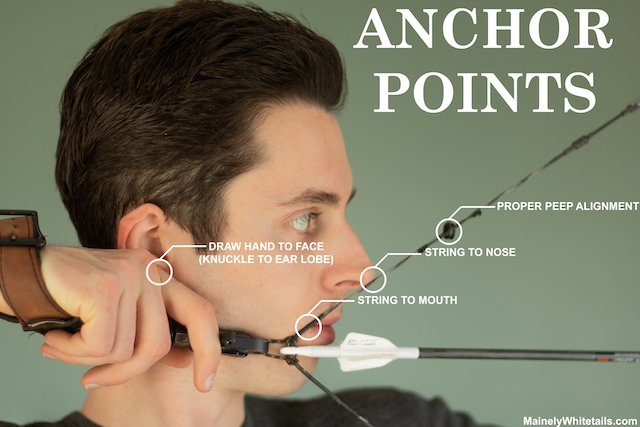
Use Multiple Tactile Reference Points
Top archers use three or more anchor points simultaneously for maximum repeatability.
Common anchor points include:
- Jawbone where the release hand touches the corner of the jaw
- Ear where the knuckle or release touches the earlobe
- Nose where the tip touches the string
- Mouth where the string contacts the corner of the lip
- Fletching where the feathers touch the bottom lip
Choose anchor points that feel natural and repeatable, then use them every time.
Align the Peep Sight Naturally
Rotate your head, not your body, to align the peep sight, front sight, and target. The peep and sight housing should form a circle within a circle. Keep your head upright without craning or dipping.
If you have to stretch or slump to see the peep, it is in the wrong position and needs adjustment.
Aim with Precision
Aiming combines your peep sight, front sight, and target into a single line of sight.
Combine Peep and Front Sight
Look through the peep sight first, then align the front sight pin with the target. Your vision should tunnel in, blocking out distractions. Focus on the center of the bullseye.
Use a Bubble Level
Mount a bubble level on your sight and check it during aim to prevent canting. Even five degrees of tilt causes significant horizontal misses at 40-plus yards. Canting is a silent accuracy killer, especially on angled shots.
Trust Your Rest
Both limb-driven and fall-away rests work when properly tuned. Fall-away rests drop at release for better arrow clearance. Ensure rest timing syncs with cam rotation.
Choose and Execute Your Release
There are three primary release methods, each suited to different goals. Try all three and choose what feels natural under pressure.
Command-Style Release
This method works best for hunting, especially under adrenaline.
Draw and aim steadily. Apply 30 percent push with your front arm and 70 percent pull with your back. Lay your finger lightly on the trigger and fire when the pin passes over center. Do not anticipate the shot.
Command-style release works well under pressure, allows quick decision-making, and is less prone to target panic for many shooters.
Surprise Release
Used by most competitive 3D shooters, this method relies on an unexpected break.
Float the pin over the target and focus on the center of the bullseye. Squeeze the trigger slowly and let the shot happen unexpectedly. If you know when it is coming, you are forcing it, which causes flinching.
Surprise release offers excellent consistency but can trigger target panic in high-pressure situations.
Back Tension Release
This elite technique uses scapular retraction to trigger the release.
Stand two to three feet from the target and draw to full anchor. Close your eyes and squeeze your shoulder blades together to trip the release. Repeat 15 to 20 times daily for one week.
In week two, shoot 30 to 40 arrows at 15 to 20 yards, finishing with 15 close-range eyes-closed shots. In week three, shoot at 20 to 30 yards, focusing on burning the pin into the target and letting back muscles fire the release.
Back tension is difficult to master and impractical for hunting, but it is the gold standard in competition.
Follow Through Naturally
After release, let form do the work. Do not force or exaggerate the follow-through.
The bow falls forward due to your relaxed grip. The string arm continues straight back along the draw path. Your head stays still with eyes on the target. Proper follow-through just happens with correct form.
Practice Like a Pro
Deliberate practice builds consistency faster than mindless repetition.
Start Close, Then Expand
Begin at 10 to 20 yards to build confidence, then gradually move to 30, 40, and 50-plus yards. Practice at odd distances like 27 yards to simulate real hunting scenarios.
Simulate Real-World Conditions
Wear full hunting gear including gloves, camo, and armguard during practice. Shoot after running 100 meters to mimic elevated heart rate. Practice in wind, low light, or rain. Have a partner call random targets and shoot within a five-second window.
Develop a Pre-Shot Routine
Consistency beats intensity. Use a mental checklist: stance, grip, draw, anchor, aim, release. Repeat the same process every time and visualize the perfect shot before and after each release.
Frequently Asked Questions About Shooting a Compound Bow
What is the best draw weight for beginners?
Start with 50 to 60 pounds and focus on building proper form before increasing weight. If you are straining at full draw or fatiguing quickly, the weight is too high.
How often should I wax my bowstring?
Apply string wax every three to five shooting sessions to prevent premature wear and maintain performance.
What is the difference between a compound bow and a recurve bow?
Compound bows use cams and cables for let-off, reducing holding weight at full draw. Recurve bows rely solely on the shooter is strength throughout the entire draw.
Can I practice with broadheads instead of field points?
You can practice with broadheads to verify flight consistency, but field points are safer for regular practice because they are less damaging to targets and equipment.
How do I choose between command-style and surprise release?
Choose command-style if you hunt or shoot under pressure. Choose surprise release if you compete in 3D tournaments and want maximum consistency. Try both and pick what feels natural and panic-free.
What causes inconsistent arrow grouping?
Inconsistent grouping usually stems from poor form, mismatched arrows, improper bow tuning, or a loose D-loop. Inspect your equipment and return to basics when accuracy drops.
Key Takeaways for Mastering Compound Bow Shooting
Consistency is the foundation of accuracy. Master the same stance, draw, anchor, peep alignment, and release every single time. Lower your draw weight if you are struggling to maintain form, and build strength gradually.
Inspect your strings and hardware before every session. A frayed string or loose D-loop compromises safety and accuracy. Tune your bow properly with correct nock height, peep alignment, and rest timing.
Practice with purpose, focusing on quality repetitions rather than quantity. Simulate real-world conditions, develop a pre-shot routine, and visualize success. Master the fundamentals, practice deliberately, and the compound bow will become an extension of your skill set.


