
How to Fix Bow String Serving | Step-by-Step Guide
If your bow string serving is unraveling or damaged, you are one shot away from potential failure. The center serving protects the core string from friction caused by arrow nocks, release aids, and contact with the riser or rail. Factory servings often use lower-grade materials and fail quickly under heavy use, especially on high-performance crossbows. This guide shows you how to assess damage, choose the best materials, apply durable wraps, and avoid common mistakes that lead to early failure.
Assess Serving Damage Early
Check for Unraveling and Core Exposure
Inspect your center serving after every 10 to 12 shots if you shoot aggressively or use a crossbow. Look for visible gaps, fraying ends, or loose wraps. Run your fingers along the serving to feel for bumpiness, softness, or movement that indicates degradation. Focus on high-wear zones near the nock point, D-loop, cable slide, and roller cage. If the core string is exposed or only one strand remains intact beneath the serving, stop shooting immediately. A compromised core cannot be safely repaired and requires full string replacement.
Know When to Repair vs. Replace
Minor unraveling at the edges with an undamaged core can be fixed in the field or workshop. But if the serving has large gaps, repeated repairs, or shifting along the string, it is time for a full re-serve. Stripping off the old material and starting fresh ensures proper tension, alignment, and durability. Repeated patch jobs shorten the usable serving length and reduce arrow clearance, leading to inconsistent releases. When in doubt, re-serve entirely, especially on high-performance setups where precision matters most.
Gather Essential Tools and Materials
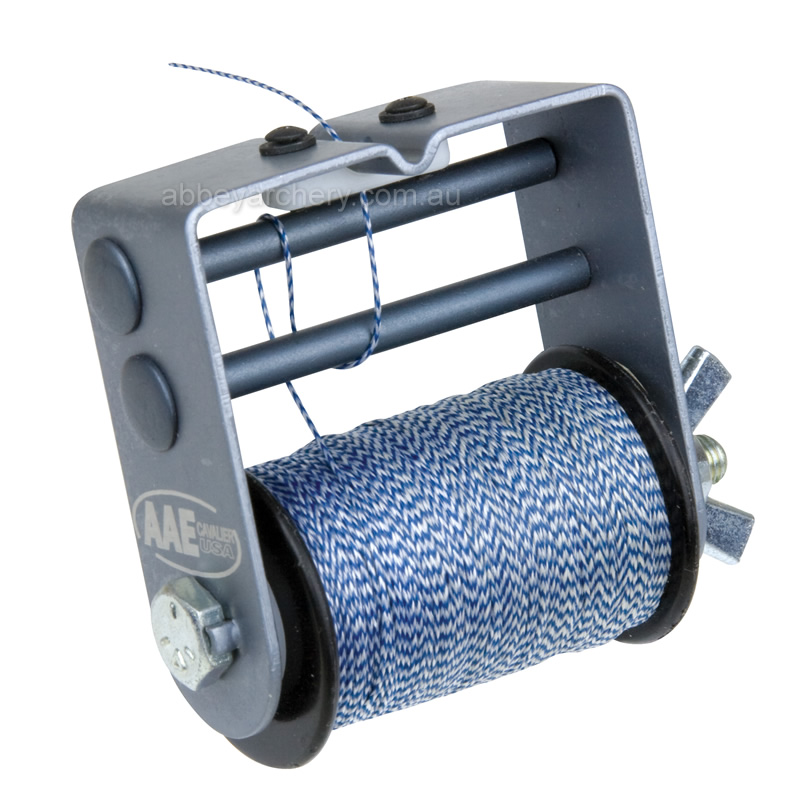
Use the Right Serving Tools
You need a knock-on serving tool or hand-wrap jig to apply consistent tension. These tools clamp onto the string and rotate smoothly, allowing even wraps without hand fatigue. Pair it with a semi-sharp blade like a box cutter to remove old serving without cutting the core. A burnishing tool, which can be a brass rod, spoon, or dedicated smoother, compacts the wraps for a slick, durable finish. Keep scissors, an Allen wrench, and a lighter nearby for trimming, tightening, and sealing ends.
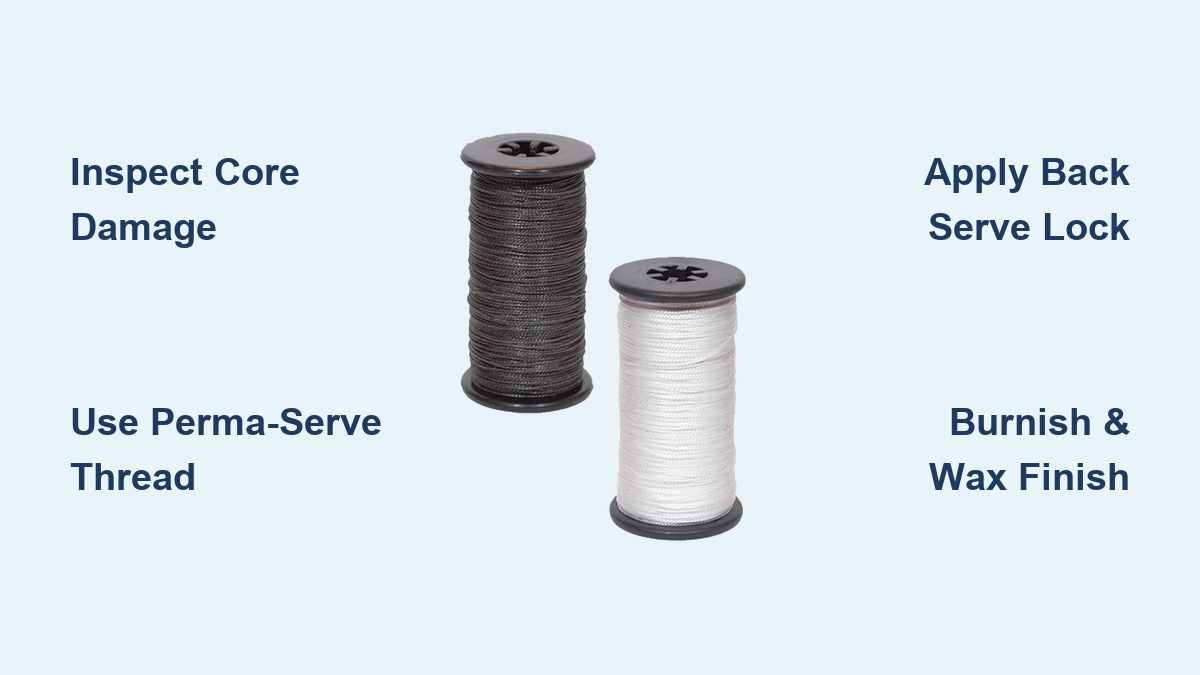
Choose High-Performance Serving Material
Not all thread is equal. BCY 62XS is common in factory strings but wears fast under heavy use. For long life, upgrade to Perma-Serve or 3D Serving Thread. Both are 0.21-inch diameter, compatible with most jigs, and resist stretching. Perma-Serve bonds aggressively with wax and develops a light fuzz under pressure that grips wax like a magnet, ideal for crossbows. Avoid dental floss except for emergency field fixes because it is strong but slippery and will not last.
Prepare the String for Re-Serving
Remove Old Serving Safely
Loosen the opposite cable or remove the bowstring to access the damaged section. Clamp the string in a vise or use a bow stringer to hold tension. Use a semi-sharp blade to make a shallow cut through the old serving only, never into the core. If the original wrap used a looped start, cut the loop and unravel the rest in one motion. Pull until clean, undamaged string is exposed. Wipe the area with a dry cloth and apply a light coat of bowstring wax to help the new serving grip.
Mark the Correct Serving Zone
Position the new serving just below the grip pivot, ensuring at least 2 inches of exposed string above for the nocking point and D-loop. Use tape or a marker to define upper and lower boundaries. This placement improves arrow clearance and reduces contact with high-wear components like cam burrs or cable slides.
Apply the Forward Wrap Correctly
Mount and Adjust the Serving Tool
Attach the serving tool to the non-dominant side of the string, right side for right-handed shooters. Adjust the tension so the tool turns with moderate resistance, about 3 to 5 pounds of pressure. Too loose and wraps will sag. Too tight and you will struggle to rotate. Start just above the lower mark with 4 to 5 tight clockwise wraps. Pull the tail back through the wraps to eliminate slack.
Maintain Continuous, Tight Wraps
Continue wrapping clockwise in one smooth motion. Never stop and restart because this creates weak points. After 5 to 10 wraps, pull the tail tightly using a finger sequence: middle finger, thumb, index finger, repeat. This keeps constant tension. Watch for a shiny, compact surface because a dull or spongy wrap means insufficient pressure. Keep wraps flat, adjacent, and gap-free. Stop about 1 inch before the upper mark and trim the tail short to reduce bulk.
Lock the Wrap with a Back Serve

Execute the 12-Wrap Locking Technique
Pull about 1 foot of slack in the serving material and position the tool approximately 4 inches from the end of the forward wrap. Loosen the jig tension slightly, then begin wrapping backward toward the center. Use the pull-wrap-pull method: pull tension, wrap once, pull again before the next turn. Complete 12 wraps in reverse to undo the final forward wrap, locking the entire section in place. Maintain firm pressure throughout. The backward wraps should nest tightly against the forward layer, creating a seamless, secure bond.
Finish and Seal the Serving
Pull Through and Burn the End
With tension still applied, pull the entire piece through the last wrap while pressing your thumb over the exit point to prevent loosening. Trim excess material close to the string. Roll the end between your fingers to compact fibers. Then melt the tip with a lighter, rotating the string slowly to avoid ignition. Press the molten end smooth with pliers or a fingernail for a snag-free finish.
Burnish for Durability
Use a brass rod or spoon to rub the entire serving length. Burnishing compacts the fibers, creating a slick, hard-wearing surface that resists abrasion. Apply a generous coat of bowstring wax immediately after completion to seal the fibers and enhance longevity.
Perform Field Repairs When Needed
Fix Missing Sections Fast
If a section is completely missing and too short to re-wrap, use a temporary method. Cut 3 feet of 3D serving or dental floss and burn both ends to prevent fraying. Form a loop over the gap and wrap clockwise for 10 tight turns. Pull the tail through the loop, wiggle to seat the knot, then pull both ends firmly. Use an Allen wrench to tighten further. Burn and seal the tail flush with the wrap. Dental floss is acceptable only for short-term use. Replace with proper re-serving as soon as possible.
Reinforce Gaps and Worn Areas
Overlap Original Serving Edges
For partial wear, start wrapping one row back from the edge of the existing serving to ensure overlap. Wrap clockwise, pulling each turn tightly against the last. After 7 to 8 wraps, trim the tail shorter to reduce bulk, especially near cams or roller cages. Keep the repair centered and symmetrical to prevent binding.
Lock Final Quarter-Inch Securely
Bring the tail to the top of the string and wrap 8 to 10 times toward the center. Then wrap tightly around itself to lock. Use a tool to pull the loop between the wraps and snug it down. Finish with a burn seal. This technique prevents unraveling in tight spaces where full back serves are not possible.
Ensure Longevity with Key Success Factors
Apply Maximum Wrap Tension
Tension is the most critical factor in serving life. Loose wraps fail after one or two shots. Use tools like scissors, Allen keys, or a pencil to apply extra leverage when pulling each wrap. The finished surface should be shiny and hard, not dull or soft. If it feels spongy, redo the wrap.
Match Original Twist Direction
Always wrap clockwise, matching the factory direction. Reversing the twist creates a weak transition that slips under load. Check the old serving lay before removing it to confirm direction.
Secure Start and Finish Points
Use a looped start, 6 to 10 wraps around a looped tail, for anchoring. Finish with a back serve or melted seal, never just a knot. Unsecured ends unravel fast, especially on high-speed crossbows.
Maintain Symmetry and Fit
Keep repairs narrow and centered. Bulky or lopsided wraps can bind in roller cages or interfere with cam movement. Match the original serving width to preserve nock fit and arrow release consistency.
Use Matching Serving Material
Stick with 3D serving or Perma-Serve to maintain original diameter and texture. Mismatched materials alter nock fit and tuning, and even slight changes affect accuracy.
Choose Between Temporary and Permanent Fixes
Understand Repair Lifespan Differences
Temporary repairs serve as emergency field fixes using dental floss or spare thread with minimal tools and moderate hand-applied tension. They last a few shots to one outing and work for hunts or competitions. Permanent repairs use 3D or Perma-Serve with a serving jig, burnisher, and high tool-assisted tension. They last hundreds of shots with proper maintenance and suit regular, aggressive shooters. Temporary repairs are not a substitute for proper re-serving.
Follow Strict Maintenance for Maximum Life
Wax Every 10 Shots on Aggressive Setups
High-performance strings demand frequent care. Wax Perma-Serve and crossbow strings every 10 shots. Apply rail lube like Rail Snot simultaneously to reduce friction. Standard strings need wax when the serving looks dry or dull. Cleaning the flight rail every few sessions removes debris and old wax buildup.
Clean and Lube Crossbow Rails Regularly
Dirt and friction accelerate serving wear. Wipe down the rail and string after every 10 to 12 shots. Apply a light coat of rail lubricant to minimize heat and abrasion, especially critical on narrow-rail designs like Ravin and Scorpyd.
Recognize Repair Limits and Bow Compatibility
Know What Can and Cannot Be Fixed
The center serving is fully repairable or replaceable. End loops and end servings are not repairable with standard tools and require full string replacement or professional splicing. If the core string has broken or frayed main strands, replace the entire string.
Confirm Crossbow Compatibility
Scorpyd, Ravin, TenPoint, and Excalibur crossbows are all compatible with re-serving using Perma-Serve. Any crossbow string can be re-served if the core is undamaged. Use Ravin or Firenock nocks for Ravin bows and Firenock Q nocks after re-serving on Scorpyd models.
Avoid Common Mistakes That Cause Failure
Wrong wrap direction causes slippage and weak transitions. Prevent this by matching the clockwise twist. Low tension leads to loosening after few shots, so use tool-assisted wrapping. No back serve allows end unraveling quickly, so always lock with reverse wraps. Shortened serving from repeated repairs causes poor nock fit and inconsistency, so replace entirely if needed. Skipping wax causes rapid wear and failure, so wax every 10 shots on aggressive setups. Wrong material alters nock fit and reduces durability, so match original diameter and type.
Quick Reference: Serving Replacement Checklist
Inspect the core string and replace if frayed. Cut old serving with a semi-sharp blade. Unravel completely to expose clean core. Mark new zone below grip pivot. Install tool on non-dominant side. Adjust tension for firm rotation. Start with 4 to 5 tight clockwise wraps. Pull tail tight to remove slack. Wrap continuously to 1 inch from top. Watch for shiny, tight wraps. Perform 12-wrap back serve. Pull through under thumb pressure. Trim, roll, and burn seal the end. Wax immediately after. Burnish the entire serving.
Final Tips for Reliable Serving Repairs
Repairing bow string serving is not optional. It is essential for safety and performance. Upgrade to Perma-Serve for crossbows and aggressive shooters. Use a serving jig for consistent, professional-grade tension. Always finish with a back serve or sealed end. Wax every 10 shots on high-performance rigs. Regular inspections catch problems early, preventing catastrophic failures. Whether you DIY or go pro, a well-served string means confidence in every shot because when it matters, your bow should never let you down.
Frequently Asked Questions About Bow String Serving Repair
How do I know if my bow string serving needs repair?
Look for visible unraveling, fraying, gaps, or loose wraps. Run your fingers along the serving to feel for softness or movement. Check high-wear zones near the nock point, D-loop, and cable slide. If the core string is exposed or only one strand remains, stop using the bow immediately and repair or replace the serving.
Can I repair bow string serving without special tools?
Temporary field repairs using dental floss can work in emergencies, but they last only a few shots. For permanent repairs, a serving jig or knock-on tool is essential for consistent tension. A semi-sharp blade, lighter, and burnishing tool are also recommended for professional results.
What is the best material for re-serving a bow string?
Perma-Serve or 3D Serving Thread are the best choices for durability. Both are 0.21-inch diameter and resist stretching. Perma-Serve is ideal for high-performance crossbows because it bonds with wax and develops a grippy fuzz under pressure. Avoid dental floss for permanent repairs.
How often should I wax my bow string serving?
Wax high-performance strings and crossbow strings every 10 shots. Standard strings need waxing when the serving looks dry or dull. Regular waxing prevents fiber degradation and extends serving life significantly.
What happens if I skip the back serve when repairing my bow string?
Skipping the back serve leaves the end unsecured. The wraps will unravel quickly, especially under the stress of high-speed crossbow shots. Always complete a 12-wrap back serve or finish with a melted seal to lock the serving in place.


