
How to Shoot a Recurve Bow and Arrow: Quick Guide
You’ve picked up a recurve bow, drawn back the string, and released—only to watch your arrow veer wildly off target. You’re not alone. Every archer, from Olympic champions to backyard beginners, started exactly where you are: trying to master a skill that blends precision, patience, and perfect form. Shooting a recurve bow and arrow isn’t just about raw strength. It’s about consistency, technique, and understanding the subtle details that turn random shots into tight groups.
This guide walks you through the exact stance, grip, draw, anchor, and release techniques used by elite archers. You’ll learn how to avoid common mistakes like string slap and inconsistent anchors, and how to set up your equipment for optimal performance. By the end, you won’t just know how to shoot a recurve bow and arrow—you’ll know how to do it right.
Proper Stance and Body Alignment
Your stance forms the foundation of every shot. Without a stable base, even the best technique falls apart.
Stand Perpendicular to the Target
Position your body at a 90-degree angle to the target. Your feet should be shoulder-width apart, with your front foot slightly ahead of your back foot. This balanced stance provides stability and allows for smooth energy transfer during the draw.
Keep your weight evenly distributed across both feet. Avoid leaning forward or backward. A slight forward tilt of your hips helps engage your core and maintain upright posture.
Maintain Upright Posture
Stand tall with your back straight and chest slightly forward. Your head should be upright, eyes locked on the target. This alignment ensures your draw hand travels straight back along your shoulder line, minimizing torque and improving accuracy.
Avoid hunching your shoulders or craning your neck. Tension in your upper body disrupts your form. Instead, relax your shoulders and let your arms hang naturally before nocking the arrow.
Correct Bow Grip and Hand Position
Your grip controls how energy transfers from bow to arrow. A small mistake here creates big problems downrange.
Use a Relaxed, Neutral Grip
Place the bow handle into the webbing between your thumb and index finger of your non-dominant hand. Wrap your fingers loosely around the grip. Do not squeeze.
A tight grip causes hand shock and introduces unwanted torque, making the bow twist on release. This leads to arrows grouping inconsistently, often left or right of center. Let the bow settle naturally in your hand. With a bow sling attached, the bow should rotate backward into your palm after release.
Prevent Bow Torque
Torque occurs when your hand twists the riser during the draw. To prevent this, keep your knuckles at a 45-degree angle to the ground. Point your thumb down the riser, not toward the target. Allow the bow to rest on your hand, not your fingers.
This neutral position supports consistent arrow flight and protects your wrist from long-term strain.
Nocking the Arrow Correctly
Nocking is where many accuracy problems begin. One small error throws off every shot.
Place Arrow Under the Nock Point
Locate the nock point—a small brass or tied-on marker on the string. Always place the arrow nock under this point.
Placing the arrow above the nock point allows it to slide up the string during the draw, leading to inconsistent nock height and erratic shots. This single mistake can ruin accuracy even with perfect form. Use a bow square to verify nock point height during setup. Standard positioning is 3/16″ to 1/4″ above level for most setups.
Choose the Right Fletching Type
Use feather fletches if shooting off the shelf. Feathers compress and flex on release, clearing the shelf without damage.
Use plastic vanes only with an arrow rest. Vanes are stiffer and won’t clear the shelf cleanly, risking contact and flight disruption.
Ensure the odd-colored fletch faces away from the bow. If it faces the riser, it may catch on the shelf and cause poor arrow flight or damage.
Drawing the Bowstring with Control
The draw is where technique separates good archers from great ones. Power means nothing without control.
Use One Over, Two Under Finger Placement
Hook the string with three fingers. Place your index finger above the arrow nock. Place your middle and ring fingers below the nock.
This “one over, two under” method is standard in Olympic and traditional recurve shooting. It provides balance, control, and consistent release. Place the string in the pads of your fingertips, not deep in the first joint. Deep string burial increases the risk of plucking the string on release.
Engage Back Muscles, Not Arms
Begin the draw by extending your bow arm toward the target while simultaneously pulling the string with your back muscles.
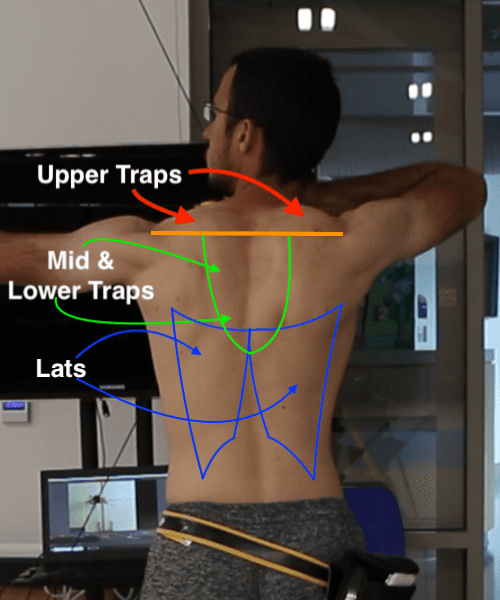
Focus on squeezing your shoulder blades together. This engages your rhomboids and trapezius—your primary draw muscles.
Avoid relying on arm strength. Using only your arms fatigues you quickly and reduces shot consistency. Proper back tension ensures a smooth, repeatable draw.
Establishing a Consistent Anchor Point

Your anchor point is your reference system. Without it, every shot becomes a guess.
Touch String to Nose and Mouth
At full draw, your string should touch two key facial reference points. The tip of your nose and the corner of your mouth.
This dual-contact anchor ensures consistent head position and draw length. Even a 1/8-inch variation can throw off accuracy at longer distances.
Common anchor variations include under the chin (string touches jawline, used in Olympic recurve) and corner of mouth (popular in barebow and instinctive shooting). Choose one and repeat it exactly every shot.
Use Tactile Feedback for Muscle Memory
Close your eyes and draw to anchor several times. If your string consistently touches the same facial points, you’ve built reliable muscle memory.
Mark your tab or glove with a reference spot if needed. Over time, your body will automatically find the anchor without visual cues.
Aiming Without Sights
Recurve archery relies on instinct and practice. There are no shortcuts here.
Align Arrow Tip with Target
In instinctive or gap shooting, aim by aligning the arrow tip with the target. Your eye, bow hand, and draw hand should form a straight line.
Focus on the center of the target, not the arrow tip. Let your subconscious guide the shot through repetition.
Use Gap Shooting for Distance
Gap shooting involves estimating the distance between your arrow tip and the target at full draw. At 20 meters, aim directly at the bullseye. At 40 meters, aim 6 inches below. At 60 meters, aim 12 inches below.
These gaps vary by draw length, arrow speed, and bow weight. Practice at known distances to build your personal gap chart.
Avoid relying on sight pins unless using a sight-equipped setup. Barebow shooters must develop spatial awareness through field experience.
Executing a Clean Release
The release is the moment of truth. Everything you’ve done either pays off or falls apart here.
Relax Fingers, Not the Back
The release should feel like a surprise—not a deliberate flick or slap.
Focus on maintaining back tension while gradually relaxing your drawing fingers. The string should slip off cleanly without jerking.
If you “pluck” the string (pulling it sideways), it’s a sign of finger tension or improper hand structure. Practice dry releases to refine your technique.
Roll Out the Draw Arm
At full draw, externally rotate your draw arm. This “set” position locks your shoulder and promotes a straight-line release.
As you release, let your hand move straight back along your jawline. Do not drop your elbow or twist your wrist.
A clean release results in your bow hand falling naturally into the sling and your draw hand brushing your earlobe.
Follow-Through and Shot Discipline
The shot isn’t over when the arrow leaves the string. What you do next matters.
Keep Focus Until Arrow Hits
After release, maintain your stance, grip, and head position. Do not drop your bow arm or turn your head to watch the arrow.
Keep your eyes on the target. Your body should remain still until you hear the arrow strike.
This discipline reinforces good form and helps diagnose issues. Flinching or dropping early often indicates anticipation or poor release.
Allow Natural Hand Movement
Your draw hand should travel straight back, ending near your jaw or neck. Your bow hand stays relaxed, allowing the bow to swing backward into the sling.
Do not force the follow-through. Let it happen naturally as a result of proper release and tension.
A consistent follow-through is a sign of solid technique.
Essential Protective Gear
Gear protects you from pain and injury. Don’t skip this section.
Wear an Arm Guard
String slap—when the bowstring hits your forearm on release—is painful and can cause bruising or flinching.
Wear an arm guard on the inside of your bow arm (left arm for right-handed shooters). Choose one with full forearm coverage, especially as a beginner.
Leather or molded plastic guards offer the best protection. Fasten it snugly, 6 to 8 inches below your elbow.
Choose Between Tab and Glove
A shooting tab covers three fingers and offers better feel and control. It’s ideal for precision and feedback.
A shooting glove protects your entire hand and reduces blistering during long sessions. It’s preferred by traditional and barebow archers.
Select based on comfort and shooting style. Both are valid. Consistency matters more than gear choice.
Adjusting for Distance and Conditions
Without adjustable sights, you must adapt manually. This takes practice.
Modify Hold Point Manually
Without adjustable sights, you must change your aiming point based on distance.
For longer ranges, aim higher (hold over). For shorter ranges, aim lower (hold under).
Practice at 10-meter intervals to build a mental range chart. Wind, elevation, and light also affect arrow flight. Learn to read environmental cues.
Account for Wind and Lighting
Wind pushes arrows sideways. At 50 meters, even a 10 mph crosswind can move a light arrow 6 inches or more.
Lean into the wind slightly or adjust your aim. Use wind flags if available.
Low light distorts depth perception. Shoot earlier in the day or use high-contrast targets.
Common Mistakes and Fixes

These errors plague beginners. Learn to recognize and correct them.
Arrow Above Nock Point
Problem: Arrow climbs the string, causing inconsistent nock height.
Fix: Always place arrow under the nock point. Double-check before every shot.
Using Plastic Fletches Off Shelf
Problem: Vanes hit the shelf, damaging fletching and ruining flight.
Fix: Use feather fletches when shooting off the shelf. Switch to vanes only with an arrow rest.
Inconsistent Anchor
Problem: Erratic grouping, arrows scatter vertically or horizontally.
Fix: Use string-to-nose and string-to-mouth contact. Practice blind draws to build muscle memory.
Tight Bow Grip
Problem: Torque, hand shock, arrows group left or right.
Fix: Loosen your grip. Use a bow sling. Let the bow fall naturally after release.
Jerky Release
Problem: Arrow fishtails or flies unpredictably.
Fix: Focus on back tension and surprise release. Practice dry firing (with caution) to refine your timing.
Training Drills for Mastery
Repetition builds skill. These drills accelerate your progress.
Practice Blank Bale Shooting
Set up a straw bale or dense target at 5 to 10 feet. Shoot without aiming. Focus only on form.
This drill helps you perfect draw, anchor, and release without worrying about accuracy. It’s ideal for building muscle memory.
Perform 50 to 100 shots per session, correcting form in real time.
Use Distance Laddering
Shoot a “ladder”: 20m → 30m → 40m → 50m → 40m → 30m → 20m.
This builds range estimation and teaches you to adjust hold points dynamically. Use consistent form at every distance.
Record and Analyze Your Form
Film your shots from the side and front. Compare your form to elite archers like Park Sung-Hyun or Brady Ellison.
Look for smooth draw path, consistent anchor, straight follow-through, and head position.
Even small adjustments—like a tilted head or bent elbow—can improve your accuracy dramatically.
Learn From Elite Techniques
Study the best to become your best. These archers represent recurve perfection.
Study Park Sung-Hyun’s Straight-Line Draw
The first woman to break 1400 points in the 1440 Round, Park uses theoretical perfection in form.
Her draw is straight back with minimal wrist movement. She releases immediately at full draw—no pause.
Key takeaway: Consistency and timing matter more than strength.
Emulate Brady Ellison’s Back Tension
Brady uses a sideways pull to engage his back muscles fully. He holds his breath until release, often triggering a subconscious shot.
His technique shows that execution quality beats perfect pre-shot setup.
Focus on back tension, not finger strength, for a cleaner release.
Analyze Ki Bo Bae’s Push Technique
She applies strong forward pressure with her bow hand at release, minimizing lateral movement.
This “push-pull” creates balance. Back tension pulls while the bow hand pushes toward the target.
The result is dramatic bow swing but incredible accuracy.
Key Takeaways for Shooting a Recurve Bow and Arrow
Mastering how to shoot a recurve bow and arrow comes down to repetition, consistency, and attention to detail. From your stance to your follow-through, every element must be repeatable.
The core principles remain simple. Maintain a relaxed grip, engage your back muscles, anchor consistently, and execute a surprise release. Use the right gear for your setup, avoid common mistakes, and train with purpose.
Whether you’re aiming for Olympic gold or just hitting the bullseye in your backyard, the principles stay the same. Relaxed form, disciplined execution, and relentless practice. Now grab your bow and shoot.
Frequently Asked Questions About Shooting a Recurve Bow and Arrow
What is the correct finger placement for drawing a recurve bow?
Use “one over, two under” finger placement. Place your index finger above the arrow nock, with your middle and ring fingers below. This provides balance, control, and a consistent release.
How do I stop string slap on my forearm?
Wear an arm guard on the inside of your bow arm. Position it 6 to 8 inches below your elbow. Ensure full forearm coverage, especially when learning.
Should I use feather fletches or plastic vanes?
Use feather fletches when shooting off the shelf. They flex and clear the shelf on release. Use plastic vanes only with an arrow rest, which compresses to allow clearance.
What is the best anchor point for recurve shooting?
The most common anchor points are string to the corner of your mouth or string under your chin. Choose one and use it consistently for every shot.
How do I aim without a sight on a recurve bow?
Use instinctive aiming or gap shooting. Align your arrow tip with the target and focus on the center. For gap shooting, estimate the distance between your arrow tip and the target and aim accordingly.


