
How to Install a Clicker on a Recurve Bow
If you’re serious about improving consistency in recurve archery, installing a clicker is a game-changer. A clicker ensures repeatable draw length by producing a sharp click when your arrow reaches the exact same point every time. Unlike compound bows with mechanical stops, recurve archers rely on muscle memory, and a clicker removes the guesswork from your shot cycle. This guide walks you through how to install a clicker on a recurve bow with precision, from choosing the right type to calibrating it for competition-level accuracy.
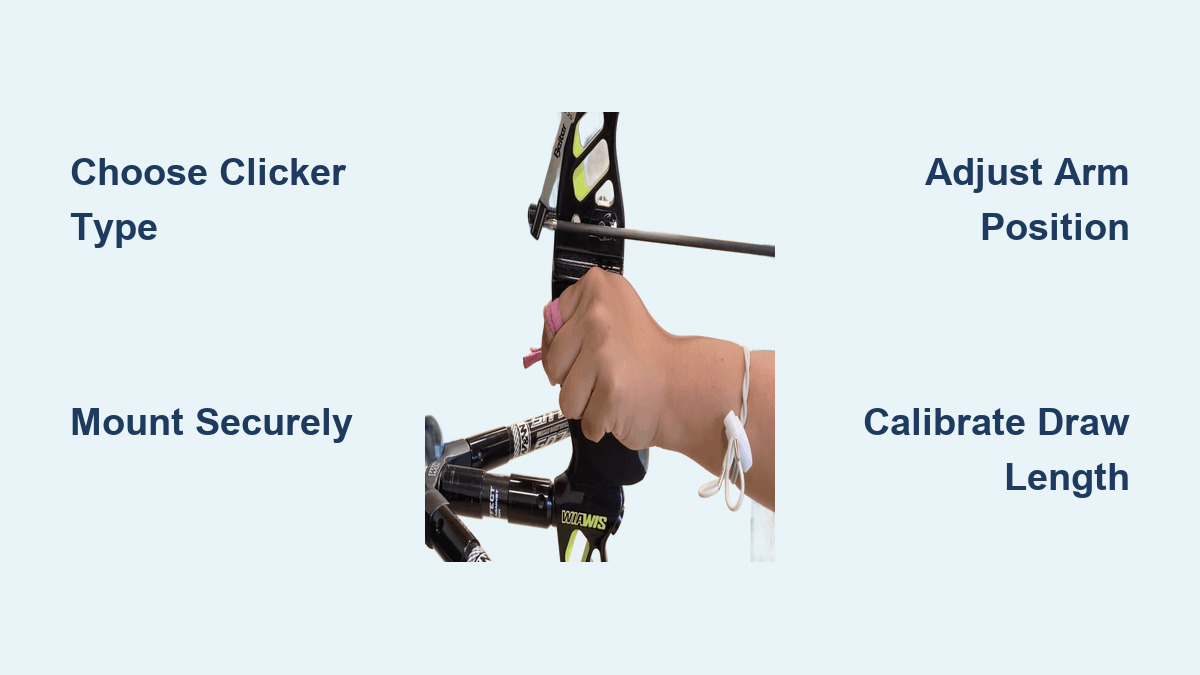
You’ll learn how to select the correct clicker type for your setup, mount it securely, adjust draw length precisely, and troubleshoot common issues fast. No fluff, just actionable steps from setup to mastery.
Choose the Right Clicker Type for Your Bow
Before installation, select a clicker that matches your bow and shooting style. The three main types differ in mounting location, function, and ideal use case.
Riser-Mounted Clickers
This is the most common type used in Olympic-style target archery. It attaches directly to the riser above the arrow shelf using a base plate and adjustable metal or plastic blade.
- Best for: Competitive shooters needing precision
- How it works: Arrow tip rests under the arm during draw, then slips past, causing the arm to snap down and click
- Pros: Highly adjustable, stable, integrates well with sights
- Cons: Requires consistent arrow length, changes mean re-tuning
Sight-Mounted Clickers
Mounted on the sight extension bar rather than the riser. Functions identically to riser-mounted clickers but offers more flexibility.
- Best for: Developing archers, youth, or those frequently changing draw length
- Pros: Easy to adjust without modifying riser, ideal for longer arrows
- Cons: Dependent on sight stability, less common in competition
Limb-Mounted Clickers
Attached to the upper limb or lower riser with tape or clamp. Connected to the string via a cord or chain.
- Best for: Hunters, traditional archers, or form trainers
- How it works: Cord tension increases during draw, at full draw the tab flexes and clicks
- Pros: Keeps riser clean, works with broadheads or blunts
- Cons: Harder to set up, sensitive to small changes, not ideal for beginners
Gather Tools and Materials
Use the right tools to ensure a secure, long-lasting installation.
What You Need
- Clicker unit (type based on your choice)
- Allen key or screwdriver (preferably Allen-head screws for field adjustments)
- Denatured alcohol and cloth (clean mounting surface)
- Outdoor mounting tape or moleskin (for silencing or padding)
- Drill bit (if replacing factory chain with thicker nylon cord)
For Cord Replacement (Hunting Models)
- Nylon cord or D-braid (low-stretch, durable)
- 0.021″ serving thread
- Serving tool or manual jig
- Lighter (to melt and flatten knot ends)
- Nail knots or surgeon’s knots for loop creation
Install a Riser-Mounted Clicker
This is the standard setup for target archery. Follow these steps for accurate placement.
Attach the Base Plate
- Locate the pre-drilled hole or 11mm dovetail rail just above the arrow shelf.
- Clean the area with denatured alcohol to remove dirt and oil.
- Slide or screw the clicker base into place.
- Tighten securely with an Allen key. No movement allowed during shooting.
Position the Clicker Arm
- Slide the adjustable arm forward or backward in the base.
- Set initial position so the arrow tip is about 1/4 inch short of clearing the arm at full draw and anchor.
- This ensures the click happens during back expansion, not before.
Lock and Test the Arm
- Use the locking screw to fix the arm in place.
- For micro-adjustments (e.g., AAE models), turn the adjustment screw in 1mm increments.
- Draw to anchor without releasing and observe where the click occurs.
- Clicks too early? Move arm backward (toward riser).
- Never clicks? Move arm forward (toward point).
Install a Sight-Mounted Clicker
Ideal for growing archers or those testing different arrow lengths.
Mount to the Sight Bar
- Use a compatible bracket to attach the clicker to the sight extension bar.
- Ensure the bar doesn’t flex under tension by testing it gently.
- Position the arm so the arrow tip is 1/4 inch short at full draw.
Adjust and Secure
- Adjustment process is identical to riser-mounted models.
- Recheck alignment after every sight adjustment.
- Avoid mounting too far forward, it can interfere with arrow clearance.
Install a Limb-Mounted Clicker
Used mainly for hunting or training. More complex but effective when set right.
Mount the Clicker Body
- Attach to the upper limb, about 7 inches from the tip.
– Use double-sided outdoor tape or a rubberized clamp - Alternative: Mount below the grip on the riser for easier reset and better control.
Attach the Cord to the String
Two reliable methods ensure a secure connection.
Method 1: Split-String Insertion
- Unstring the bow to relieve tension.
- Mark the string 8 inches below the nocking point.
- Split the strands (~½ inch) at the mark.
- Insert the nylon cord through the split.
- Pull until the knotted or collared end seats against the string.
- Re-string the bow.
- Serve above and below the insertion point with 0.021″ thread to prevent slippage.
Method 2: Served Loop
- Hand-serve a 1½-inch section of the string (8 wraps, back-serve 6-8).
- Burn ends with a lighter.
- Tie a free-spinning loop using a nail knot or surgeon’s knot.
- Thread D-loop material through the clicker body.
- Tie an overhand knot, flatten and burn for smooth operation.
Set the Cord Length
- Draw to full expansion with correct form.
- Have a partner mark where the cord crosses the string.
- Fold cord at mark, tie a nail knot on top.
- Keep it snug but adjustable for tuning.
- Test:
– Too early? Lengthen cord slightly
– No click? Shorten cord
Calibrate the Clicker for Consistent Draw
Setup isn’t complete until you’ve calibrated for your specific draw length.
Start at a Blank Bale
- Practice at 1-2 meters without aiming.
- Focus only on draw, anchor, and expansion.
- Eliminates visual distraction, builds pure form.
Confirm Solid Form First
The clicker amplifies consistency, it doesn’t fix bad technique. Ensure you have:
- Stable bow hand
- Consistent anchor point
- Proper grip
- Repeatable draw path
Set Initial Arm Position
- At full draw, arrow tip should be 1/4 to 1/2 inch short of clearing the arm.
- This forces the final movement to come from back tension, not arm pull.
Test and Refine
- Draw 5-10 times without releasing.
- Watch for:
– Clicks before anchor → Move arm backward
– No click → Move arm forward - Optimize until click occurs smoothly during expansion.
Confirm Consistency
- Shoot 10-20 arrows focusing on timing.
- The click should happen at the same point in the shot cycle every time.
- Tighter vertical groups indicate consistent draw length.
Shoot Correctly With a Clicker
Using it wrong defeats the purpose. Follow this sequence every time.
Draw to Anchor Smoothly
- Pull to a consistent anchor point first.
- No clicking should happen during draw.
Settle and Aim
- Let body stabilize.
- Begin scapular retraction (back tension).
Expand to Trigger the Click
- Continue slight rearward pressure using back muscles, not arm.
- The click should be the result of expansion, not something you pull to.
Release Immediately on Click
- If form and aim are correct, release without hesitation.
- The click is your neutral release cue, not a decision point.
Follow Through
- Hand moves toward shoulder.
- Elbow rotates down.
- Expansion continues after release.
Avoid Common Mistakes
Even experienced archers make these errors. Don’t let these undermine your progress.
Pulling to the Click
- Mistake: Muscling the draw arm to force the click.
- Consequence: Triggers target panic and inconsistent releases.
- Fix: Let the click happen during expansion, don’t chase it.
Inconsistent Anchor
- Mistake: Varying anchor points.
- Consequence: Click triggers at different draw lengths.
- Fix: Lock in anchor before installing clicker.
Forcing the Release
- Mistake: Releasing just because the click sounded, even if aim is off.
- Consequence: Poor shot selection, flinching.
- Fix: Abort the shot if form or aim is bad. The click is a cue, not a command.
Over-Adjusting
- Mistake: Tweaking the clicker after every missed shot.
- Consequence: Destroys muscle memory.
- Fix: Adjust only after multiple sessions confirm inconsistency.
Ignoring Shoulder Creep
- Mistake: Shoulder rising during draw.
- Consequence: Early or late click.
- Fix: Keep shoulder down and stable, correct form first.
Troubleshoot Clicker Issues Fast
Quick fixes keep you shooting rather than debugging.
Click Happens Too Early
- Cause: Arm too far forward or shoulder creep
- Fix: Move arm backward, correct shoulder position
Click Never Happens
- Cause: Arm too far back or inconsistent anchor
- Fix: Move arm forward, verify anchor
Arrow Deflection
- Cause: Arm protruding into arrow path
- Fix: Adjust arm height or angle
Hand Discomfort
- Cause: Arm extends too far laterally
- Fix: Reposition or trim arm length
Inconsistent Clicks
- Cause: Loose mount, worn parts, fatigue
- Fix: Tighten base, inspect wear, rest between sets
Clicker Too Quiet
- Cause: Dampened blade or hearing loss
- Fix: Use plastic dog-clicker blade, remove tape, add moleskin for resonance
Cord Slips (Endless Loop)
- Cause: No serving to hold position
- Fix: Serve above and below insertion point
First Shot Early, Later Shots Delayed
- Cause: String stretch or warm-up
- Fix: Let bow settle, recheck tension
Maintain Your Clicker for Longevity
A well-maintained clicker lasts years and performs reliably.
Inspect Regularly
- Check for loose screws
- Inspect for worn blades
- Look for frayed cords or chains
Clean and Store Properly
- Remove debris under the arm
- Loosen or remove clicker when not in use
- Store in a dry place
Replace Parts Promptly
- Most brands sell spare blades, cords, and screws
- Burn all thread and cord ends to prevent fraying
Expert Tips for Clicker Mastery
Learn from the pros to go from beginner to elite-level consistency.
Don’t Rush the Clicker
- Only install after mastering consistent anchor, back tension, and stable bow hand.
- Coaching recommended, a coach spots subtle flaws you might miss.
Practice Dry-Firing
- Dry-draw to build timing between expansion and click.
- No arrow, just focus on the sequence.
Use Shorter Arrows Temporarily
- For riser-mounted clickers, shorter arrows help during setup.
- Revert to full length once tuned.
Transition Gradually
- Blank bale drills (form only)
- Short-distance targets (10-15 meters)
- Full-field practice
Commit to 3 months of consistent use to build muscle memory.
Field-Test Hunting Setups
- Test under pressure, like turkey season drills.
- Ensure cord doesn’t snag or slip.
Frequently Asked Questions About Installing a Clicker on a Recurve Bow
What is the best type of clicker for target archery?
The riser-mounted clicker is the best choice for target archery. It’s the most common type in Olympic competition, offers high precision, and integrates easily with sight systems. The adjustable arm allows fine-tuning for consistent draw length.
How do I know if my clicker is positioned correctly?
At full draw, the arrow tip should be 1/4 to 1/2 inch short of clearing the clicker arm. The click should occur during back expansion, not before. Test by drawing without releasing and observing where the click happens.
Can a beginner use a clicker on a recurve bow?
Limb-mounted clickers are not recommended for beginners due to their sensitivity and lack of visual feedback. Riser-mounted clickers can work for beginners but only after mastering consistent anchor, proper grip, and back tension.
How often should I adjust my clicker?
Avoid over-adjusting. Make changes only after multiple sessions confirm consistent issues. Small tweaks after every missed shot will destroy muscle memory rather than improve it.
Why is my clicker clicking too early?
Early clicking is usually caused by the clicker arm being positioned too far forward, or shoulder creep during the draw. Move the arm slightly backward toward the riser and ensure your drawing shoulder stays down and stable.
Can I use a clicker for hunting with a recurve bow?
Yes, limb-mounted clickers work well for hunting. They’re compatible with broadheads and blunts. Many hunters replace the factory ball chain with durable nylon cord for better performance in the field.
Key Takeaways for Installing Your Clicker
Installing a clicker on a recurve bow is about precision, not convenience. It won’t fix bad form, but when used correctly, it reveals consistency and elevates your shooting to competition level.
- Riser-mounted clickers are best for target archery and competition
- Sight-mounted clickers suit growing archers or those experimenting with arrow lengths
- Limb-mounted clickers work well for hunting and form feedback
Follow the installation steps carefully: mount securely, calibrate precisely, and shoot with discipline. Never pull to the click, let it happen naturally through back expansion. With patience and consistent practice, your clicker becomes invisible, just part of the shot. And when that happens, tighter groups, higher scores, and greater confidence naturally follow.
Install it right, use it wisely, and watch your shooting improve.


