
How to Install a Nock Point on a Recurve Bow
A properly installed nock point is essential for consistent, accurate shooting with a recurve bow. It ensures your arrow nocks at the same height every time, which directly affects arrow flight, grouping, and overall performance. Without a correctly positioned nock point, even the most precise form cannot compensate for erratic launches or poor clearance. Whether you are a beginner setting up your first bow or an experienced archer fine-tuning your equipment, knowing how to install a nock point correctly is a foundational skill that will transform your shooting.
This guide walks you through every step, from determining the right height to final tuning, using only the tools and techniques proven by archery experts and competitive shooters. You will learn about the zero reference point, different installation methods, and how to fine-tune your setup for maximum accuracy.
Finding Your Zero Reference Point Before Installing
Before installing a nock point, you must identify the zero point, which serves as the baseline from which all measurements begin. This ensures your nock point aligns perfectly with your arrow rest and shooting style. The zero point represents the theoretical centerline of the arrow path, and every measurement flows from this foundation.
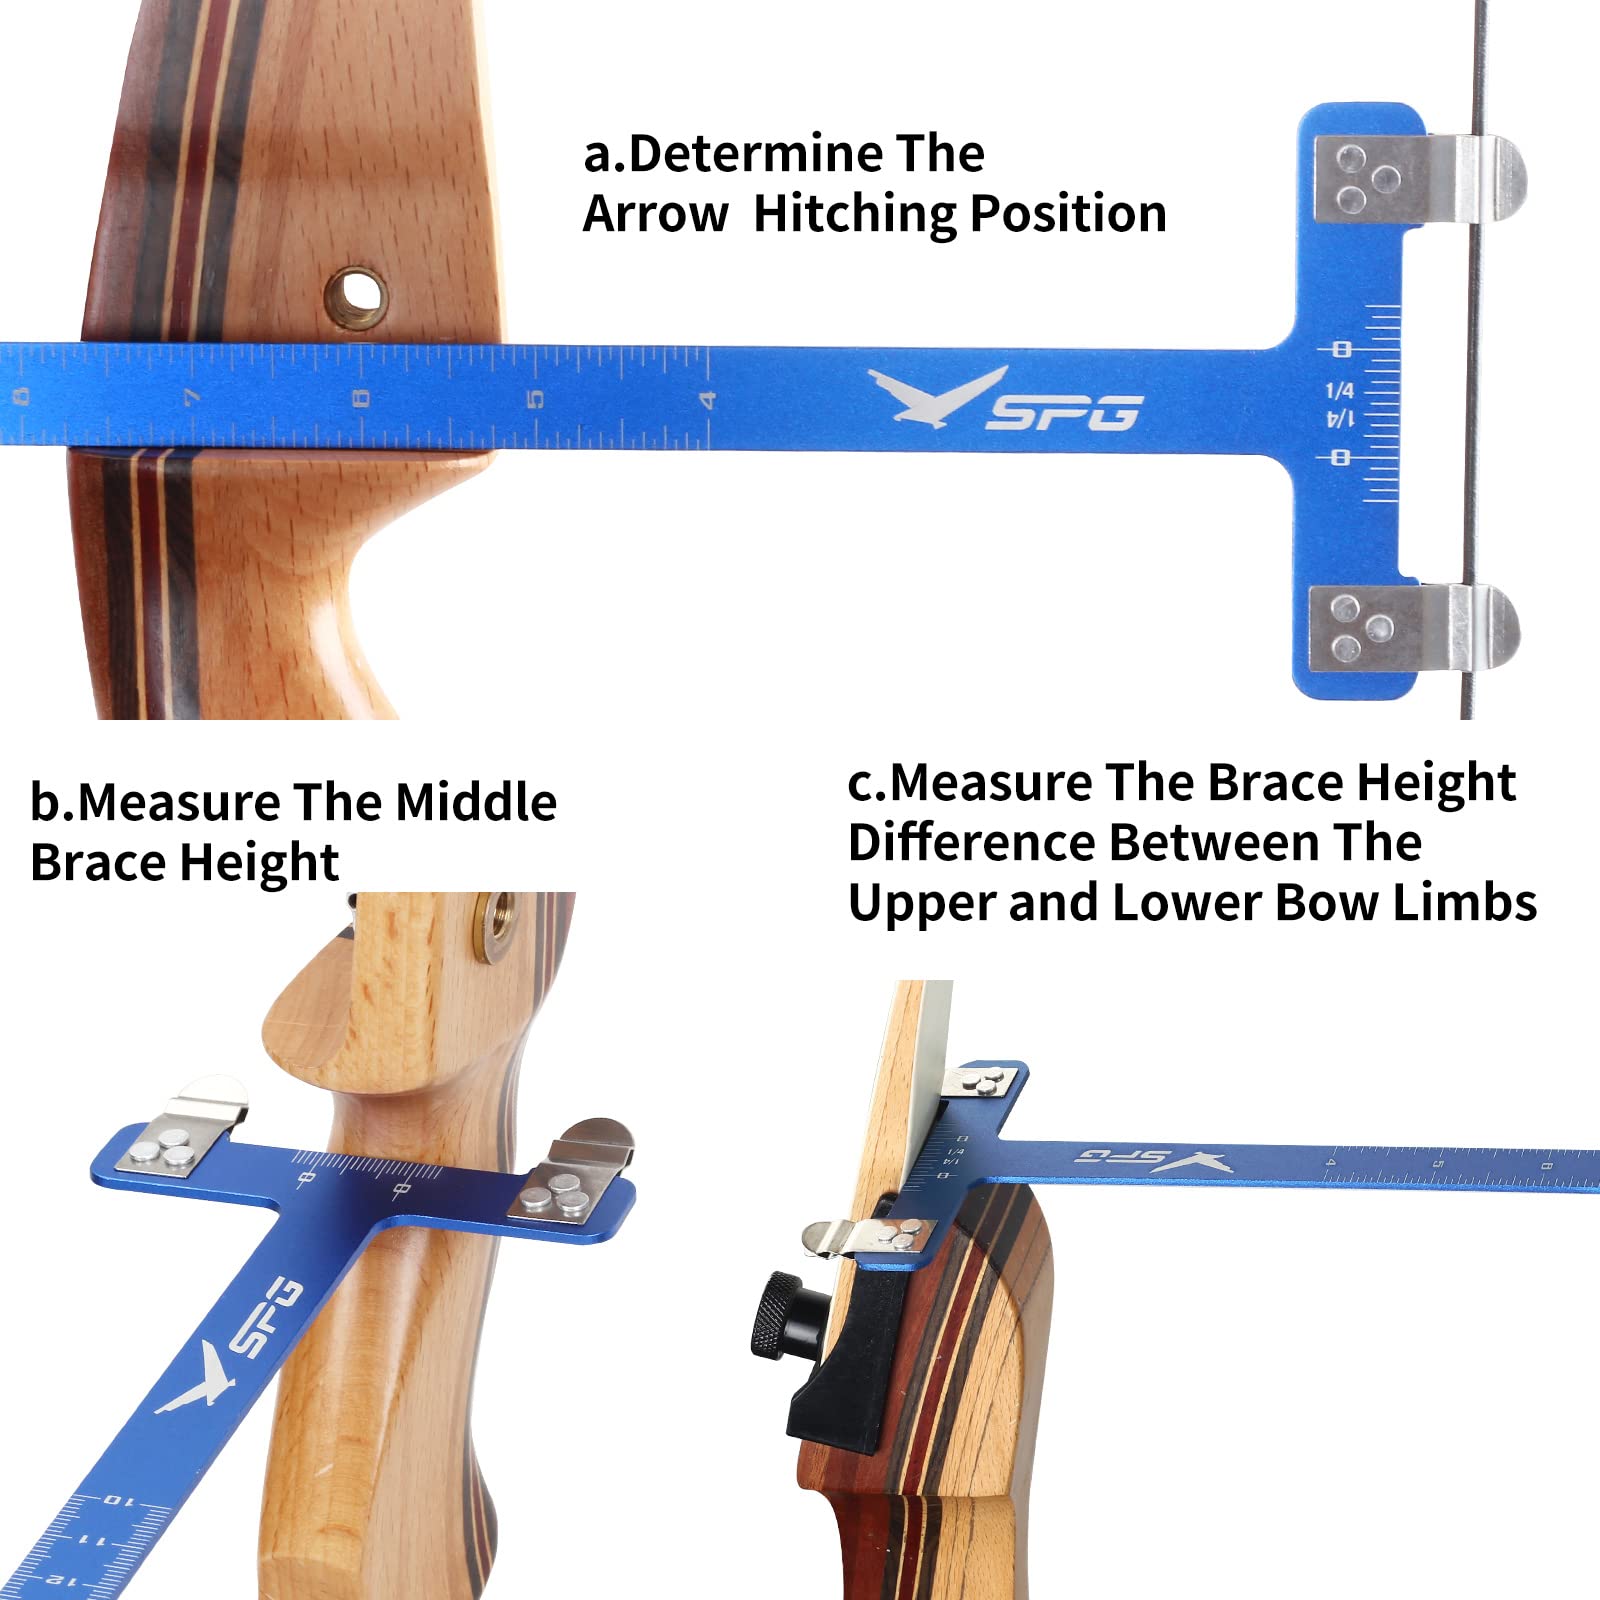
Using a Bow Square for Precise Measurements
Attach the long arm of a T-square bow square to the bowstring, then slide it down until the horizontal arm rests flush on the arrow rest shelf, arrow plate, or center of the pressure button. The point where the horizontal bar meets the string marks your zero reference line. This is the level of the arrow functional plane and serves as your starting measurement point.
Always install your arrow rest and arrow plate before measuring, as their position directly impacts your zero point. If you are using an elevated rest, align the bow square with the functional plane of the rest, not the shelf. Consistency in this step ensures repeatable results every time you string or restring your bow.
Determining the Right Nock Point Height

There is no universal height for a nock point, as it varies by shooting style, bow setup, and archer preference. However, several proven starting points exist based on discipline and technique. These heights serve as starting positions only, and fine-tuning through live shooting is necessary to find your bow ideal setup.
Matching Height to Your Shooting Style
The following recommendations provide a solid starting point for different archery styles. Split-finger Olympic shooters should begin at 5/8 inch above zero. Three-finger-under shooters typically start at 3/4 inch above zero to compensate for the altered string angle. Traditional recurve and barebow archers often find success at 1/2 inch above zero, which has been field-tested and confirmed by experts. Beginners may prefer 1/4 inch above zero for added stability during the learning phase. If you use a drop-away rest, set the nock point just 1/8 inch above zero for minimal clearance.
Most traditional bows perform best with the nock point approximately 1/2 inch above the shelf. Remember that these are starting positions only, and empirical testing through shooting will reveal the ideal height for your specific setup.
Marking the String for Installation
Once you have determined your desired height, transfer that measurement to the bowstring using a precise marking method. This step is critical because any error in marking will translate directly to inconsistent shooting. Take your time and double-check all measurements before proceeding.
Precisely Marking the Nocking Position
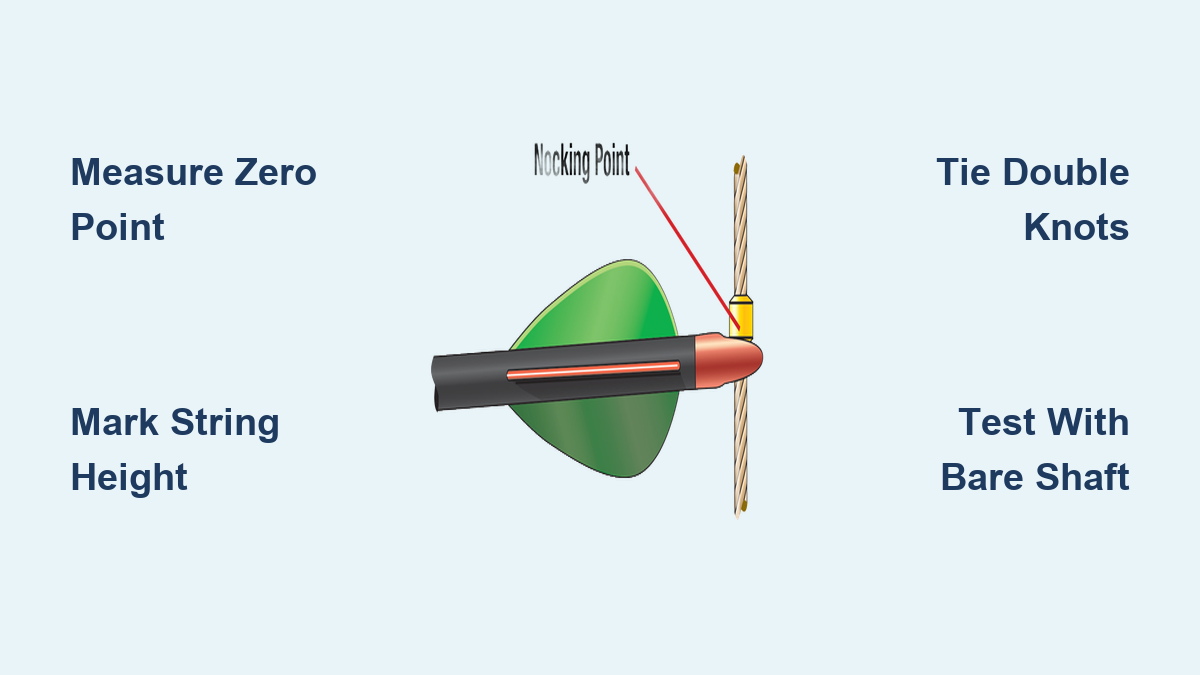
Using a pencil or fine marker, mark the string exactly at your chosen height above the zero point. If using a double nocking point system, mark two positions: the upper position at your primary nocking height, and the lower position 1/16 inch below the bottom of the arrow nock. This small gap prevents nock pinch during the draw, allowing smooth release without binding.
Ensure the bow is unstrung or safely braced during marking to avoid accidental movement. Use consistent reference points, such as always measuring from the center of the pressure button, for future adjustments. Write down your measurements in a shooting journal for reference.
Installing a Tied Nocking Point
Tied nocking points offer superior durability, adjustability, and customization. They are preferred by serious archers and are easy to install with basic tools. While tied knots require more skill than crimp-on brass nocks, the benefits in performance and longevity make them worth the effort.
Preparing Your Serving Thread
Use 2 feet of high-strength serving thread such as B50, Fast Flight, or nylon dental floss. Avoid cotton thread, as it frays under tension and lacks longevity. The thread must withstand repeated stress from thousands of shots, so choosing quality materials matters significantly.
Do not use weak or stretchy thread for your nocking point. Your nocking point must withstand repeated stress without slipping or degrading. Invest in proper serving thread from an archery supply store rather than improvisations.
Tying Alternating Double Overhand Knots
Place the center of the thread against your marked spot on the string. Tie a single overhand knot to anchor the thread in place. Begin alternating double overhand knots, placing the first knot on one side of the string and the second knot on the opposite side. Continue back and forth across the string, building a secure anchor.
Tie 6 knots per side for strength and grip, then finish with two single overhand knots to lock the end securely. Trim excess thread to about 5 mm, then use a lighter to melt the ends and press them into the knot for a clean, secure seal. Apply a drop of super glue or string glue after tuning confirms the correct position, as gluing too early limits adjustability during the fine-tuning process.
Installing a Brass Crimp-On Nocking Point
For beginners or quick setups, brass crimp-on nocking points provide a reliable alternative to tied knots. They are easier to install and require less specialized skill, making them an excellent choice for new archers or those who prefer simple equipment adjustments.
Sliding and Positioning the Brass Nock
Slide the soft brass nock onto the string at your marked height. Position it so the bottom of the nock sits at your target measurement, such as 1/2 inch above rest for traditional bows. Lightly pinch the brass nock into a closed C shape by hand before placing it, as this pre-tension helps hold it in place during adjustment.
Crimping Securely with Nocking Pliers
Insert the nock into the correct groove of your nocking pliers. Apply light, even pressure, and do not over-crimp. Over-crimping damages the string serving and weakens the bowstring over time, which can lead to catastrophic failure.
For tuning purposes, leave the crimp slightly loose so you can slide the nock up or down for adjustments. Once final height is confirmed through testing, re-crimp firmly to lock it in place permanently.
Setting Up a Double Nocking Point System
Adding a second nocking point increases stability and prevents the arrow from slipping off during draw, which is ideal for beginners, youth archers, or training environments. This system creates a sandwich effect that holds the arrow nock securely without interfering with release quality.
Installing Upper and Lower Nocks
Place the primary upper nock at your standard height, such as 5/8 inch above zero. Nock an arrow and slide a second brass nock under the arrow nock, positioning it snugly against the bottom. Crimp the lower nock securely to lock it in place.
The result is that the arrow nock is gently sandwiched between two points without binding. Leave a 1/16 inch gap between the arrow nock and the lower knot to allow slight vertical play and prevent binding during release. As an alternative, you can tie a lower knot instead of using brass for a fully custom setup.
Fine-Tuning with Bare Shaft Testing
Even perfect measurements cannot replace real-world feedback. Use bare shaft tuning to empirically verify your nocking point height and make final adjustments based on actual arrow flight. This method is the gold standard for precision tuning and is used by competitive archers worldwide.
Shooting Fletched and Bare Arrows
At 20 to 30 feet, shoot a mix of fletched and bare shaft arrows into a target. Observe the group patterns carefully to determine if adjustments are needed. If bare shafts hit high, your nocking point is too low and you need to raise it. If bare shafts hit low, your nocking point is too high and you need to lower it. The ideal result occurs when bare shafts group vertically with fletched arrows and show no fishtailing or porpoising.
Adjust in 1/16 inch increments and retest after each change. This method requires consistent form to produce reliable results, so beginners may prefer starting with group shooting before attempting bare shaft tests. The Easton Archery Tuning Guide provides detailed instructions for this precision method.
Testing with the Close-Range Field Test
For traditional archers or those without access to tuning guides, a simple field test works well and requires minimal equipment. This method has been used since the 1960s and remains effective for traditional setups where sophisticated tuning methods are not available.
Testing Arrow Entry Angle
Stand 7 yards from the target. Shoot an arrow at shoulder height and observe how it enters the target. If the arrow enters straight, your nocking point is well-aligned. If the arrow dips or climbs sharply, adjust up or down in small increments until the entry angle becomes straight.
Start with fletched arrows, then progress to bare shafts once your consistent grouping improves. This method relies on visual observation of arrow entry rather than comparing group positions, making it accessible for all skill levels.
Avoiding Common Installation Mistakes
Even small errors can ruin accuracy significantly. Watch for these frequent issues and address them promptly to maintain consistent shooting. Prevention is far easier than correction after bad habits form.
Preventing Fishtailing and Porpoising
Fishtailing, which is side-to-side wobble, is often caused by a nocking point that is too low, causing the arrow to hit the rest on release. Raise the nock to resolve this issue. Porpoising, which is up-and-down oscillation, is usually due to a nocking point that is too high or incorrect brace height. Lower the nock or check your brace height to correct this problem.
Always verify brace height, which is typically 7.5 to 8.5 inches, before installing the nocking point. New strings stretch significantly, so shoot in for 50 to 100 dry shots before final setup to allow the string to settle.
Stopping Arrow Nock Slippage
If the arrow falls off during draw, you likely have a single nock that is too loose or no retention below the nock. Install a double nocking point system or re-crimp securely to resolve this dangerous issue. Arrow slippage during release can cause serious injury or equipment damage.
Performing Final Validation Checks
After installation, run these quick checks to ensure reliability and safety before shooting. These validation steps take only a few minutes but prevent problems that could ruin your shooting session or cause injury.
Dry-Fire and Visual Inspection
Perform several dry draws with caution to confirm the nocking point stays fixed and the arrow nock seats consistently without twisting or slippage. Visually inspect that the nocking point is level and parallel to the shelf. Use the bow square again to verify alignment with your original measurements.
Confirming Arrow Nock Fit
The arrow should snap onto the string securely at the nocking point. It should not be too tight, and it should not be too loose. If the arrow binds or slips easily, adjust the knot tightness or crimp pressure until you achieve a secure, repeatable fit.
Maintaining Your Nocking Point
A well-installed nocking point can last hundreds of shots, but only if maintained properly. Regular inspection prevents unexpected failures that could ruin a competition or training session. Make maintenance part of your routine before every shooting session.
Inspecting Before Every Session
Check for fraying or loosening of tied knots, cracks or slippage in brass nocks, and string stretch affecting position. Retie or replace components as needed. Carry a pre-stretched, pre-tuned spare string with nocking points already set for quick replacement when problems occur.
The bow will tell you what it wants, so adjust based on arrow flight observations rather than just numbers on a chart. Every bow responds differently, and your tuning should reflect your specific equipment and shooting style.
Best Practices for Long-Term Success
Follow these expert-backed habits to maximize performance and consistency throughout your archery journey. Good habits formed early will serve you well for years to come.
Recording Your Setup
Keep a notebook logging your nocking point height, brace height, arrow spine and point weight, and string type and twist count. This allows you to replicate winning setups and troubleshoot issues faster. When something changes, you will have the data to understand what shifted and why.
Pre-Stretching New Strings
New strings, especially Flemish twist varieties, stretch significantly during initial use. Shoot in your string over several sessions before setting permanent nocking points. Unstretched strings can lose up to 1/2 inch of brace height initially, which will throw off your entire setup if you install nocking points too early.
Using Adjustable Nocks During Tuning
Leave tied knots unglued or brass nocks slightly loose during the tuning phase. Only secure permanently once optimal height is confirmed through testing. Rushing to glue everything before testing wastes time and materials.
Frequently Asked Questions About Installing a Nock Point on a Recurve Bow
What is the best height for a nocking point on a recurve bow?
The best height varies by shooting style. Traditional recurve and barebow archers typically start at 1/2 inch above the arrow rest. Olympic-style shooters often use 5/8 inch above zero. These are starting points that require fine-tuning through shooting to find your ideal position.
Can I use regular thread to tie a nocking point?
No, you should not use regular thread. Use high-strength serving thread such as B50, Fast Flight, or nylon dental floss. Regular cotton thread frays under tension and lacks the durability needed to withstand repeated shooting stress.
How do I know if my nocking point is too high or too low?
Shoot bare shafts alongside fletched arrows at 20 to 30 feet. If bare shafts hit high, your nocking point is too low. If they hit low, your nocking point is too high. You can also observe fishtailing or porpoising behavior during shooting.
Should I use a tied nocking point or a brass crimp-on?
Tied nocking points offer superior durability and adjustability, making them preferred by experienced archers. Brass crimp-on nocking points are easier for beginners and work well for quick setups. Choose based on your skill level and preference for customization.
How often should I check my nocking point?
Inspect your nocking point before every shooting session. Look for fraying, loosening, or wear. After any string change or significant equipment adjustment, recheck your nocking point position and verify it has not shifted.
Do I need a double nocking point system?
Double nocking point systems are recommended for beginners, youth archers, and training environments. They increase stability and prevent the arrow from slipping off during draw. Experienced archers may prefer single nocking points for a cleaner release feel.
Key Takeaways for Installing Your Nock Point
Installing a nocking point on a recurve bow is more than just tying a knot or crimping a brass nock. It is about creating a repeatable, reliable foundation for accuracy that will influence every shot you take. Start with proven heights based on your shooting style, use a bow square for precision measurements, and commit to fine-tuning through bare shaft testing. Whether you choose a tied serving knot or a brass crimp, the key is consistency in installation and attention to detail during the tuning process.
Your nocking point will change as your equipment breaks in and as your shooting form develops. Accept this evolution as part of the journey rather than a problem to solve. With the right tools, proper technique, and willingness to learn from your arrow flight, you will build a setup that enhances every shot and builds confidence in your recurve bow system.


