
How to Shoot a Recurve Bow: Beginner’s Guide
You’ve picked up a recurve bow, stood in front of a target, and now you’re wondering: How do I actually shoot this thing? You’re not alone. Thousands of beginners face the same question every year, and the good news is that recurve archery is one of the most accessible and rewarding skills to learn. With the right form, equipment, and mindset, you’ll go from shaky first shots to consistent, accurate hits in weeks.
The key isn’t strength or natural talent. It’s repetition, consistency, and proper technique. This guide cuts through the noise and gives you a clear, step-by-step path to shooting a recurve bow correctly. You’ll learn how to choose the right gear, stand with confidence, draw smoothly, and release with precision, all while avoiding the most common beginner mistakes.
Choose the Right Bow and Arrows for Your Size
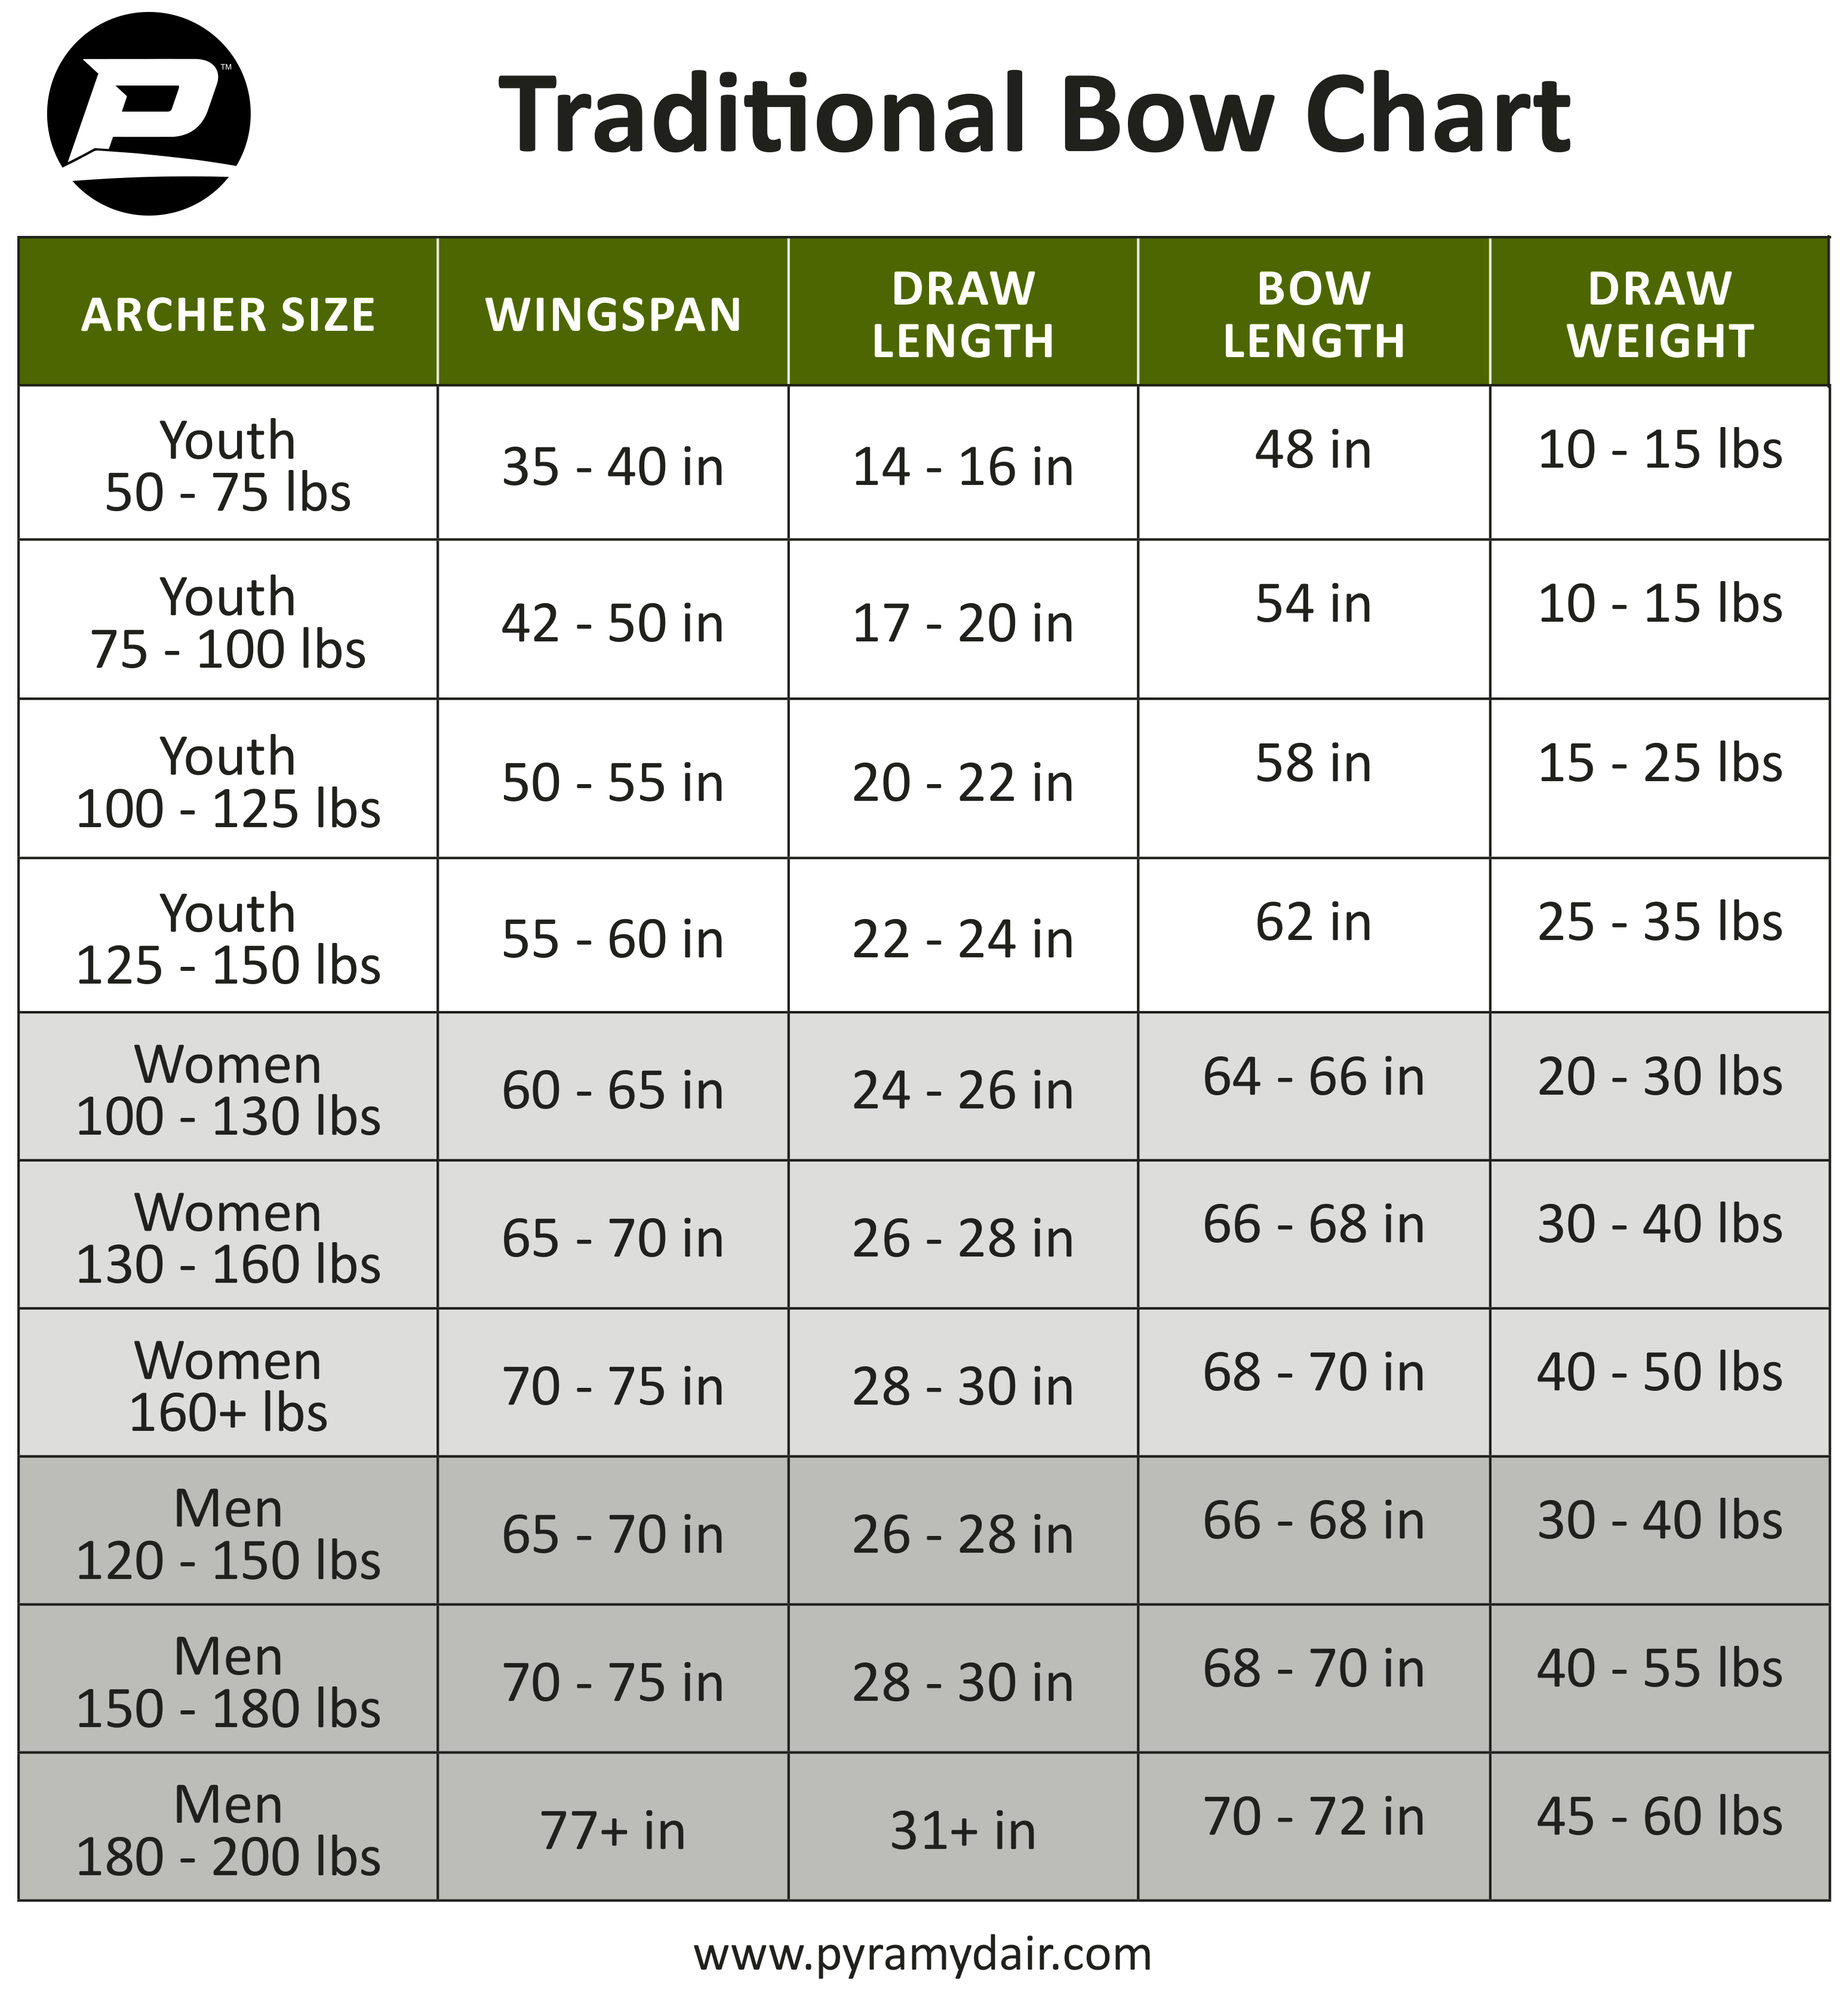
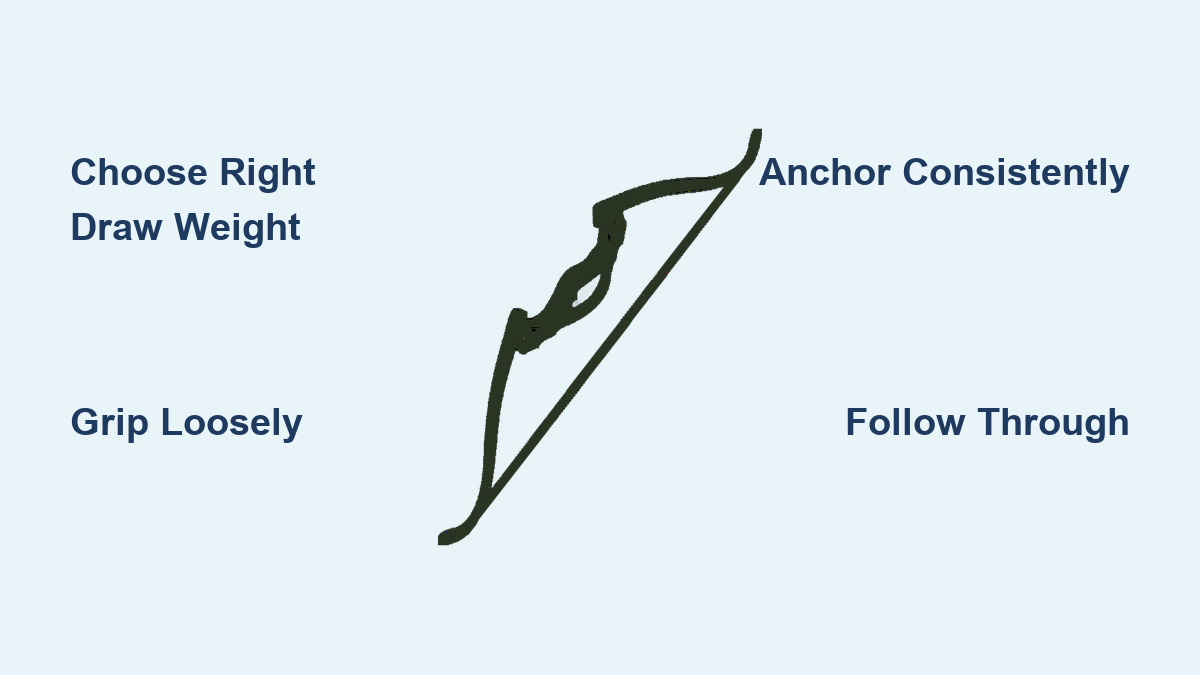
Select a Draw Weight You Can Handle
Start with a draw weight that challenges you but doesn’t exhaust you. Adult beginners should begin at 20 to 30 pounds, depending on strength and gender. A good rule is that you should be able to hold full draw for 5 seconds without shaking. If you’re struggling, the bow is too heavy.
Draw weight is rated at 29 inches of draw length. For every inch longer or shorter, add or subtract about 2 pounds. So if your draw is 31 inches, a 25-pound bow feels like 29 pounds. Always test before buying if possible.
Pick the Correct Bow Length
Bow length affects stability and forgiveness. For most adults, a 66 to 70 inch bow is ideal. Longer bows at 70 inches are more stable and easier to shoot accurately, which makes them perfect for beginners. Shorter bows at 62 inches are compact but less forgiving of form errors.
Take-down bows are highly recommended for beginners. They let you swap limbs later as you build strength, so you keep the same riser for years.
Match Your Arrow Length to Your Draw
Your arrow length should be your draw length plus 1 to 2 inches. To find your draw length, measure your wingspan from fingertip to fingertip, subtract 15, and divide by 2. Or divide your wingspan by 2.5 for a quick estimate.
Use aluminum arrows as a beginner. They’re durable, consistent, and safer than carbon. If you do use carbon, flex each shaft and listen for cracks. Damaged carbon can shatter on release and cause injury.
Orient Fletchings the Right Way
Every arrow has three fletchings. Two are the same color, and one is different. The odd-colored fletch, called the “cock” vane, must face away from the riser. If it faces the bow, it’ll drag on the shelf or rest, causing erratic flight and damage.
Use feathers if you’re shooting off the shelf with no rest. Use plastic vanes with an arrow rest because they’re stiffer and last longer.
Wear Essential Protective Gear
Use an Arm Guard Every Time
String slap is the number one complaint among new archers. It’s that painful snap of the bowstring against your forearm. Prevent it with an arm guard worn on your bow-holding arm. For right-handed shooters, that’s your left arm.
Choose a larger guard that covers from elbow to wrist. It’s better to have extra protection while you’re learning proper form.
Protect Your Fingers from Damage
You have two main options: a shooting tab or a glove. Tabs are preferred by Olympic archers. They’re thin, precise, and allow a clean release. Gloves offer more coverage and comfort during long sessions, but they can interfere with string feel.
Whichever you choose, never shoot bare-fingered. Blisters, cuts, and inconsistent releases are guaranteed if you do.
Stand with Stable, Balanced Posture
Adopt the Square Stance
Stand with your feet shoulder-width apart, perpendicular to the target. For a right-handed shooter, your left hip faces the target. Your body forms a T with the shooting line.
Keep your weight evenly distributed on both feet. Don’t lean forward or backward. A balanced stance prevents swaying and builds consistency.
Align Your Head and Spine Correctly
Turn only your head to aim. Don’t twist your torso. Keep your spine neutral with shoulders relaxed and down. Your chest should be slightly forward but not puffed up.
At full draw, the bowstring should touch the tip of your nose. This nose touch ensures consistent draw length shot after shot.
Grip the Bow Correctly to Avoid Torque
Stop Gripping Too Tightly
Most beginners grip the bow too tightly, which torques the riser and throws arrows off target. Instead, hold the bow loosely in the web of your hand.
Position your lifeline between thumb and index perpendicular to the ground. Your knuckles should be at a 45-degree angle. Let the bow fall away naturally after the shot. If you’re gripping hard, your knuckles will turn white. Relax. The bow is designed to release. Your job is to guide it, not wrestle it.
Set the Right Bow Angle
If you’re shooting off the shelf with no rest, a slight canted tilt like opening a can improves arrow clearance. If using an arrow rest, keep the bow vertical. What matters most is consistency. Pick an angle and repeat it every time.
Master the Six-Step Shot Cycle
Step 1: Nock the Arrow Properly
Clip the arrow onto the string under the nock point. Never place it above the nock point. The nock point is a small brass clip that sets arrow height. Ensure the cock vane faces away from the riser. If it’s not possible, your arrow may not be compatible with recurve shooting.
Step 2: Set Up Before Drawing
Raise your bow arm before drawing. Fully extend it toward the target. Lock your elbow. A bent arm shortens draw length and increases string slap risk. Your bow arm should feel like a steady post, not a muscle under tension.
Step 3: Draw Smoothly with Back Muscles
Use the three-finger draw with your index finger above the nock and your middle and ring fingers below. Pull straight back along your jawline.
Engage your back muscles, not just your arms. You should feel tension between your shoulder blades. A smooth, controlled draw prevents jerky motion and builds consistency.
Step 4: Anchor with a Fixed Point
Bring your drawing hand to a consistent anchor point on your face. Common spots include the corner of your mouth, under the jawbone, or the trigger point at your jawline.
Use bony landmarks, not soft tissue. Your anchor must be the same every time. At full draw, the string should touch your nose tip. This locks in your draw length.
Step 5: Expand with Back Tension
After anchoring, keep pulling with your back. This expansion builds tension until the release happens naturally.
Don’t force it. The goal is a surprise release. You shouldn’t know exactly when the string slips off your fingers.
Step 6: Release and Follow Through
Relax your fingers off the string. Don’t let go or curl them. Use just the fingertips for a clean release.
After release, hold your position. Keep your bow arm extended and your anchor point intact until the arrow hits the target. Dropping your arm too soon sends arrows low.
Pro Tip: Record yourself shooting. You’ll spot form flaws that are invisible to the eye.
Fix the Most Common Beginner Mistakes

Arrow Above the Nock Point
Placing the arrow above the nock point risks slipping off during draw. Always nock under the nock point.
Bent Bow Arm
A bent arm reduces power and increases string slap. Lock your elbow every time.
Wrong Fletch Orientation
If the cock vane faces the riser, it drags and causes arrow veer. Always face it away from the riser.
Inconsistent Anchor Point
Shooting from different anchor points leads to wild grouping. Use the corner of your mouth or jawbone. Something solid and repeatable works best.
Tight Bow Grip
A death grip torques the bow, sending arrows left or right. Relax your hand. Let the bow fall freely.
Dropping the Bow Arm Too Soon
Lowering your arm after release ruins follow-through. Hold it steady until impact.
Holding the Draw Too Long
Muscles fatigue in 3 to 5 seconds. If you’re not ready to release by then, lower the bow and start over.
Shooting Too Fast
Rushing kills form. Take 10 to 15 seconds per shot. Focus on process, not speed.
Over-Aiming at the Target
Beginners often obsess over the sight. Remember that 99 percent form and 1 percent aim is the right ratio. Perfect form beats perfect aim every time.
Aim with Confidence Using Proven Methods
Start with Instinctive or Gap Shooting
Don’t rely on a sight at first. Learn instinctive aiming. Your brain learns trajectory through repetition.
Or use gap shooting. Estimate the distance and aim above or below the target with a hold-over or hold-under. It builds depth perception and field accuracy.
Use a Sight for Target Practice Later
If your bow has a sight, adjust it so the pin aligns with where arrows actually hit. Shoot a group at 10 yards. If arrows hit high and right, move the sight up and right. Make tiny adjustments because small changes have big effects.
Align the string with the edge of the sight for consistency.
Practice Like a Pro to Build Consistency
Focus on Repeatable Form, Not Perfection
Shoot for repeatable form, not bullseyes. Small improvements compound over time.
Vary Your Distances
Don’t just shoot at 20 yards. Practice at 10, 15, 25, and 30 yards. It builds adaptability and improves your range judgment.
Try the One-Arrow-a-Day Routine
Shoot one arrow per day, then analyze it. Was your draw smooth? Did you anchor consistently? How did the arrow fly? This builds discipline and sharpens awareness.
Train with Light Bows or Bands
Use a lighter bow or resistance band to drill form without fatigue. It’s perfect for home practice and mastering back tension.
Stay Safe at All Times
Never Dry Fire Your Bow
Releasing the string without an arrow, called dry firing, can destroy your bow and send splinters flying. Always double-check that an arrow is nocked.
Use a Solid Backstop
Shoot into a commercial target or hay bale wrapped in shade cloth. Never shoot into open space.
Clear the Shooting Line
Always check that no one is downrange before shooting. Call “Clear!” if needed.
Inspect Your Arrows Before Each Shot
Check for cracks, especially on carbon shafts. Damaged arrows can explode on release.
Carry Arrows Safely
When moving, carry arrows with tips down, sideways, and secured in a quiver.
Frequently Asked Questions About Shooting a Recurve Bow
What Draw Weight Should a Beginner Start With?
Adult beginners should start with a draw weight between 20 and 30 pounds. You should be able to hold full draw for at least 5 seconds without shaking. If you can’t, the bow is too heavy.
How Do I Determine My Draw Length?
Stand with arms outstretched and measure from fingertip to fingertip. Subtract 15 and divide by 2. Your arrow length should be your draw length plus 1 to 2 inches.
Which Eye Determines My Handedness?
Your dominant eye determines which bow you should use, not your dominant hand. Test by forming a triangle with your hands, looking through it at a distant object, and bringing it to your face. The eye that stays centered is dominant.
What Is the Correct Fletching Orientation?
The odd-colored fletch, called the cock vane, must face away from the riser. If it faces the bow, it’ll drag and cause erratic arrow flight.
How Long Does It Take to Learn to Shoot a Recurve Bow?
Most beginners can shoot consistently within a few weeks with proper instruction and regular practice. Mastering the sport takes months or years of dedicated practice.
Can I Teach Myself to Shoot a Recurve Bow?
Yes, many archers self-teach using online resources and practice. However, joining a local archery club for coaching can help you avoid developing bad habits.
Key Takeaways for Your Recurve Bow Journey
Shooting a recurve bow is a journey of patience and precision. There’s no single perfect form. Only consistent, repeatable execution matters.
Start with the right equipment. Choose a draw weight you can handle, select arrows that match your draw length, and always wear protective gear. Master the six-step shot cycle, focusing on smooth execution rather than speed.
Avoid the common mistakes that plague beginners. Lock your elbow, anchor consistently, and hold your follow-through until the arrow hits the target.
Practice at varied distances, film your form, and join a local archery club if possible. Every expert was once a beginner. You’ve got this.


