
How to Change a Compound Bow String
Changing a compound bow string is essential maintenance that keeps your bow performing at its best. Over time, strings wear down from repeated shots, UV exposure, and constant limb tension, even when the bow sits unused. Signs like fraying, peep rotation, or inconsistent arrow grouping mean it’s time for a replacement. This guide walks you through the complete restringing process using a bow press, from gathering the right tools to final tuning, so you can maintain your equipment safely and confidently.
When to Replace Your Compound Bow String
Strings degrade silently under constant limb pressure. Replace your compound bow string every 2,000 to 2,500 shots or annually for regular shooters. Even with occasional use, swap strings every 2 to 3 years because environmental factors like humidity and UV light cause material fatigue.
Watch for these warning signs that indicate immediate replacement is needed. Visible fraying or separated serving fibers mean the string is near failure. Loose loops, cracked string ends, or peep sight rotation during draw are clear danger signals. Reduced arrow speed, poor accuracy, or visible kinks and flat spots all point to a worn string that should not be shot.
Essential Tools for Bow String Replacement
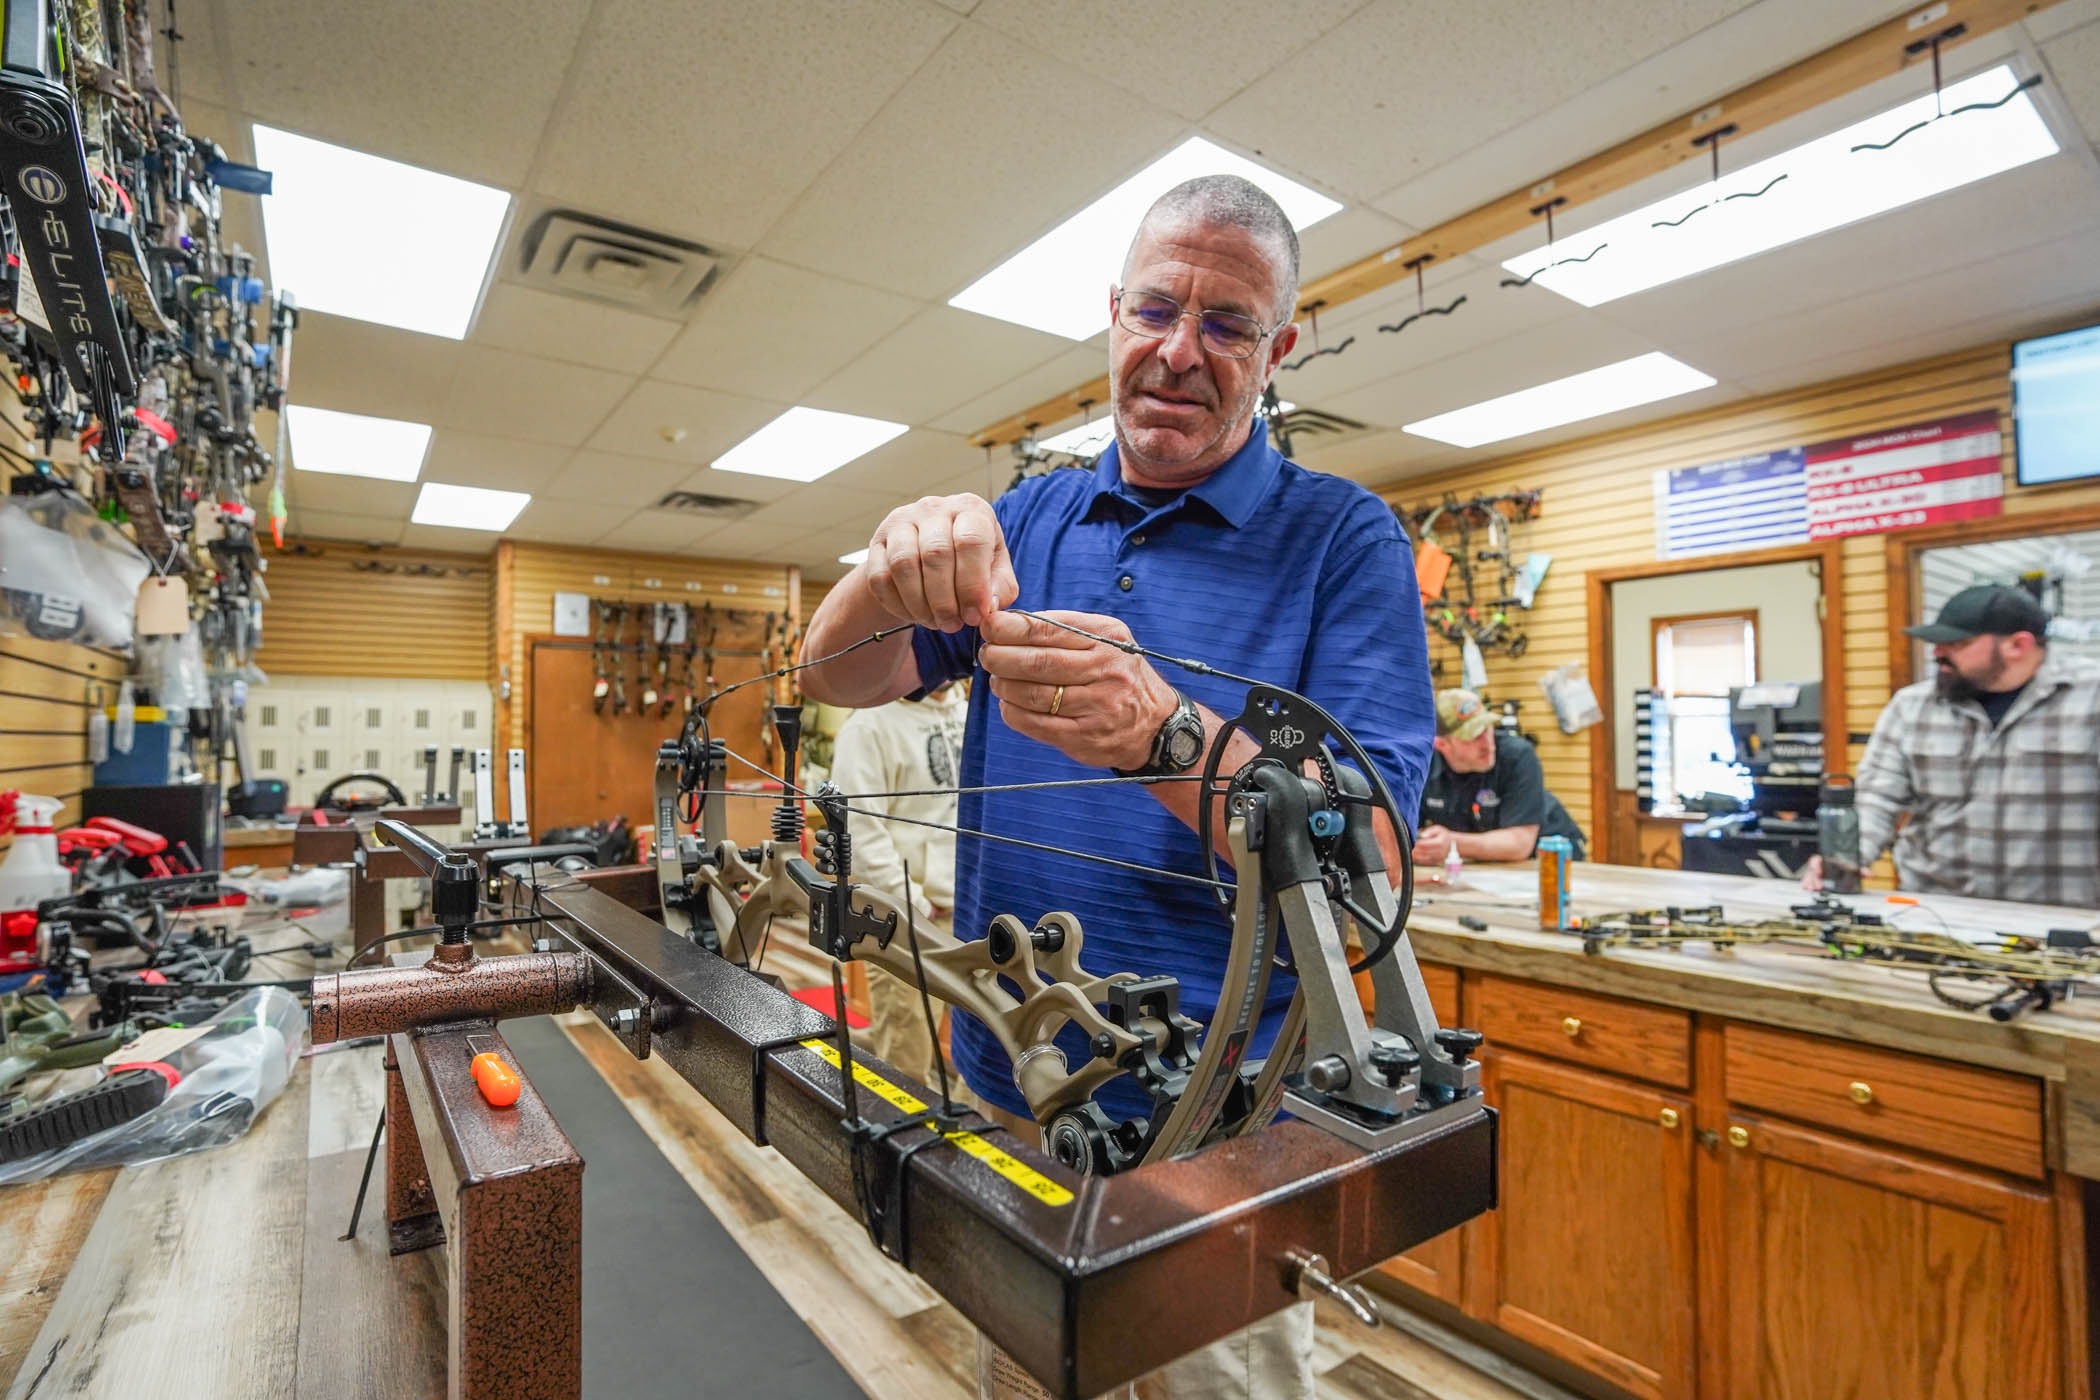
You need specific equipment to replace a compound bow string safely. A bow press is absolutely required for modern compound bows because it relieves limb tension and prevents dangerous uncontrolled releases. Without one, attempting this job risks serious injury or permanent bow damage.
Gather these tools before starting. A new string and cable set matched to your exact bow model and cam type is essential. Safety glasses protect your eyes from snapping strings or flying debris. Allen wrenches remove axle screws, limb bolts, and cable guard hardware. A razor blade or small knife cuts old peep sights and trims excess material.
Take photos of your current setup before disassembly. Document cable routing, cam timing marks, and peep sight position. Use a silver Sharpie to mark alignment points on dark string material. A magnet tray holds small screws securely, and paper clips prevent new string ends from untwisting.
Why a Bow Press Is Non-Negotiable

Modern compound bows store tremendous energy in their limbs. Attempting to remove or install a string by hand on these bows is extremely dangerous and should never be attempted. Without a bow press, you risk uncontrolled release causing injury, dry-firing which destroys limbs or cams, and damaged axles or risers.
Professional technicians consistently warn against DIY restringing without proper equipment. Every shop that has seen someone attempt this without a bow press has witnessed either injury or damaged bow components. The force required to work with modern compound bows simply exceeds what human strength can safely control.
Always wear safety glasses during the entire process. Inspect new strings for defects before installation. Never fully relax the bow until all new components are fully seated. Use only manufacturer-specified strings made from materials like Dyneema or Vectran.
Selecting the Right Bow Press for Your Needs
Two main types of bow presses serve different needs. Floor-standing presses offer maximum stability and precision, making them ideal for pro shops or frequent maintenance. They cost around $500 and aren’t portable. If you lack nearby pro shop access, this investment pays for itself quickly.
Portable presses work well for home use and hunting trips. Models like the Bow Master with L-brackets handle split-limb bows such as Bear Cruzer. The Easy Press Green offers compact, user-friendly operation. Prices range from $60 to $500. These presses fold or store in small spaces, making them practical for occasional use.
Verify press compatibility with your specific bow model before purchasing. User experiences show that first-time use feels nervous but becomes straightforward with practice. If you shoot regularly and lack nearby professional service, a portable press represents a smart investment.
Step-by-Step Restringing Process
Start by documenting everything before touching any hardware. Measure and record your axle-to-axle length, brace height, peep-to-nock distance, and D-loop length. Take photos of cable routing through guards, cam timing marks, and peep orientation. Use tape to mark cam alignment with limb tips.
Secure the bow in the press following manufacturer instructions. Apply minimal tension to stabilize the bow without over-compressing the limbs. You should see slight limb flex. Remove stabilizers or quivers for better access.
Loosen hardware by removing limb end screws and center cable guard pieces. Pop off E-clips from center pins to free cables if needed. Unscrew axle set screws and use Allen wrenches to lift plastic retainers. Operate the press to compress limbs and create enough slack to remove string and cables.
Remove the old string intact to preserve its twist. Secure both ends with paper clips to prevent untwisting. Never untwist a factory string because its twist rate is pre-set for optimal performance. Remove cables one at a time while noting the routing path.
Installing New Cables and String
Install new cables first before the main string. Route the new cable through the cable guard, then under the opposing cable to prevent friction. Hook the cable into the cam post.
Reinstall cams and axles carefully. Align yokes level and perpendicular to the riser. Hold yokes in place with an Allen wrench while sliding the axle back through. Tap gently with a rubber mallet if needed to seat the axle. Reinstall the set screw and washer.
Install the new string by laying it into cam grooves while keeping it taut. Ensure the center serving faces the top cam for correct peep alignment. Apply slight press tension to help seat a stiff new string.
Install the peep sight by roughly seating it at your recorded distance. Let the string twist naturally and observe the rotation. When stable, mark the final position with a silver Sharpie and tie the peep securely. Never tie the D-loop before installing the peep because this can twist the center serving and cause premature failure.
Verifying Cam Timing and Alignment

Recheck your measurements after installation. Axle-to-axle length should match within 1/8 inch tolerance. Brace height typically falls between 6.375 and 7 inches with the same tolerance. Confirm cam alignment marks match limb edges.
Test cam timing using a draw board for controlled observation. Draw the bow slowly and watch which cam reaches full draw first. If one leads, add twists to the cable on that cam. Re-draw and repeat until both cams roll over simultaneously.
Correct cam lean by pressing the bow and adding twists to the yoke opposite the lean. Remove the same number from the other yoke. For example, if the cam leans left, add twists to the right yoke and remove them from the left. Always twist equally on both sides to preserve cam timing.
Tuning Your Bow After Restringing
Reinstall all accessories once timing is correct. Tie the D-loop using a T-square to align with the limb. Form the loop around your arrow nock and measure from the soft knot top to the peep center at your recorded distance. Reattach drop-away rests, kisser buttons, silencers, quivers, and stabilizers.
Begin tuning with paper tuning. Shoot an arrow through paper and examine the tear pattern. A clean bullet hole indicates good alignment. Adjust the rest or nocking point based on tear direction.
Continue with walk-back tuning. Shoot at a target from increasing distances and check group consistency. Arrows that drift or group inconsistently require further adjustment to cam sync or rest position. Even minor misalignment significantly affects grouping, so spend time tuning properly.
Common Restringing Mistakes to Avoid
Several problems commonly occur during string replacement. If the string won’t seat, increase limb compression slightly with the press. Cams becoming misaligned usually results from string derailment or dry fire; re-press and realign without shooting the bow.
Peep rotation indicates yoke imbalance, which requires adjusting yoke twists equally. If the bow feels off after restringing, recheck all specifications and retune. Cable tension being off or limb twist causes this issue. A string coming off during use stems from poor seating, a worn string, or using a finger release on a release-aided bow.
Never shoot a bow with suspected cam or string issues because it risks catastrophic failure. Address all problems before using the bow.
Maintaining Your Bow String for Longevity
Protect your investment with regular maintenance. Inspect strings monthly for fraying or stretched loops. Wax strings every 1 to 2 months to prevent drying and abrasion. Avoid dry-firing because it’s the leading cause of string failure. Use a mechanical release unless your bow is specifically designed for finger shooting.
Store your bow in a hard case away from UV light and moisture. Keep strings waxed during storage. Replace strings every 2 to 3 years even if unused because material fatigue builds silently under constant limb tension.
Replace entire string and cable sets together rather than mixing old and new components. Use a professional string builder who needs your exact bow model, draw weight, and draw length. Consider sharing press costs with fellow archers if professional access is limited.
Frequently Asked Questions About Changing a Compound Bow String
How often should I replace my compound bow string?
Replace your compound bow string every 2,000 to 2,500 shots or annually if you shoot frequently. For occasional use, replace every 2 to 3 years. Even unused strings degrade from constant limb tension and environmental exposure.
Can I change my bow string without a bow press?
No. Modern compound bows require a bow press for safe string replacement. Attempting this without a press risks serious injury or permanent bow damage. Only older teardrop-limb bows with intact old strings can be restrung by hand under specific conditions.
What are the signs my bow string needs replacement?
Visible fraying, separated serving fibers, loose loops, or cracked ends indicate immediate replacement needs. Peep sight rotation, reduced arrow speed, poor accuracy, and visible kinks or flat spots all signal a worn string that should not be shot.
How long does it take to change a compound bow string?
Plan for 1 to 2 hours for first-time attempts. Experience reduces this to 30 to 45 minutes. The process includes documentation, disassembly, installation, timing adjustment, and tuning.
Do I need to replace cables when changing the string?
Yes. Always replace entire string and cable sets together. Mixing old and new components causes imbalance and can damage your bow. Cables and strings wear at similar rates and should be replaced as a matched set.
What happens if I don’t tune after changing the string?
Skipping tuning leads to poor accuracy and inconsistent arrow grouping. Restringing affects cam timing, brace height, and nock point position. Proper tuning ensures your bow shoots accurately and safely.
Key Takeaways for Changing Your Compound Bow String
Changing a compound bow string is a manageable DIY task with the right equipment and knowledge. A bow press is absolutely mandatory for modern compound bows, and portable models work well for home use. Document all measurements and take photos before disassembly to ensure accurate reassembly.
Replace strings proactively based on shot count and time rather than waiting for failure. Install cables before the main string, verify cam timing after installation, and tune thoroughly before shooting. Regular maintenance including monthly inspections and waxing extends string life significantly.
When in doubt, consult a professional archery shop. However, investing in a quality bow press pays dividends if you shoot regularly or hunt in remote areas without nearby service options. Fresh strings mean better speed, consistency, and accuracy for your bow.


