
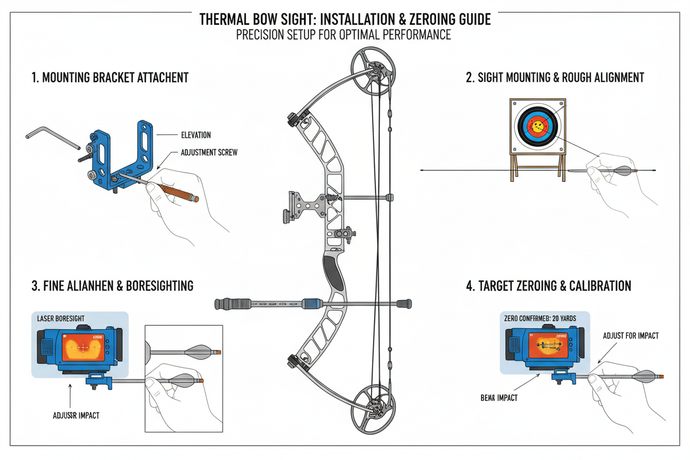
How to Adjust Axcel Bow Sights – Step-by-Step Guide
If your arrows are consistently missing the mark, the problem might not be your form. Axcel bow sights are engineered for elite-level accuracy, but their precision hinges on correct adjustment. Whether you’re a competitive archer, 3D shooter, or serious hunter, knowing how to adjust Axcel bow sights is essential for dialing in sub-inch groups at any distance.
Axcel’s micro-click system, dual-pointer technology, and zero-backlash design offer unmatched control when used correctly. This guide breaks down every adjustment step across popular models like the Axcel HD, Landslide Slider, and AXCEL Achieve, using verified mechanical specs and pro-tested techniques.
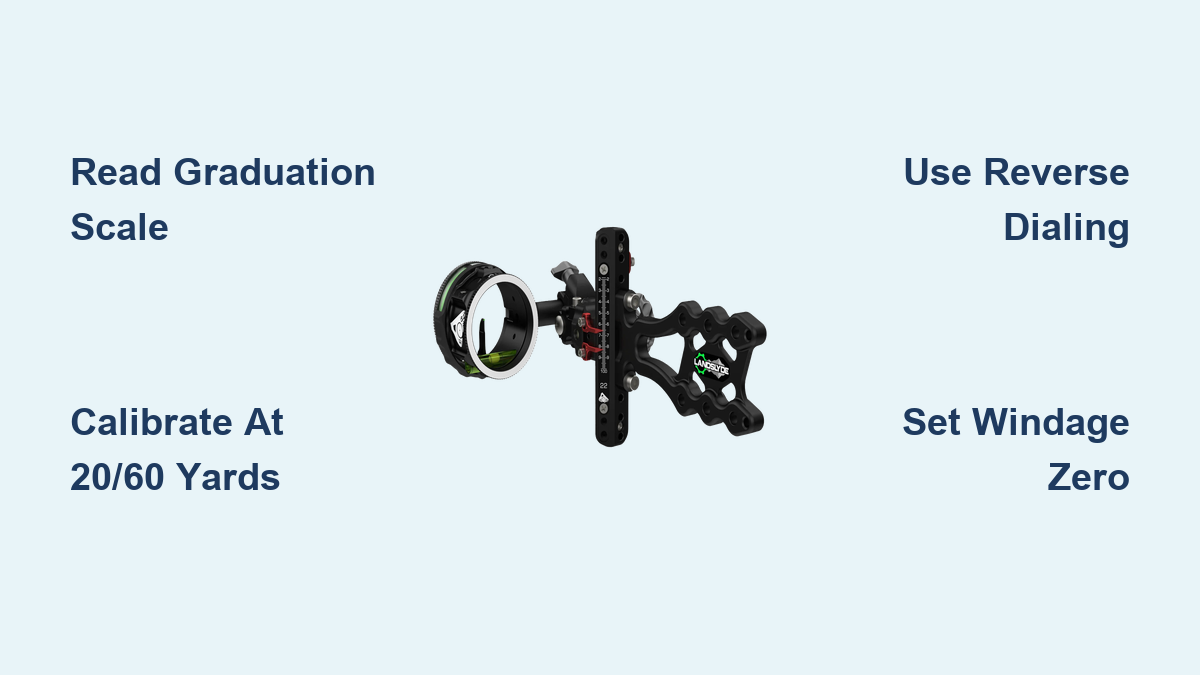
Read the Graduation Scale Correctly
Understanding the graduation system is the foundation of precise sight adjustment. The numbered scale appears on both the sight body and the adjustment knob, creating a dual-reference system for accuracy.
Understand the 0.005-Click System
Each audible click on an Axcel sight adjusts the pin by 0.005 units. With 200 clicks per full revolution, this allows for micro-level tuning critical at 50+ yards. The knob markings follow a 0.5-unit pattern (1.0, 1.5, 2.0…), but the real precision comes from counting clicks between major marks.
For example, moving from 61.0 to 61.3 requires 60 clicks (0.3 ÷ 0.005 = 60). Use this calculation for fine-tuning elevation after establishing baseline yardages.
Combine Needle and Knob for Final Setting
The actual sight setting combines two readings. The indicator needle shows the whole number (e.g., 59), while the knob marking adds the decimal (e.g., +0.6). If the needle is just before 60 and the knob reads 69.1, the true setting is 59.6. Misreading this combination is a common cause of long-distance inaccuracy.
Zero the Knob Before Starting
Always begin with the knob at 0 and aligned with the hash mark. The needle should sit exactly on a whole number. If it does not, your reference point is off. Recheck your setup before proceeding with any calibration.
Calibrate Using 20 and 60 Yard Marks
Establishing two primary reference distances validates the entire sight system. These yardages create a baseline for all intermediate settings.
Start at 20 Yards for Baseline
Set up a target with a thin horizontal line at 20 yards. Shoot five arrows using consistent form. Adjust the sight so the indicator needle aligns with the aiming line at full draw and release.
This distance minimizes trajectory error and establishes your mechanical zero. Focus only on horizontal alignment at this stage.
Confirm at 60 Yards for Scale Accuracy
Move to 60 yards and repeat the process. Shoot another five-arrow group. If your 20-yard zero holds, the needle should track accurately across the entire scale.
If groups are high or low, your sight tape or ballistic curve may be mismatched. Use the Axcel Sight Mark app to recalculate intermediate settings or verify your arrow’s flight path.
Validate Intermediate Distances
Test at 35, 40, 50, and 60 yards to ensure smooth progression. Any sudden deviation indicates incorrect sight tape, backlash in the mechanism, loose set screws, or an inconsistent anchor point. Tight groups across all distances confirm a properly calibrated system.
Use the Axcel Sight Mark App
The Axcel Sight Mark app (available for iOS and Android) calculates all intermediate yardages from 0 to 100 yards based on your verified reference points.
Input Two Yardages for Full Chart
Open the app and enter your verified settings. For example, 20 yards equals 55.0 and 60 yards equals 62.0. The app generates a custom yardage-to-setting table tailored to your bow, arrow weight, and draw length. No more guessing at 43 or 57 yards.
Dial In 42 Yards in 3 Steps
Suppose the app recommends 53.8 for 42 yards. Rotate the knob past 53.0 (to 54.0), then dial back down to 53.0 to eliminate gear backlash. Finally, click up 80 times (0.8 ÷ 0.005) to reach 53.8. This reverse-dial method ensures mechanical consistency and prevents slop in the gears.
Save Multiple Profiles
Store separate profiles for different arrow setups, hunting versus competition, and seasonal changes. Switch instantly when conditions change without re-zeroing required.
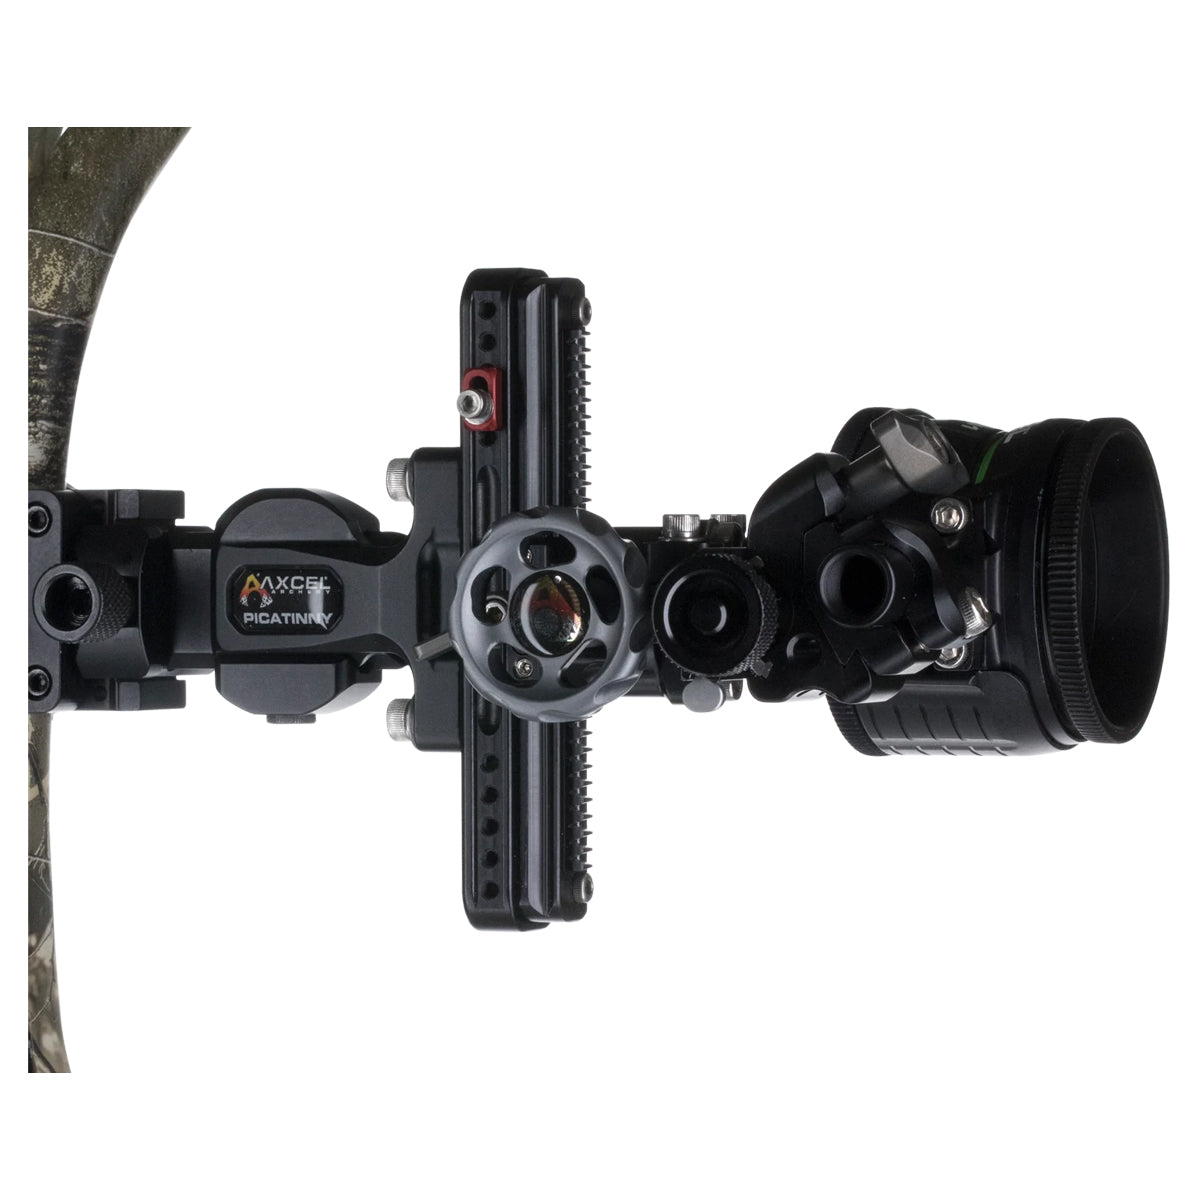
Adjust Axcel HD Pins Individually

The Axcel HD features independently adjustable pins, allowing custom yardage configuration for each pin.
Loosen Set Screw First
To move a pin, use a hex key to loosen the set screw at least 1.5 turns. Turn the bottom adjustment knob to raise or lower the pin. Once aligned, lightly tighten the screw. Do not over-tighten.
Avoid Thread Damage
The set screw only needs light pressure to hold. If resistance is felt after initial tightening, stop immediately. Excessive torque damages aluminum components and voids warranty. Apply a drop of blue Loctite to prevent loosening during transport, but never use red.
Set Up the Landslide Slider Dual Pointers
The Landslide Slider features two pointers for rapid yardage estimation and interpolation.
Set Bottom Pointer as Home Base
The bottom pointer is your primary reference, typically set at 40 yards. Dial the sight to your verified 40-yard setting, slide the bottom pointer to match the scale, and tighten gently to lock in place.
Align Top Pointer to 20 Yards
The top pointer acts as a secondary reference. Set it to 20 yards for fast interpolation between distances. At 70 yards, the bottom pointer reads 70, the top shows approximately 55, and the midpoint gives a rapid estimate for middle-yardage shots.
Use Bubble Gap for 52-Yard Shortcut
The half-inch gap between the top of the bubble level and the pin center equals approximately 52 yards when referenced against the scale. This allows quick visual verification without dialing.
Fine-Tune Windage Without MOA Reference
Axcel does not publish standardized angular values per click for windage adjustments, requiring shooters to build their own reference data.
Clockwise Moves Impact Right
Turn the windage knob clockwise and the sight moves right, meaning arrow impact moves right. Counterclockwise rotation moves the sight left. Test with live fire at 30 yards to confirm direction.
Establish Your Own Zero
There is no factory-defined windage zero mark. Center the dial roughly in its range, shoot a group at 30 yards, and mark the housing and dial with nail polish or a scribe when point of impact is centered. This personal zero lets you return to a known setting after wind changes.
Build a Personal Wind Chart
Create your own archery DOPE by shooting in controlled conditions and recording results. For example, at 30 yards with 5 mph full-value wind, you might need 2 clicks clockwise. Use this chart in the field rather than guessing.
Eliminate Backlash with Reverse Dialing
Backlash elimination is critical for zero-backlash models like the Achieve and Landslide Slider.
Always Dial Back to Target
When adjusting elevation or windage, turn past your target setting first, then rotate back down to the desired number. This takes up slack in the gear train and ensures consistent pin placement regardless of turning direction.
To set 58.4, go to 58.5 first, then return to 58.4. This technique is essential for repeatable shot placement.
Adjust Knob Tension for Better Feel
Customizing click resistance improves tactile feedback, especially in cold weather or when wearing gloves.
Customize Elevation Click Resistance
Loosen the set screws on the elevation knob. Snug the top knob onto the shaft. Rotate it backward by three clicks, then retighten the screws. This adjusts internal pressure without affecting calibration.
Apply Same Method to Windage
Use the identical process for the windage knob. Proper tension improves consistency and feel during adjustments.
Set the 20-Yard Dead Stop
The dead-stop feature provides instant recall to a preset distance.
Install with 0.050″ Allen Wrench
Use the 330-second (0.050″) hex key to adjust the red dead-stop flange. Loosen the stop screw, slide the red piece until it touches the flange, and tighten securely. The indicator will now read 20 yards when fully lowered.
Customize for Any Distance
You can set the stop at 30, 40, or any preset yardage for rapid recall. This is ideal for hunters who need instant access to a specific range.
Maintain Zero and Prevent Drift
Regular maintenance prevents drift and ensures long-term precision.
Check Set Screws Regularly
After shooting or transport, inspect all screws including pin set screws, pointer locks, and windage/elevation caps. A single loose screw can throw off your entire sight picture.
Lubricate Threads Occasionally
Apply a small drop of archery-grade lubricant to elevation and windage threads every 3-6 months. Wipe excess to avoid attracting dirt. Avoid WD-40; use silicone or Teflon-based products only.
Verify After Impact or Drop
Even a minor bump can shift the pointer. Always recheck your zero at 20 yards after any impact or drop.
Model-Specific Adjustment Workflow
Different Axcel models require slightly different approaches.
Standard Axcel Sight
Use 20/60 yard calibration, count clicks for micro-adjustments, and reverse-dial to eliminate backlash. No tools are needed for this fully manual system.
Axcel HD
Loosen the pin screw 1.5+ turns, adjust via the bottom knob, and lightly tighten without over-torquing. A hex key is required.
Landslide Slider
Set the bottom pointer as home base, align the top pointer to 20 yards, and use the bubble gap for 52-yard reference. A 0.050″ Allen wrench is needed for the dead stop.
Frequently Asked Questions About Adjusting Axcel Bow Sights
How many clicks are in one full revolution on an Axcel sight?
One full revolution equals 200 clicks. Each click adjusts the pin by 0.005 units, allowing for extremely fine micro-adjustments at long distances.
What is the proper way to eliminate backlash when adjusting elevation?
Always dial past your target setting first, then rotate back down to the desired number. For example, to set 58.4, go to 58.5 before returning to 58.4. This takes up slack in the gear train.
Can I over-tighten the set screws on my Axcel HD sight?
Yes, over-tightening can strip threads or warp the housing. The set screw only needs light pressure to hold position. Stop immediately if you feel significant resistance.
How do I establish a windage zero on my Axcel sight?
Axcel does not provide a factory-defined windage zero mark. Shoot a center group at 30 yards, then mark the housing and dial with nail polish or a scribe when point of impact is centered.
What app can help me calculate intermediate sight settings?
The Axcel Sight Mark app (available for iOS and Android) generates a complete yardage-to-setting table from 0 to 100 yards based on two reference points you input.
How often should I lubricate my Axcel sight adjustment threads?
Apply archery-grade lubricant every 3-6 months. Use silicone or Teflon-based products only, and wipe any excess to avoid attracting dirt.
Key Takeaways for Adjusting Your Axcel Bow Sight
Mastering Axcel sight adjustment requires understanding the 0.005-click micro-adjustment system and combining the indicator needle with knob markings for accurate readings. Calibrate at 20 and 60 yards to establish a reliable baseline, then validate intermediate distances to ensure smooth tracking across the entire scale.
Always use reverse dialing to eliminate backlash, build a personal wind chart since Axcel does not publish standardized windage click values, and mark your windage zero manually. Regular maintenance, including checking set screws and applying light lubricant, prevents drift and maintains precision.
With proper adjustment, Axcel sights deliver Olympic-grade accuracy. The margin between bullseye and miss is often just one click. Now you know how to make it count.


