
How to Sight In a One Pin Bow Sight
Getting your one-pin bow sight dialed in is essential for consistent, accurate shooting, especially when hunting or competing at variable distances. A single-pin slider sight relies on precise calibration across a yardage tape, letting you adjust vertically for arrow drop without the clutter of multiple pins. Whether you use an HHA, CBE, Black Gold, or Axcel sight, the process remains the same: establish two key reference points, match your yardage tape, and verify real-world performance.
This guide walks you through every step, from initial setup to final validation, so you can confidently shoot from 20 to 80 yards with one clean pin. You will learn how to avoid common mistakes, use pro-level techniques like caliper matching and blank tape marking, and ensure your peep sight and axis alignment do not sabotage your accuracy.
Set Peep Sight and Align All Three Axes

Before firing a single arrow, your foundation must be solid. Misaligned components lead to cant errors and inconsistent groups, especially at long range. Skipping this step guarantees frustration later.
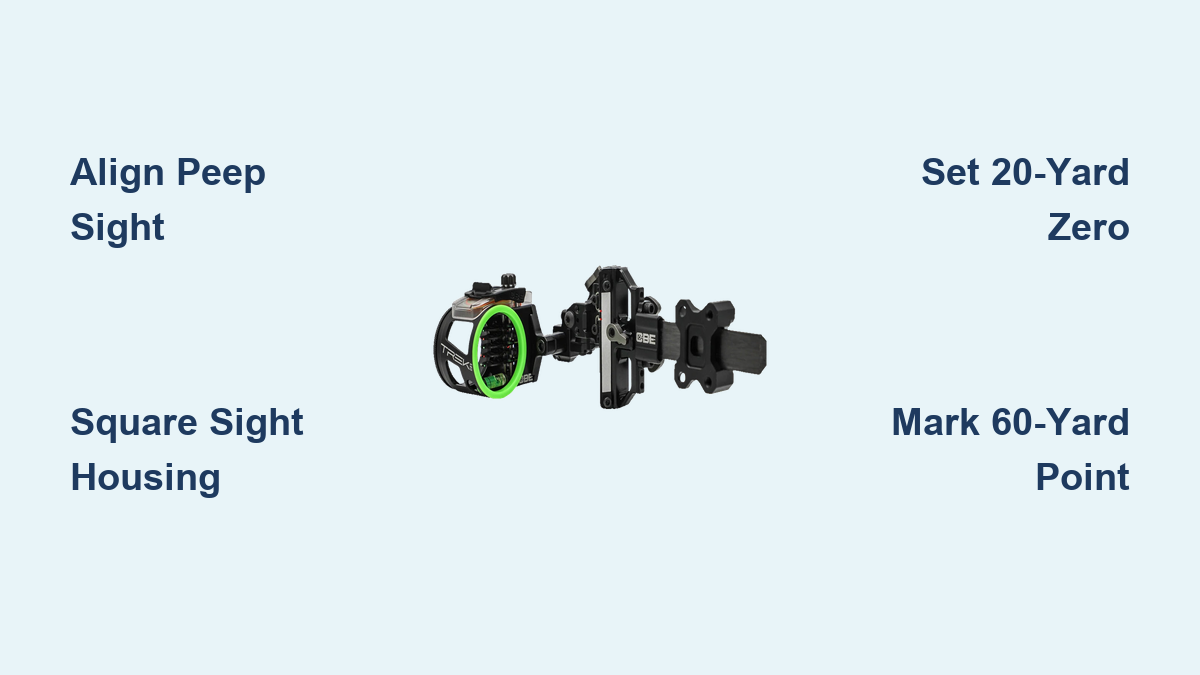
Install and Position the Peep Sight
Install the peep on your string so it aligns naturally with your dominant eye at full draw. Your sight picture should be centered without neck craning or eye strain. Many archers set the peep before mounting the sight to prevent rework later.
Pro Tip: Once set, secure the peep with dental floss or string serving to prevent rotation.
Square the Sight Housing to the Bow
Use a bubble level or axis alignment tool to ensure the sight is square with the bow riser. The first axis controls left and right tilt, the second controls up and down movement, and the third controls twist. All three must be neutral. Even slight cant causes pin drift at 50 plus yards, so do not skip this step.
Start at 5 to 10 Yards
Begin close to get arrows on paper and establish a rough zero. At this range, you are adjusting the entire sight housing, not the slider. Arrow flight is nearly flat at close range, so any deviation reflects sight misalignment rather than trajectory drop.
Shoot an Initial Group
Place a target at 5 to 10 yards. Fire 3 to 5 arrows aiming dead center. Watch where the group lands, because this tells you exactly how to adjust the sight.
Adjust the Housing Using the Chase Rule
Follow the rule: chase your arrows. If arrows hit low, move the housing down. If arrows hit right, move the housing right. Only adjust the sight housing screws, not the slider or elevation wheel. This works because at close range, arrow flight is nearly flat, so deviations indicate sight misalignment rather than trajectory issues.
Dial In the 20-Yard Zero
The 20-yard mark is your primary reference point. Everything else builds from here, so precision at this stage determines your overall accuracy.
Use a Level Reference Line
Hang a fresh target face and draw a perfectly horizontal line using a laser or bubble level. Aim the pin at this line. Your arrows should hit exactly on it.
Shoot Multiple Groups
Fire 3 to 5 arrows per group and repeat 2 to 3 times. Look for consistency, with tight clusters on or near the line. If groups are scattered, check your form, anchor point, or torque issues before continuing.
Mark the 20-Yard Point
Once arrows consistently hit the line, mark the yardage tape at the slider position. Use an erasable pencil for testing or a fine-tip Sharpie for permanence. Make a full horizontal line across the tape for clarity.
Warning: If the slider cannot go low enough to hit 20 yards, adjust the housing upward slightly to bring the pin into range.
Walk Back to 60 Plus Yards
Now you will use the slider to calibrate for arrow drop. The housing stays fixed, and only the pin moves. This is where the one-pin system shows its true value.
Move in 10-Yard Increments
Step back to 30, 40, 50, then 60 yards. At each distance, aim the pin at the same horizontal line. Shoot a 3 to 5 arrow group. Adjust the slider until the group centers on the line. Mark the new yardage on the tape.
Adjust Pin Position Accordingly
Arrows hit below the line? Raise the pin by sliding up. Arrows hit above the line? Lower the pin by sliding down. Be patient because small adjustments make big differences.
Push Beyond 60 Yards If Possible
Extend to 70 or 80 yards if your range allows. The farther you calibrate, the more accurate your long-range holds become. Use a 1-inch by 1-inch piece of painter’s tape as a precise aiming point at 60 plus yards.
Pro Insight: Some archers use 5-yard increments past 40 yards for tighter calibration.
Mark the 60-Yard Reference Point
The 60-yard point is your second anchor, just as critical as 20 yards. This mark, combined with your 20-yard point, defines the arc of your arrow trajectory.
Confirm Tight Grouping
Spend time ensuring arrows consistently hit the line at 60 yards. Poor grouping here throws off your entire tape curve and makes long-range shooting unreliable.
Mark Clearly and Permanently
Use a fine-tip marker to make a bold, precise line. Double-check that the slider has not shifted during marking. This reference point will determine which factory tape fits your setup or how you should mark a custom tape.
Match or Install the Yardage Tape

Now choose the right tape or skip factory options entirely. This step transforms your sight from a single pin into a精确 distance system.
Use Digital Calipers for Accuracy
Measure the exact distance between your 20-yard and 60-yard marks with calipers. Compare this measurement to the spans in your sight is tape booklet. Pick the tape with the closest matching distance. Install and align the 20 and 60 markers.
This method beats guessing FPS because it is based on real arrow flight rather than theory.
Choose a Factory Tape
For HHA sights, if your 20-yard mark lines up with 17 and 60 with 49, use tape 1749. For CBE sights, match your 20 and 40-yard spacing to the correct pre-printed tape. Always verify after installation by shooting a few groups.
Go Custom with a Blank Tape
Install a blank yardage tape. Manually mark every 5 yards from 20 to 80. Use solid lines for full yards and dashes for 5-yard increments. No reliance on FPS charts or estimated speeds makes this the most accurate method.
Why it wins: Fully customized to your bow, arrow weight, draw length, and shooting style.
Verify All Distances
Never assume your sight is perfect after tape installation. Test everything to ensure the calibration holds across the entire range.
Shoot Intermediate Ranges
Fire groups at 15, 25, 35, 45, 55, and 65 yards. Aim with the pin at the correct mark and check the impact point against your expectations.
Fix Minor Errors
If off by a few inches, slightly adjust the slider or recheck your marks. If major discrepancies exist, remeasure the 20 to 60-yard span or switch to a blank tape system.
Recheck Reference Points
After extended shooting, confirm your two reference points still hold. Vibration or impacts can shift settings over time, so periodic checks prevent accuracy loss in the field.
Avoid Common Pitfalls
Even experienced shooters make these mistakes. Knowing how to fix them saves time and frustration.
Cannot Reach 20-Yard Zero
Cause: Slider is maxed out and pin is too high. Fix: Adjust the sight housing upward to lower the pin is starting position.
Inconsistent Groups
Cause: Poor form, torque, or inconsistent anchor point. Fix: Practice draw consistency and use a mirror or video to check your alignment.
Tape Does Not Match Any Factory Option
Cause: Your arrow speed or setup differs from factory assumptions. Fix: Use blank tape and mark manually because it is more accurate anyway.
Pin Off at Mid-Range
Cause: Nonlinear trajectory or tape misalignment. Fix: Recheck your 20 and 60-yard marks and remeasure the span with calipers.
Windage Drift at Long Range
Cause: Peep misalignment, cant, or axis error. Fix: Recheck peep height and axis alignment. Do not ignore the basics.
Use the Right Tools
Having the correct gear makes the process faster and more precise. Invest in quality tools before starting.
Essential Equipment List
Targets with replaceable faces let you see groupings clearly. A laser or bubble level ensures perfectly horizontal aim lines. A measuring tape verifies shooting distances. Digital calipers provide critical exact measurements for tape matching. Fine-tip markers and erasable pencils work for testing and permanent marks. Painter’s tape creates small, precise aiming points at long range. A yardage tape booklet helps if using factory tapes, and blank yardage tape enables custom hand-marked calibration.
Pro Tip: Keep a small toolkit in your range bag, including calipers, a marker, and extra tapes.
Maximize Real-World Accuracy
Once sighted, use these strategies to stay deadly in the field under actual hunting or competition conditions.
Mark Every 5 Yards
This increases precision for holdover shots and lets you estimate distances faster during 3D shoots or hunting scenarios. More reference points mean faster adjustments when distances change unexpectedly.
Calibrate for Hunting Conditions
Re-sight with your heaviest hunting arrows, including broadheads. Broadheads can fly differently from field tips, so test them at all distances before the season starts.
Field Test: One user reported being deadly to 40 yards without adjusting the slider, just using holdover techniques.
Frequently Asked Questions About Sighting In a One-Pin Bow Sight
How long does it take to sight in a one-pin bow sight?
The process takes 2 to 4 hours depending on your experience level and how far you calibrate. Plan for at least one range session of 3 hours to complete all steps properly.
Do I need special tools to sight in a one-pin sight?
Yes, digital calipers are essential for accurate tape matching. You also need a level, measuring tape, fine-tip markers, and a target with replaceable faces for best results.
Can I use my hunting arrows for sighting in?
You should sight in with the exact arrows you will use for hunting, including broadheads. Broadheads fly differently from field tips, so testing with your actual hunting setup prevents surprises in the field.
What if my slider cannot reach 20 yards?
Adjust the sight housing upward to lower the pin is starting position. The housing adjustment gives you the range you need to establish your 20-yard zero.
Should I use factory tapes or blank tapes?
Blank tapes are more accurate because they are customized to your specific bow, arrow weight, draw length, and shooting style. Factory tapes rely on estimated FPS, which often does not match real-world performance.
How often should I recheck my sight alignment?
Recheck your 20 and 60-yard reference points after every 200 to 300 shots or before any hunting trip. Vibration and impacts can shift settings over time.
Key Takeaways for Perfect One-Pin Sight Calibration
Peep sight and axis alignment come first because they make or break long-range precision. The 20 and 60-yard marks are your two critical anchors, so dial them in with care and verify them multiple times. Use calipers or blank tape for the most accurate setup rather than relying on factory guesses. Test and verify every distance rather than assuming the tape is perfect after installation. Custom marking beats factory estimates every time because it reflects your actual arrow flight.
With this method, your one-pin bow sight becomes a precision instrument that is clean, fast, and deadly from close cover to open field. Whether you are stalking deer or shooting 3D courses, a properly sighted single pin gives you confidence with every draw. Take your time at the 20 and 60-yard reference points because these two marks determine the accuracy of your entire system.


