
How to Heat Treat a Bow: Step-by-Step Guide
You’ve shaped your wooden bow stave, tillered it carefully, and now you’re ready to unlock its full potential. Heat treating the belly of a bow isn’t magic, but it might feel like it. This process can increase draw weight by up to 14 pounds, reduce string follow, boost arrow speed, and correct minor flaws—all through controlled application of heat. Whether you’re working with hickory, ash, or black locust, this guide walks you through how to heat treat a bow safely and effectively.
Why Heat Treat a Bow
Heat treating strengthens the compression side—the belly—where wood is most vulnerable when drawn. Unlike the back, which handles tension well, many woods struggle under compression. Heat alters the cellular structure, increasing density and rigidity.
Key Benefits
- Draw weight boost: Documented jumps from 38 lbs to 52 lbs in black locust
- Less set and string follow: Limbs spring back faster and stay truer
- Improved efficiency: Lighter limbs can deliver more power
- Shape correction: Fix twists, bends, or misalignments using clamps during treatment
- Permanent results: Changes are structural, not temporary
Heat treating doesn’t fix poor craftsmanship, but it enhances good work.
Best Woods for Heat Treating
Not all woods respond equally. The best candidates are light-colored, tension-strong species that tend to compress easily.
Top Choices
- Hickory
- White ash
- Maple
- Black locust
- Elm
- Hazel
- Almond
- Mulberry
Why These Work
These woods have strong backs that resist tension while having soft or flexible bellies that benefit most from hardening. They respond predictably to heat with visible color change and performance gains.
Avoid oily, resinous woods like Osage or yew unless you’re experienced—there’s significant risk of scorching or uneven results.
Choose the Right Heat Source

Your heat source must deliver deep, even heat without charring the surface. Fast, shallow heating like a torch damages wood without providing any benefit.
Recommended Tools
- Heat gun: Precise control, ideal for home use
- Gas or electric stove: Medium setting around 6.5/10 works well
- BBQ grill: Radiant heat covers large areas evenly
- Bed of coals: Traditional method requiring constant motion
- Heating strips or radiators: Slow but gentle for extended treatment
Avoid These
- Propane or butane torches: Too intense and cause surface burns
- Open flames without moderation: High risk of fire and damage
The goal is to penetrate deep into the wood, not just toast the top.
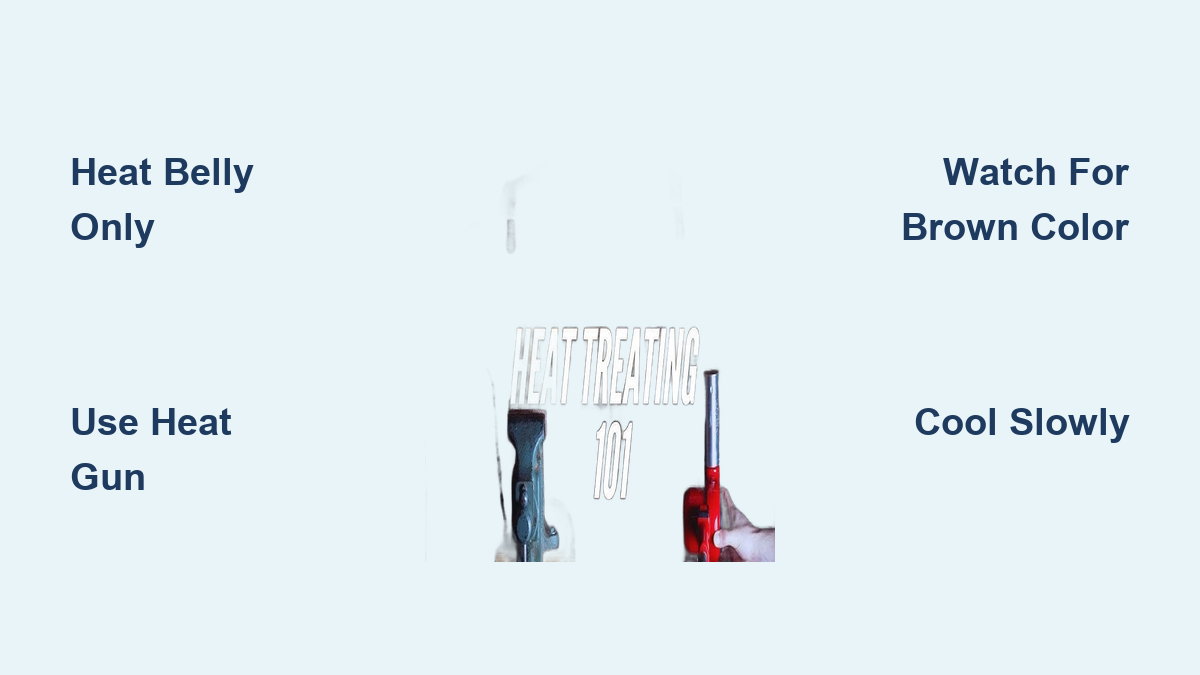
Target the Belly Only
This is the most critical rule in heat treatment.
Critical Rule
Only treat the belly. The back must remain cool at all times. Heating the back weakens its tension strength, leading to cracks or complete failure.
Treatment Zones
Focus on the outer 8 inches of each limb, or the full bending section. Include the handle only if you’re correcting alignment issues. Tips can be lightly treated but monitor closely since natural curvature may reassert itself.
Never apply heat to the back. Ever.
Prepare the Bow Stave
Before heating, your stave should be nearly finished.
Steps to Follow
- Rough out to near-final thickness, approximately 1 inch in the limbs
- Tillering should be 90% complete—minor adjustments are possible post-treatment
- Ensure symmetry since uneven limbs complicate tiller checks later
- Sand smooth to remove fuzz and improve heat transfer
Heat treating isn’t a fix for bad tiller, but it can help balance minor stiffness between limbs.
Clamp for Shape Correction
Use this step to fix warps, twists, or misalignments before heat treatment.
How to Clamp
Build a reflex form from wood or use adjustable clamps. Apply at least three clamps per limb for stability. Clamp the bow into its desired shape before heating, but do not force extreme recurves—use steam for that instead.
A molle stave was once corrected 2 inches out of alignment using clamps and heat combined.
Pro Tip
Clamp slightly past your target shape since wood may relax slightly after cooling.
Apply Cooking Shortening
Coating the belly with cooking shortening protects the wood and may improve heat transfer.
Why Use Shortening
- Prevents drying and scorching
- Helps distribute heat evenly
- Leaves no residue after treatment
How to Apply
Rub a thin layer of shortening over the entire belly. Reapply between sessions if needed, and wipe off excess before final use.
This works like a heat-transfer oil—simple, safe, and effective.
Apply Heat: Technique and Timing
This is where transformation happens. The key is slow and steady.
General Settings
- Distance from heat source: approximately 4 inches
- Stove setting: around 6.5/10 (medium-high)
- Heat gun: medium-high, never maximum
- Duration per side: roughly 5 minutes for 1-inch thick wood
Heating Technique
Move constantly—never heat one spot stationary. Overlap your strokes to prevent hot spots. Rotate the bow every 3 to 5 minutes if your heat source is fixed. Work from tip to handle, then flip and repeat.
Number of Sessions
Typically 1 to 3 treatments per limb are sufficient. Re-treat only if set appears during tillering.
Think of this as “baking” the wood, not burning it.
Watch for Visual and Sensory Cues

Your senses are your best tools during treatment.
What to Look For
- Color: Target a toasty, nutty brown—like a perfectly cooked pancake
- Texture: Surface feels harder and slightly shrunken
- Smell: Sweet, nutty aroma, not smoky or acrid
- Shape: Belly may become slightly concave, which is a sign of successful shrinkage
Stop Immediately If
- Wood starts to blacken
- Smoke appears
- Back of the bow feels warm to the touch
Black means damage. Brown means success.
Cool the Bow Properly
Cooling locks in the changes, especially if you used clamps for shape correction.
Cooling Steps
- Leave clamped until completely cool, which takes 1 to 2 hours
- Do not rush the cooling process—thermal shock risks cracks
- Optionally, briefly run under cool water to speed cooling
- Dry immediately since moisture reverses the benefits
Never bend or test the bow while it’s still warm.
Wait for Rehydration
After treatment, the wood needs time to rebalance its moisture content.
Stabilization Period
Wait at least one week before final tillering or shooting. Store in stable humidity between 40% and 60% relative humidity. This allows the fibers to rehydrate and settle properly.
Skipping this step risks cracks or inaccurate tiller readings.
Check Tiller and Adjust
Now is the time to fine-tune your bow’s performance.
Tiller Test Steps
- String the bow lightly
- Draw to half-draw and watch for even bend
- Identify stiff or soft spots
- Scrape or sand stiff areas on the belly only
Common Adjustments
- Stiff tips: Thin slightly at the ends
- Weak center: Leave alone since the belly is already hardened
- Twisting: May require light re-treatment or tiller correction
Minor color variations mean you should re-treat only the pale sections.
Final Testing and Shooting In
Ease into full draw—your bow is stronger but still needs care.
Break-In Steps
- Start at quarter draw for 10 shots
- Increase to half draw for 20 shots
- Then three-quarters draw, then full draw over several sessions
- Monitor for cracks, twists, or noise throughout
Performance Signs
- Faster snap-back
- Higher arrow speed
- Less hand shock
- Draw weight increase will be evident
You’ll feel the difference instantly.
Can You Heat Treat a Backed Bow?
Short Answer: Not Recommended
Heat may weaken glue used in backed bows, whether hide, epoxy, or other adhesives. Backing materials like linen, sinew, or fiberglass can delaminate under heat. Different materials respond differently to heat, causing uneven expansion.
Always heat treat before applying any backing.
How Hot Should the Heat Be?
Exact temperatures aren’t always given, but we can estimate the target range.
Target Range
- 300 to 375°F (150 to 190°C) is the typical stove or heat gun setting
- This is hot enough to change cell structure but not burn the wood
How to Test
Hold your hand near the heat source—it should feel strong but manageable. Wood should not smoke or sizzle. Use an infrared thermometer if available.
If it smells like burnt toast, you’ve gone too far.
Avoid Common Mistakes
Even experienced bowyers make errors. Don’t let these happen to you.
Top Mistakes to Avoid
- Using a torch: Causes surface burns with no deep effect
- Heating the back: Weakens the tension side and creates failure risk
- Rushing the process: Causes irreversible damage
- Skipping cooling time: Shape corrections will fail
- Bending too soon: Increases crack risk significantly
Slow, controlled, and consistent wins every time.
Multiple Treatments: When and Why
One session isn’t always enough to achieve optimal results.
When to Re-Treat
- If set returns during tillering
- Belly color is uneven or too light
- Draw weight gain is less than expected
How Many Times
One to 3 treatments per limb is typical. Wait between sessions to let the wood stabilize.
Each treatment adds incremental improvement, but don’t overdo it.
Performance Results: What to Expect

Real data shows measurable gains from proper heat treatment.
Documented Gains
- Black locust flatbow: 38 lbs to 52 lbs at 28 inches
- Elm bow: Reduced set by 70% after treatment
- Hickory: Improved snap-back and efficiency
- General: 5 to 14 lb draw weight increase is common
Gains are permanent and measurable.
Safety First: Protect Yourself and the Bow
Heat involves fire. Respect it.
Safety Checklist
- Work in a well-ventilated area
- Keep a fire extinguisher nearby
- Wear heat-resistant gloves
- Never leave the bow unattended during heating
- Keep the back cool at all times
One mistake can destroy hours of work.
Final Tips from Master Bowyers
Wisdom from those who’ve done it for decades.
Expert Advice
Marc St. Louis is widely credited with popularizing modern heat treating in selfbow making. His research demonstrated that heat treating cannot destroy a bow if done correctly—applied to the belly only.
The technique is a tool in the box, not a miracle fix. It won’t save bad wood or fix poor tiller. But in skilled hands? It’s magic made real.
Key Takeaways for Heat Treating Your Bow
| Step | Action |
|---|---|
| Target Area | Belly only—never the back |
| Heat Source | Heat gun, stove, or coals; avoid torches |
| Color Goal | Nutty brown, never black |
| Motion | Constant, overlapping movement |
| Clamping | Use for corrections; cool in position |
| Cooling | Full cool-down before unclamping |
| Wait Time | Minimum 1 week before use |
| Treatments | 1 to 3 per limb, spaced out |
| Safety | Back stays cool; no bending when hot |
Frequently Asked Questions About Heat Treating a Bow
What happens if I heat treat the back of the bow?
Heating the back weakens its tension strength, which can lead to cracks or complete failure. The back must remain cool and untreated to preserve its elasticity and strength.
Can I heat treat a bow that already has a backing?
It’s not recommended. Heat may weaken the adhesive holding the backing, and different materials respond to heat differently, causing uneven expansion or delamination. Always heat treat before applying any backing.
How do I know if I’ve heated the wood enough?
The wood should turn a toasty, nutty brown—similar to a perfectly cooked pancake. It should emit a sweet, nutty aroma, not smoke. The surface should feel harder and slightly shrunken. Stop immediately if the wood blackens or smokes.
How long does it take to heat treat a bow?
For 1-inch thick wood, approximately 5 minutes per side is typical. Most bows require 1 to 3 treatment sessions per limb, with time between sessions for the wood to stabilize. Factor in additional time for clamping, cooling, and the required 1-week rehydration period before use.
What wood responds best to heat treatment?
Hickory, white ash, maple, black locust, elm, and hazel respond best. These woods have strong backs that resist tension but tend to develop set or string follow on the belly, which heat treatment addresses effectively.
Can heat treating fix a warped bow?
Heat treating can help correct minor warps, twists, or misalignments when combined with clamping. Clamp the bow into the desired shape before heating, then allow it to cool while still clamped. Major recurves require steam or boiling rather than dry heat treatment.


