
How to Set Up a Bow Sight: Step-by-Step Guide
You’ve just bought a new bow or sight, and you’re ready to start hitting bullseyes, but your arrows are missing the mark. The problem? Your bow sight isn’t properly set up. Even the most precise archery gear fails without correct sight alignment. Learning how to set up a bow sight correctly is the foundation of accuracy, consistency, and confidence in the field.
Setting up a bow sight isn’t just about mounting it and shooting. It’s a systematic process involving mechanical alignment, arrow tuning, peep placement, multi-axis calibration, and live-fire adjustment. Skip one step, and your groups scatter. Follow them all, and you’ll shoot tighter than ever before.
Mount the Sight Correctly for Maximum Precision

Attach your bow sight to the riser using the pre-drilled mounting holes, which are often shared with quiver brackets. Position the sight as far forward as possible to maximize the sight radius, the distance between your peep sight and front pins. A longer sight radius reduces the effect of small aiming errors, improving overall precision.
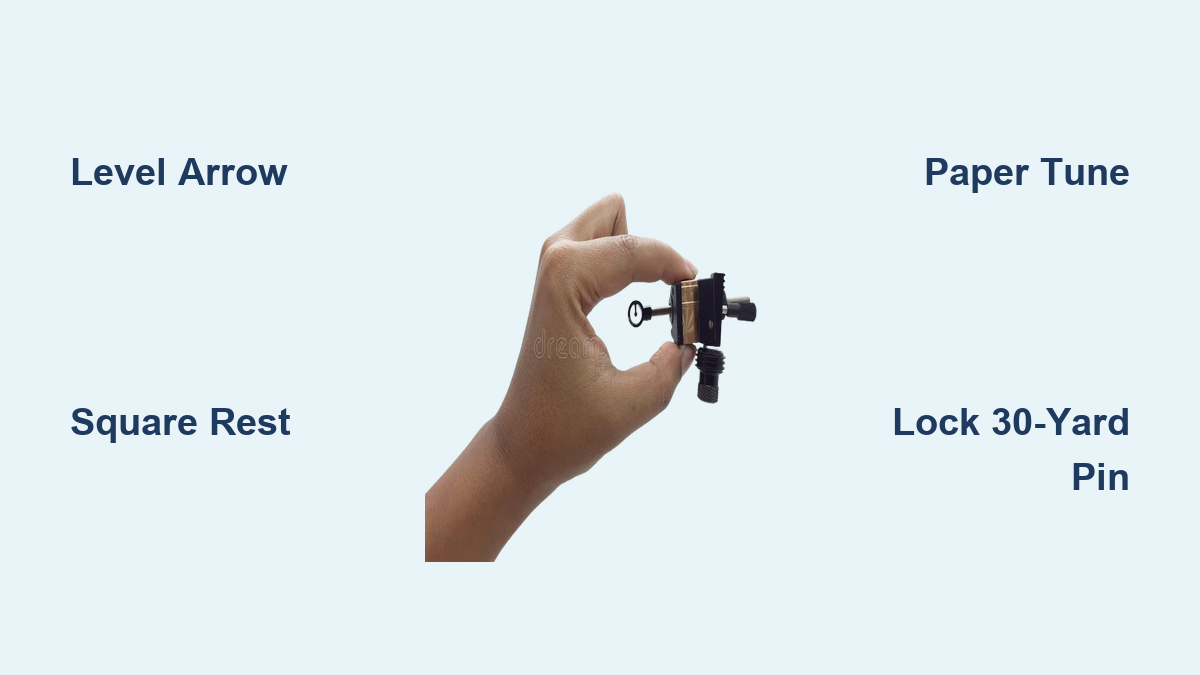
Use steel screws with aluminum sight housings, but apply a thin layer of wax to the threads before installation. Wax prevents corrosion, reduces galling, and ensures consistent torque when tightening. Don’t overtighten. Snug is enough. You’ll need room for micro-adjustments later.
Verify Mechanical Readiness Before Sighting
Before firing a single arrow, confirm your bow is mechanically ready. If your draw length doesn’t match your anatomy, your anchor point shifts, and your zero drifts. Any change to draw length, nocking point, or rest position after sighting forces you to start over completely.
Ensure these components are set correctly:
• Draw weight is set and consistent
• Peep sight aligns with your anchor and front pins
• Arrow rest is square and level
• Bubble level is mounted and calibrated
Adjusting draw length or rest position post-sighting means re-zeroing your entire setup.
Level and Square the Arrow for Straight Flight
A crooked arrow path guarantees inconsistent accuracy. Start by leveling the arrow on the rest. Place a bubble level on the shaft and adjust the rest height until the arrow is perfectly horizontal.
Next, square the arrow to the string using this method:
- Secure the bow vertically in a vice
- Nock an arrow and look down its shaft from behind
- The string should split the arrow exactly at both nock and point
- If misaligned, shift the rest left or right until centered
This step ensures your arrow leaves the bow straight, which is critical for clean paper tuning and tight groups. Plan for about 10 minutes to complete this process properly.
Perform Paper Tuning to Diagnose Flight Issues

Paper tuning reveals how your arrow exits the bow. A perfect bullet hole means straight flight. Tears indicate problems that no amount of sight tuning can fix.
Set up by taping a sheet of paper over a cardboard frame at shoulder height, then shoot from 5 to 10 yards. Interpret the tears:
• Vertical tear indicates cam timing or nocking point issue
• Horizontal tear means rest misalignment
• Clean round hole means flight is true
Adjust the rest or cam timing slightly, then retest. Repeat until you get a bullet hole. Many archers skip this step, but elite shooters use it to eliminate hidden flaws early.
Boresight for Initial Alignment
Boresighting gives you a mechanical baseline so your first shots aren’t miles off target. This visual alignment ensures your sight is parallel to the arrow’s trajectory, saving arrows and frustration during live-fire tuning.
To boresight properly:
- Ensure proper center shot with arrow aligned to string path
- Nock an arrow and look down the shaft from behind the bow
- Adjust the sight housing so the top pin lines up directly over the arrow tip
The purpose is getting close before shooting. You’ll no longer guess where to aim at 10 yards.
Start Sighting-In at 10 Yards
Begin at 10 yards to easily see pin alignment. This close range lets you eyeball whether your top sight pin is actually close to where it needs to be.
Shoot a group of 3 to 5 arrows, then adjust the top pin so arrows hit approximately half an inch low of center. Move to 20 yards and shoot again. Why aim low at 10 yards? Because most arrows rise slightly at short range due to trajectory. Hitting half an inch low at 10 yards typically results in dead-on impact at 20.
Follow this adjustment rule: move the sight in the direction your group is drifting. Arrows left? Move sight left. Arrows high? Move sight up. Never adjust after one shot. Wait for a consistent 3 to 5 arrow group.
Lock the 30-Yard Pin as Your Reference Point
Once the 20-yard pin is dialed, move to 30 yards and adjust the entire sight body to align the 30-yard pin with the bullseye. Lock it in place and don’t touch the sight body again.
All other pins are now adjusted individually. This method prevents cumulative errors. If you move the body later, you throw off every other pin. The 30-yard pin becomes your fixed reference point for the entire setup.
Adjust Remaining Pins Using the Gap Method
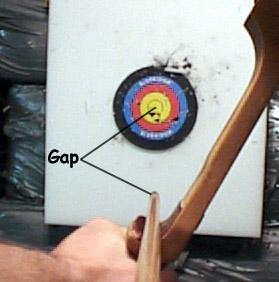
With the 30-yard pin locked, test each remaining pin. The 20-yard pin should hit high at 30 yards. If too high, move it up slightly to reduce the gap. If too low, move it down.
At 40 yards, if arrows hit high, lower the pin. If low, raise it. Repeat for 50 and 60-yard pins. Pin spacing reflects your arrow’s drop, so always verify with live fire. Modern high-speed bows often make sub-20-yard pins unnecessary unless shooting slower setups or youth bows.
Choose the Right Pin Configuration
Most multi-pin sights come pre-set, but default spacing isn’t one-size-fits-all. Recalibrate based on your arrow speed and hunting style.
Recommended setups by use case:
• 3-Pin Fixed: 20, 30, 40 yards for whitetail hunting in dense woods
• 3-Pin Extended: 20, 40, 60 yards for open-country hunting
• 5-Pin Standard: 20 to 60 every 10 yards for mixed terrain versatility
• Single-Pin Slider: 15 to 80 yards adjustable for long-range precision
Forest hunters focus on 20 to 40 yards. Western hunters need 60-plus yard capability.
Install a Peep Sight for Consistency
A peep sight installed in the string provides a fixed rear reference, locking in eye alignment and anchor point. A peep locks you into your anchor and ensures consistent sight picture better than anything else.
Installation steps:
- Find string center using two-tone string for visibility
- Insert peep into center loop
- Draw bow and position peep so it aligns with your eye and front pins
- Serve it in place with old string material
- Shoot 10 to 15 times to let string settle
- If peep rotates, use a bow press and add half-twists until it stays square
On pre-stretched strings, peeps can stay aligned for years. Alternatives include kisser buttons for short-range shots under 30 yards, though a kisser without a peep is only slightly better than no rear sight.
Calibrate 2nd and 3rd Axes for Slope Accuracy
Even a perfectly sighted bow fails on hills if axes aren’t aligned. Misleveling causes right drift on uphill shots and left drift on downhill shots. Rechecking axis alignment before big hunts or competitions is essential.
Set the second axis by mounting sight on a leveling device, leveling the device, then adjusting sight until both device and sight bubbles are centered. Lock adjustment screws. This ensures the sight plane is perpendicular to ground and matches bow orientation.
Verify the third axis by pointing sight straight up and observing the bubble. If it stays centered, the third axis is correct. If it drifts, tilt down to confirm opposite drift, which confirms error. Fix using manufacturer instructions.
Set Up Single-Pin Slider Sights
For single-pin slider sights, start by sighting in at your primary distance, such as 20 or 30 yards. Use the slider to adjust for longer or shorter shots, but still begin at 10 yards for rough alignment.
Many long-range shooters pair these with rangefinder apps or yardage tapes for fast dialing. Mark your slide track with tape at key distances for quick reference.
Follow Pro Best Practices
Minimize variables for repeatable results. Shoot from level ground, maintain consistent form with no tight grip and the same anchor every time, and avoid wind and glare during setup.
Spread the process over 3 to 5 sessions to average out daily inconsistencies. It may take five practice sessions to get a bow perfectly sighted-in. Tired muscles cause form breakdown, so take breaks.
Use video to analyze your release and follow-through. Many archers learn faster with visual guides.
Troubleshoot Common Problems
When accuracy fails, always check arrow level and square first. No amount of sight tuning fixes a crooked launch.
Common issues and solutions:
• Arrows left or right: Misaligned rest or sight, re-square arrow and adjust sight toward group
• Arrows high or low: Elevation error, move sight up or down
• Peep rotates: String stretch, add half-twists
• Inconsistent groups: Poor anchor or form, use peep or kisser and practice
• No bullet hole: Arrow not level, re-level and re-square
Final Verification and Real-World Testing
After tuning, test at intermediate distances like 15, 25, and 35 yards. Shoot from tree stands, slopes, and awkward positions. Make day-of adjustments for wind, light, or elevation.
With this setup, you have a reliable baseline. You can fine-tune on hunt day based on conditions.
Complete Sighting-In Workflow Summary
Follow this ordered process for best results:
- Level and square arrow to ensure straight flight
- Paper tune to achieve bullet hole
- Mount sight forward to maximize sight radius
- Install peep to lock anchor and alignment
- Boresight to align top pin over arrow tip
- Zero at 10 to 20 yards, starting close and aiming half inch low
- Lock 30-yard pin to set sight body, then leave it alone
- Adjust remaining pins using gap method
- Calibrate 2nd and 3rd axes to prevent slope drift
- Verify and log all settings, then test in the field
Final Tips for Long-Term Accuracy
Recheck levels after transport or impact. Inspect screws regularly and reapply wax if disassembled. Verify zero before each season or competition.
Practice on angles by testing uphill and downhill performance. Keep a log recording pin positions, adjustments, and weather conditions.
Many bowhunters never fully sight in their bows, leading to avoidable misses. Those who complete the full process report higher success rates and unshakable confidence. Take the time. Follow the steps. Your next shot could be the one that counts.
Frequently Asked Questions About Setting Up a Bow Sight
How long does it take to sight in a bow sight properly?
Sighting in a bow sight properly typically takes 3 to 5 practice sessions spread over multiple days. Rushing the process leads to inconsistent results. Each session allows the bowstring and peep to settle while averaging out daily inconsistencies in your form.
What is the best distance to start sighting in a bow?
Start sighting in at 10 yards for the initial alignment. This close range makes it easy to see pin alignment and observe where your arrows are hitting. You’ll adjust the top pin to hit half an inch low, then move to 20 yards where it should hit dead center.
How do I know if my bow sight axes are properly calibrated?
Point the sight straight up and observe the bubble. If it stays centered, the third axis is correct. If it drifts, tilt the sight downward. Opposite drift confirms axis misalignment. Use a leveling device to set the second axis by ensuring both device and sight bubbles are centered.
Should I use a peep sight with my bow sight?
Yes, a peep sight is highly recommended for consistent accuracy. It locks you into your anchor point and ensures a consistently aligned sight picture. Without a peep or kisser button, maintaining the same anchor point becomes difficult, leading to inconsistent groups.
Why do my arrows hit left on uphill shots?
This indicates your sight axes aren’t properly calibrated. On uphill shots, a misaligned third axis causes the sight to appear level when it’s actually canted, resulting in lateral drift. Calibrate all three axes before hunting in mountainous terrain.
How often should I re-check my bow sight settings?
Verify your zero before each hunting season or competition. Recheck levels after any transport or impact that could have shifted the sight. Inspect screws regularly and reapply wax if you’ve disassembled the sight.


