
How to String a Recurve Bow: Quick Steps
Stringing a recurve bow might seem simple, but doing it incorrectly can lead to serious injury, limb damage, or equipment failure. Whether you’re a beginner or an experienced archer, knowing how to string a recurve bow properly is essential for safety, performance, and longevity. The process involves more than just attaching a string. It requires understanding your bow’s design, using the right tools, and applying controlled force. This guide breaks down every step with precision, focusing on the safest and most effective methods.
Choose the Correct Bowstring
Before attempting to string your bow, ensure you have the right string. Using the wrong one can cause permanent damage to your recurve bow.
Match String Length to AMO Standard
Every recurve bow is built to an AMO length, typically 66, 68, or 70 inches. The correct string is usually 2 inches shorter than the bow’s AMO length.
For a 66 inch bow, use a 64 inch string. For a 68 inch bow, use a 66 inch string. For a 70 inch bow, use a 68 inch string. Always confirm this with your manufacturer’s specifications, as some modern models may vary.
Identify Loop Sizes and Orientation
Recurve bowstrings have two loops of different sizes.
The larger loop goes on the top limb tip. The smaller loop fits into the notch on the bottom limb. Some strings are directional due to strand twist or serving placement. Check manufacturer markings or documentation to ensure proper orientation.
Select the Right String Material
Different materials affect performance and maintenance.
Dacron B50 is stretchy and durable, ideal for beginners and wooden bows. Fast Flight (BCY 4500/8190) offers low stretch and high speed, best for competition. Kevlar is strong but moisture-sensitive and rarely used today. Dacron strings stretch more initially and require waxing every 5 to 10 sessions. Fast Flight strings are sensitive to abrasion and need careful handling.
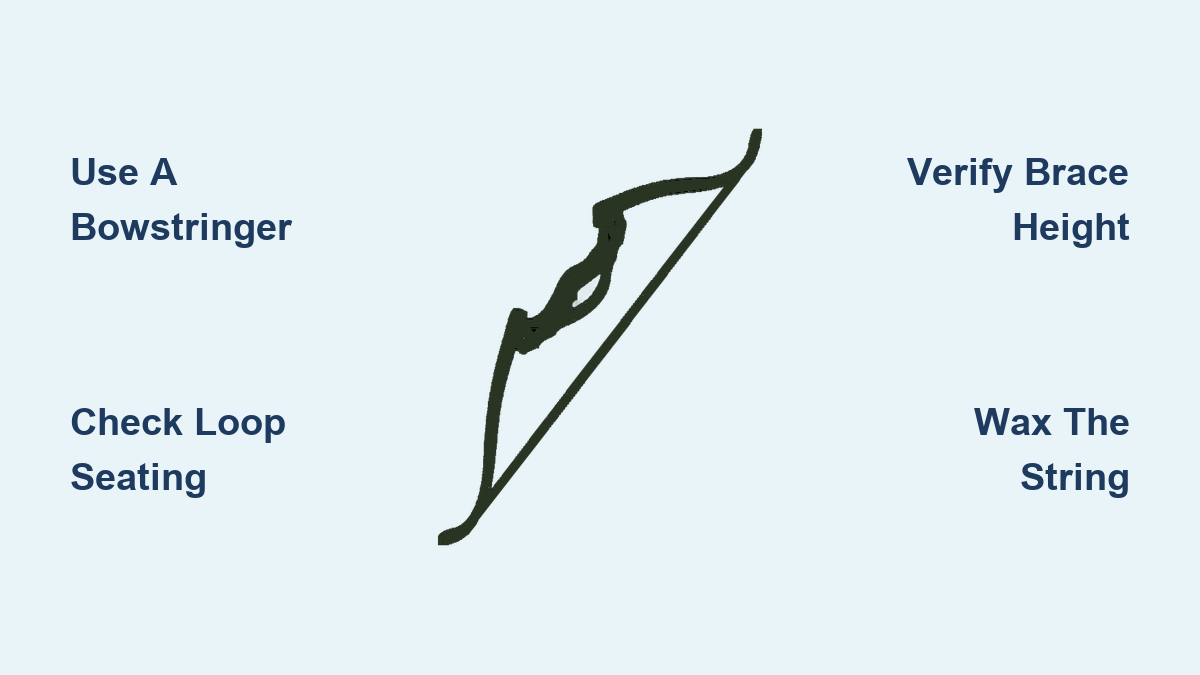
Use a Bowstringer for Safety

The safest way to string a recurve bow is with a bowstringer. It reduces physical strain and prevents dangerous limb slip or snapback.
Choose the Right Type of Stringer
Three main types exist, each with pros and cons.
The saddle stringer works best for most users. The padded saddle holds the upper limb securely and provides even pressure. The double-pocket stringer suits high-poundage bows. It encloses both limb tips and minimizes twisting. The single-pocket stringer offers compact storage. It fits the lower limb only and requires manual upper limb control. Avoid improvised methods like using boots, as they offer poor control and risk damaging limb tips.
Inspect Your Stringer Before Use
Check for fraying or worn stitching. Check for stretched or weakened webbing. Check for loose foot loop. Replace immediately if any damage is visible. A failed stringer under tension can cause catastrophic injury.
Step-by-Step: String with a Saddle Stringer
This method is recommended for all skill levels and draw weights up to 70 plus pounds.
Attach the String to the Bow
Slide the larger loop over the top limb tip, letting it rest behind the groove. Position the smaller loop near the bottom limb tip, ready to engage. Do not force either loop into place yet. This comes after tension is applied.
Fit the Stringer Correctly
Place the saddle pad about 3 inches (8 cm) behind the upper limb tip, just before the groove. Ensure the large string loop remains inside the saddle. Step on the center of the foot loop with both feet, shoulder-width apart. Hold the bow grip firmly in your non-dominant hand.
Apply Tension Gradually
Bend slightly at the waist, lowering the bow until the stringer contacts the ground. Keep your back straight. Use leg and core strength, not arm power. Slowly pull upward on the grip, flexing the limbs inward. As tension increases, the limbs will bend, shortening the distance between tips and allowing the string to stretch into position.
Seat the Bottom Loop First
Guide the smaller loop onto the bottom limb tip, pressing it firmly into the groove. You should hear or feel a slight click when fully seated. Double-check that it cannot slip off under light pressure.
Release and Remove the Stringer
Slowly lower the bow back to horizontal, allowing tension to decrease. Never let go suddenly. This risks limb slap or string failure. Once slack, remove your feet and detach the stringer. Rotate the bow so limbs face away from your body during inspection.
Alternative: Body Mechanics Method (Advanced Only)
This tool-free technique should only be used by experienced archers with bows up to 50 pounds draw weight.
Prepare the String Position
Hold the bow in your left hand (for right-handed shooters). Place the larger loop over the top limb, behind the groove. Let the string drape down, bringing the smaller loop close to the bottom tip.
Engage Foot and Arm Together
Hook the string near the bottom limb with your right foot. Press down with your foot while simultaneously pushing up with your left arm. Use a bench-press-like motion with elbows in and core tight. As the limbs flex, guide the smaller loop into the bottom groove.
Finalize and Verify
Once seated, check that the top loop is still in place and fully engaged. Lower the bow slowly and inspect both ends. Never attempt this method if you lack strength, have joint issues, or are using a bow over 50 pounds.
Verify Proper String Seating
After stringing, always confirm both loops are secure before handling or shooting.
Perform a Visual Check
Look directly at each limb tip from multiple angles. Ensure the string loop sits fully inside the factory groove. No part of the loop should be riding on the edge or outside the notch.
Conduct a Tactile Inspection
Run your fingers around each loop. Feel for gaps, misalignment, or looseness. If the loop moves easily, re-string carefully.
Pluck the String for Tone
Gently pluck the string like a guitar string. A clear, resonant tone means proper tension and seating. A dull thud indicates slack or poor seating. Unstring and retry if needed.
Adjust and Confirm Brace Height
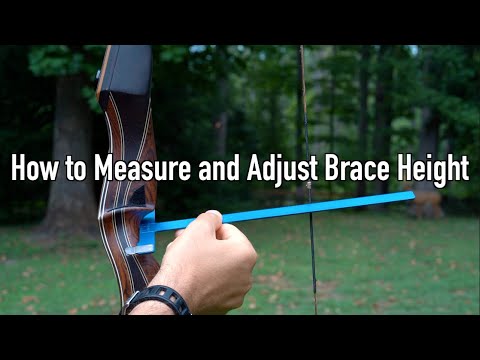
Brace height, the distance from the grip’s deepest point to the string, is critical for performance.
Measure Accurately
Use a measuring tape or brace height gauge. Standard range is 7.5 to 9.75 inches (19 to 25 cm), depending on your model. Consult your manufacturer’s specs for the ideal range.
Fine-Tune with Twists
Add twists to shorten the string, which increases brace height. Remove twists to lengthen the string, which decreases brace height. Unstring the bow first, twist or untwist the string, then re-string and remeasure. Repeat until within spec.
Account for New String Stretch
New strings, especially Dacron, stretch significantly. To stabilize, shoot 50 to 100 practice arrows, or leave the bow strung for 24 hours. Then recheck and adjust brace height.
Set the Nocking Point Correctly
The nocking point determines where the arrow attaches and affects flight.
Position Using a T-Square
Place the T-square base on the arrow rest or shelf. Align the vertical arm with the string. Position the nocking point one-half inch (1.25 cm) above the shelf line. Use brass nocking points or tied-on servings for precision.
Test Arrow Flight
After shooting, if arrows fishtail, check nocking point height and string alignment. If grouping is inconsistent, verify centering and brace height.
Maintain and Store Your Bow Properly
Proper care extends the life of both your bow and string.
Wax the String Regularly
Apply bowstring wax every 5 to 10 shooting sessions. Work it in with your fingers. Do not leave residue. Use Dacron-specific wax for B50 strings.
Store Unstrung When Not in Use
Unstring after each use, especially for wooden or vintage bows. This prevents set, which is permanent curvature in the limbs. Store in a cool, dry place, away from sunlight and humidity. Modern laminated recurves can stay strung for up to one week, but long-term unstrung storage is best.
Replace Worn Strings Promptly
Retire your string if you see frayed or broken strands. Also replace if you notice loose or cracked serving, excessive stretching, or a history of dry firing. Even with light use, replace every 2 to 3 years due to material degradation.
Troubleshoot Common Stringing Problems
Quick fixes for frequent issues when learning how to string a recurve bow.
String Slips Off Limb Tip
Cause: Poorly seated loop or mismatched stringer. Fix: Re-string slowly, ensuring full groove engagement. Use a properly sized stringer.
Loud Twang or Vibration
Cause: Brace height too low. Fix: Add twists to increase brace height within manufacturer range.
Arrows Fly Erratically
Cause: Misaligned string or incorrect nocking point. Fix: Use a T-square to realign. Verify centering from behind the bow.
Difficulty Applying Tension
Cause: Stringer too short or weak webbing. Fix: Upgrade to a heavy-duty saddle or double-pocket model rated for your draw weight.
Twisted String Appearance
Cause: Uneven limb flex or improper twisting. Fix: Unstring, untwist completely, then re-string with even tension.
Follow Expert Safety Rules
Safety should never be compromised during stringing.
Always Point the Bow Safely
Never point at people, animals, or breakable objects. Keep limbs directed downrange or toward the ground.
Wear Eye Protection
A broken string can snap back at high speed. Safety glasses are a simple, effective defense.
Inspect Before Every Use
Check limbs for cracks or delamination. Check string for fraying or loose servings. Check stringer for wear or stitching failure. No component is too small to fail catastrophically.
Avoid Slippery Surfaces
String on dry, stable ground. Wet or icy conditions increase fall risk and reduce foot control.
Frequently Asked Questions About Stringing a Recurve Bow
What is the most common method for stringing a recurve bow?
While the over-under method was historically common, the saddle or pocket stringer method is now the most widely used due to its safety and ease.
Is it safe to string a recurve bow without a bowstringer?
No, especially for beginners. Manual stringing increases risk of injury and limb damage. Only experienced archers should attempt it, and only on bows at or below 50 pounds draw weight.
How do I know if my bowstring is at the correct tension?
Check brace height with a measuring tape and compare to manufacturer specs. Pluck the string. It should produce a moderate pitch. A dull thud means too loose. A sharp ping means too tight.
Can I use any string on my recurve bow?
No. Use only strings matched to your bow’s AMO length and draw weight. Incorrect strings can damage the bow or create unsafe conditions.
How often should I replace my recurve bowstring?
Replace every 2 to 3 years with average use. Frequent shooters or those in harsh environments should replace every 12 to 18 months or after 1,500 to 2,000 shots.
Why does my new string keep losing tension?
New strings undergo initial stretch, especially Dacron. Leave the bow strung for 24 hours or shoot 50 to 100 arrows to settle the string before final tuning.
Key Takeaways for Stringing Your Recurve Bow

Stringing a recurve bow safely is a skill that protects both you and your equipment. Always use a bowstringer unless you’re experienced and within safe draw weight limits. Double-check loop seating, confirm brace height, and maintain your gear regularly. By following these steps, you ensure consistent performance, extend your bow’s life, and eliminate preventable risks. Keep a spare string and stringer in your kit, especially for field use, and never skip the final inspection. With the right knowledge, stringing becomes a quick, safe routine that sets you up for accurate, enjoyable shooting every time.


